本文是看了杨丰盛老师的视频(http://edu.51cto.com/course/course_id-579.html)后个人的一些感悟
杨丰盛老师说得非常详细,推荐和我一样的初学者去看一下
-------------------------------------------------------------------------------------------
AppDelegate类的代码解析
applicationDidEnterBackground()
这是个当程序进入后台时会调用的程序,有时候玩游戏时突然有一些事情,把游戏最小化,所以在这个函数中我们应该实现暂停的功能,
所以这是Hello World程序中实现applicationDidEnterBackground()的代码
voidAppDelegate::applicationDidEnterBackground(){
CCDirector::sharedDirector()->stopAnimation();

//ifyouuseSimpleAudioEngine,itmustbepause
//SimpleAudioEngine::sharedEngine()->pauseBackgroundMusic();
}
applicationWillEnterForeground()
这是程序进入前台时调用的程序,当最小化后再重新把游戏打开会调用这个函数,所以该函数应该实现继续游戏的功能,所以这是Hello World程序中实现applicationWillEnterForeground()的代码
voidAppDelegate::applicationWillEnterForeground(){
CCDirector::sharedDirector()->startAnimation();

//ifyouuseSimpleAudioEngine,itmustresumehere
//SimpleAudioEngine::sharedEngine()->resumeBackgroundMusic();
}
applicationDidFinishLaunching()
这是程序开始运行时调用的函数,下面是Hello World程序中实现applicationDidFinishLaunching()的代码
boolAppDelegate::applicationDidFinishLaunching(){
//initializedirector
CCDirector*pDirector=CCDirector::sharedDirector();
CCEGLView*pEGLView=CCEGLView::sharedOpenGLView();
pDirector->setopenGLView(pEGLView);
//turnondisplayFPS
pDirector->setdisplayStats(true);
//setFPS.thedefaultvalueis1.0/60ifyoudon'tcallthis
pDirector->setAnimationInterval(1.0/60);
//createascene.it'sanautoreleaSEObject
CCScene*pScene=HelloWorld::scene();
//run
pDirector->runWithScene(pScene);
returntrue;
}
我们知道导演是Cocos2dx中执行一切的开始,所以该函数首先定义了一个导演。
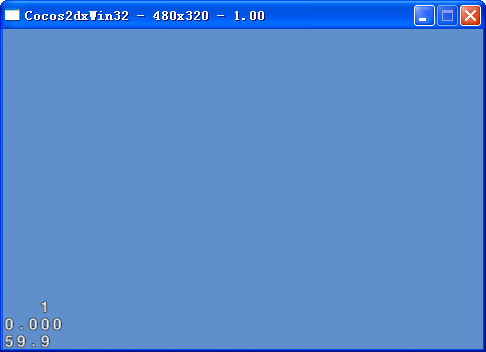
然后导演调用的前三个成员都是用来设置FPS,所以我们能在Hello World的左下角中看到FPS
接着该函数定义了一个场景(pScene),该场景等于HelloWorldScene中的场景,然后用导演运行这个场景,所以接下来我们就转到HelloWorldScene类中去看看这个场景是怎么实现的
HelloWorldScene类的代码解析
scene()
这是前面在AppDelegate类中applicationDidFinishLaunching()函数中CCScene*pScene=HelloWorld::scene();中的scene,下面我们看看它的代码
CCScene*HelloWorld::scene()
{
//'scene'isanautoreleaSEObject
CCScene*scene=CCScene::create();

//'layer'isanautoreleaSEObject
HelloWorld*layer=HelloWorld::create();
//addlayerasachildtoscene
scene->addChild(layer);
//returnthescene
returnscene;
}
该场景的函数中定义了一个图层,这个图层被加在场景中,所以我们只需要对图层进行操作就可以了
init()
顾名思义这是初始化的函数
boolHelloWorld::init()
{
//////////////////////////////
//1.superinitfirst
if(!cclayer::init())
{
returnfalse;
}

CCSizevisibleSize=CCDirector::sharedDirector()->getVisibleSize();
CCPointorigin=CCDirector::sharedDirector()->getVisibleOrigin();
/////////////////////////////
//2.addamenuitemwith"X"image,whichisclickedtoquittheprogram
//youmaymodifyit.
//adda"close"icontoexittheprogress.it'sanautoreleaSEObject
CcmenuItemImage*pCloseItem=CcmenuItemImage::create(
"Closenormal.png","CloseSelected.png",this,menu_selector(HelloWorld::menuCloseCallback));

pCloseItem->setPosition(ccp(origin.x+visibleSize.width-pCloseItem->getContentSize().width/2,origin.y+pCloseItem->getContentSize().height/2));
//createmenu,it'sanautoreleaSEObject
Ccmenu*pMenu=Ccmenu::create(pCloseItem,NULL);
pMenu->setPosition(CCPointZero);
this->addChild(pMenu,1);
/////////////////////////////
//3.addyourcodesbelow...
//addalabelshows"HelloWorld"
//createandinitializealabel

cclabelTTF*pLabel=cclabelTTF::create("HelloWorld","Arial",24);

//positionthelabelonthecenterofthescreen
pLabel->setPosition(ccp(origin.x+visibleSize.width/2,origin.y+visibleSize.height-pLabel->getContentSize().height));
//addthelabelasachildtothislayer
this->addChild(pLabel,1);
//add"HelloWorld"splashscreen"
CCSprite*pSprite=CCSprite::create("HelloWorld.png");
//positionthespriteonthecenterofthescreen
pSprite->setPosition(ccp(visibleSize.width/2+origin.x,visibleSize.height/2+origin.y));
//addthespriteasachildtothislayer
this->addChild(pSprite,0);

returntrue;
}
在这个函数中,我们看到了首先添加了一个CcmenuItemImage的按钮,这是Hello World程序中的关闭按钮,按下按钮是会调用menuCloseCallback成员函数,然后用pCloseItem->setPosition来设置按钮的位置的,最后再用this->addChild(pMenu,1)来把它添加到场景中。
然后,该函数添加了一个cclabelTTF,这是Hello World程序中显示在程序中间的那一行字,同样的,用setPosition设置位置,用this->addChild来把它添加到场景中
最后,该函数还添加了一个CCSprite,这个精灵就是Hello World程序中的背景图片,用setPosition设置位置,用this->addChild来把它添加到场景中
//addChild第二个参数是添加层的意思,比如我添加了一个精灵在1,然后又添加一个在0,那么层数在1的精灵在相同的位置就会覆盖层数是0的精灵
menuCloseCallback(CCObject* pSender)
这个成员函数是但按下关闭按钮时调用的,所以他应该实现关闭程序的功能
voidHelloWorld::menuCloseCallback(CCObject*pSender)
{
#if(CC_TARGET_PLATFORM==CC_PLATFORM_WINRT)||(CC_TARGET_PLATFORM==CC_PLATFORM_WP8)
CcmessageBox("Youpressedtheclosebutton.WindowsstoreAppsdonotimplementaclosebutton.","Alert");
#else
CCDirector::sharedDirector()->end();
#if(CC_TARGET_PLATFORM==CC_PLATFORM_IOS)
exit(0);
#endif
#endif
}
―――――――――――――――――――――――――――――――――――――――――――――
cocos2dx中各层次调用关系:
Director(导演)->Scene(场景)->Layer(图层)->Sprite(精灵)
导演只有一个,导演可以调用多个场景,场景中可以有多个图层,图层中也可以有多个精灵,图层中也可以有多个子图层,精灵可以不经过图层直接加在场景中。


