本文实践自 Ray Wenderlich、Ali Hafizji 的文章《How To Create Dynamic Textures with CCRenderTexture in Cocos2D 2.X》,文中使用Cocos2D,我在这里使用Cocos2D-x 2.1.4进行学习和移植。在这篇文章,将会学习到如何创建实时纹理、如何用Gimp创建无缝拼接纹理、如何混合阴影和光照到纹理上以显现逼真效果、如何创建条纹纹理、如何设置纹理重复等等。
步骤如下:
1.新建Cocos2d-win32工程,工程名为"TinySeal",勾选"Box2D"选项(后续文章会使用到),勾选"Simple Audio Engine in Cocos Denshion"选项;
2.打开HelloWorldScene.cpp文件,在添加如下方法:
|
1 2 3 4 5 6 7 8 9 10 11 12 13 14 15 16 17 |
CCSprite *HelloWorld::spriteWithColor(ccColor4F bgColor, float textureWidth, float textureHeight) { // 1: Create new CCRenderTexture CCRenderTexture *rt = CCRenderTexture::create(textureWidth, textureHeight); // 2: Call CCRenderTexture:begin rt->beginWithClear(bgColor.r, bgColor.g, bgColor.b, bgColor.a); // 3: Draw into the texture // You'll add this later // 4: Call CCRenderTexture:end rt->end(); // 5: Create a new Sprite from the texture return CCSprite::createWithTexture(rt->getSprite()->getTexture()); } |
正如你所见,这5个步骤是用来创建动态纹理的,具体描述如下:
①.创建一个新的CCRenderTexture:指定所要创建纹理的宽度和高度。
②.调用CCRenderTexture的begin方法:设置OpenGL以便之后的任何图形绘制都在CCRenderTexture上,而不是屏幕上。
③.绘制纹理:使用原始的OpenGL命令来绘制,或通过调用现有的Cocos2D对象的visit方法。
④.调用CCRenderTexture的end方法:渲染纹理,关闭绘制到纹理上。
⑤.以纹理创建一个新的精灵:以CCRenderTexture的getSprite()->getTexture()来创建一个新的精灵。
注意这里不是调用CCRenderTexture:begin方法,而是调用一个更方便的方法beginWithClear,可以在绘制之前,用特定的颜色来清除纹理。
3.接着打开HelloWorldScene.h文件,添加如下代码:
|
1 2 |
private: cocos2d::CCSprite *_background; |
打开HelloWorldScene.cpp文件,在构造函数里添加如下代码:
| 1 | _background = NULL; |
|
1 2 3 4 5 6 7 8 9 10 11 12 |
bool HelloWorld::init() { bool bRet = false; do { CC_BREAK_IF(! cclayer::init()); bRet = true; } while (0); return bRet; } |
|
1 2 3 4 5 6 7 8 9 10 11 12 13 14 15 16 17 18 19 20 21 22 23 24 25 26 27 28 29 30 31 32 33 34 35 36 37 38 39 40 41 42 43 44 |
ccColor4F HelloWorld::randomBrightColor() { while (true) { float requiredBrightness = 192; ccColor4B randomColor = ccc4(rand() % 255, rand() % 255, rand() % 255, 255); if (randomColor.r > requiredBrightness || randomColor.g > requiredBrightness || randomColor.b > requiredBrightness) { return ccc4FFromccc4B(randomColor); } } } void HelloWorld::genBackground() { if (_background) { _background->removeFromParentAndCleanup(true); } ccColor4F bgColor = this->randomBrightColor(); _background = this->spriteWithColor(bgColor, 512, 512); CCSize winSize = CCDirector::sharedDirector()->getWinSize(); _background->setPosition(ccp(winSize.width / 2, winSize.height / 2)); this->addChild(_background, -1); } void HelloWorld::onEnter() { cclayer::onEnter(); this->genBackground(); this->setTouchEnabled(true); } void HelloWorld::cctouchesBegan(CCSet *ptouches, CCEvent *pEvent) { this->genBackground(); } |
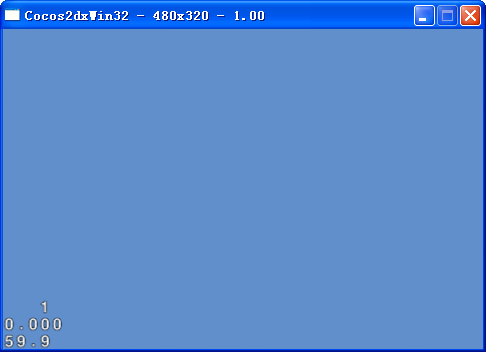
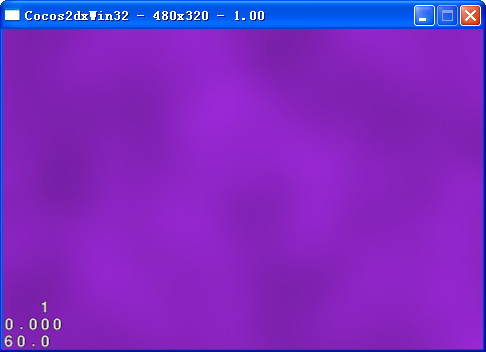
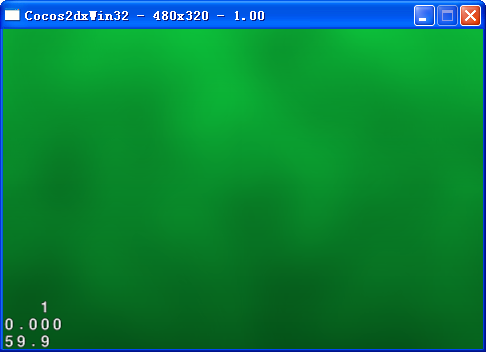
randomBrightColor是一个辅助方法,用来创建随机颜色。注意到这里是使用ccc4B,所以可以指定R/G/B/A值在0-255范围内,并且确保至少其中之一大于192,这样就不会得到较深的颜色。然后再将颜色转换成ccc4F。genBackground方法调用spriteWithColor方法,然后把创建的精灵加到屏幕中央。onEnter方法调用genBackground,并且开启触摸,这样触摸屏幕就可以重新生成另一个随机背景。编译运行,每次运行程序或触摸屏幕都会有不同颜色的背景,如下图所示:
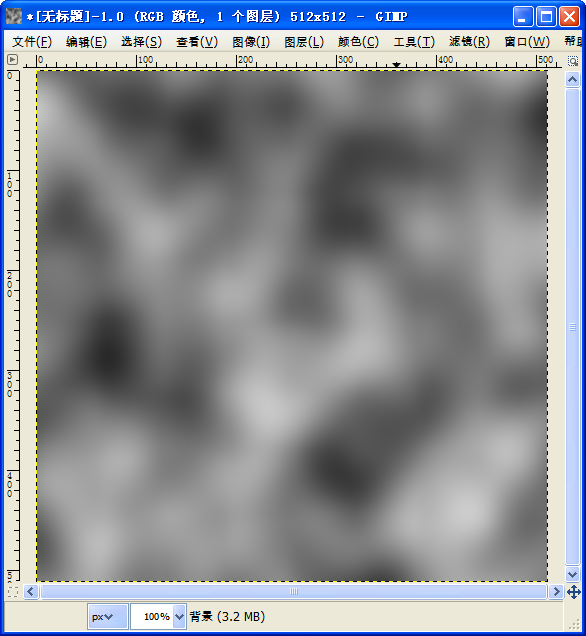
4.创建噪音纹理。用一些噪音来进行修饰,这样会使得它们看起来像是有阴影和光照。可以编写一些代码生成动态噪音,但是使用一些预先做好的噪音,这将更容易,性能也更高,这也是这里所将要介绍的。一种简单的方法来创建随机噪音,是通过一个免费的图像编辑程序,名为Gimp。在这里,可以下载已经制作好的图片(下载),跳过这部分。也可以下载Gimp(下载,当前2.8.4版本),动手制作。启动Gimp程序,菜单栏→“文件”→“新建”,创建一张512x512大小的图像。菜单栏→“滤镜”→“绘制”→“云彩”→“纯色噪音”,如果需要的话,可以在这里调整参数,然后点击“确定”。这样就会得到看起来像下图那样的图片:
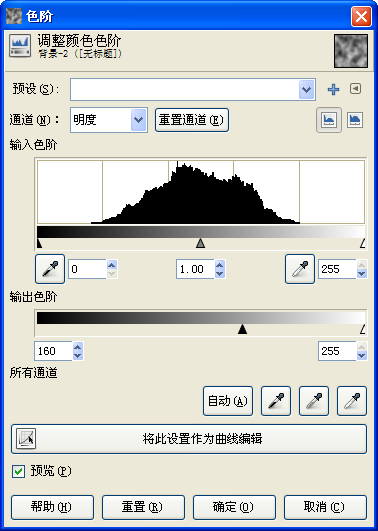
将会使用这张图片乘以纹理的颜色。因此,图片中的白色部分,将使原来的颜色显现出来,而黑色的部分,将使原来的颜色变得更暗。目前,图片中有太多的黑色部分,这会影响到我们所需要的效果。所以要减少黑色部分的数量,菜单栏→“颜色”→“色阶”,拖动“输出色阶”最左边的滑块到右边一些,这里调整为160,如下图所示:
将会看到图片变得明亮许多,如下图所示:

噪音纹理需要制作成无缝拼接,这样才能创建拼接完整的重复纹理。菜单栏→“滤镜”→“映射”→“无缝处理”即可。最后保存文件,菜单栏→“文件”→“导出到”,名称为Noise.png,保存到工程Resources文件夹下。
5.应用噪音纹理。把这张噪音图片应用到用CCRenderTexture所创建的纹理上。在spriteWithColor函数里面,第3步注释后面添加如下代码:
|
1 2 3 4 5 |
CCSprite *noise = CCSprite::create("Noise.png"); ccBlendFunc blendFunc = {GL_DST_COLOR, GL_ZERO}; noise->setBlendFunc(blendFunc); noise->setPosition(ccp(textureWidth / 2, textureHeight / 2)); noise->visit(); |
这里用噪音纹理来创建精灵,将它放置在渲染纹理的中心,然后调用visit方法。这个visit方法就是一系列的OpenGL ES命令调用,来绘制纹理。ccBlendFunc的第一个常量(GL_DST_COLOR)指定如何乘以输入/源(也就是噪音纹理)的颜色,第二个常量(GL_ZERO)指定如何乘以现有的/目标(也就是上面的纯色纹理)的颜色。具体如下:
- 现有的颜色乘以GL_ZERO,意味着现有的颜色被清除掉。
- 噪音纹理的颜色乘以GL_DST_COLOR,而GL_DST_COLOR意味着现有的颜色,因此噪音纹理的颜色乘以现有的颜色。所以噪音中白色部分越多,那么对应现有的颜色将会越明显,而噪音中黑色部分越多,则对应现有的颜色越暗。
- 上述两种颜色进行相加,由于第一种颜色为零,所以真正重要的是第二种颜色结果。
6.添加渐变到纹理上。为了使纹理看起来更好些,添加一个从上到下的渐变,纹理越往下越暗。虽然可以通过Gimp修改噪音文件达到效果,但也可以用代码做到,这样使得事情更加动态,而且容易修改。基本的想法是,在纹理之上绘制一个黑色矩形,它的顶部完全透明,而底部不透明,这将使得纹理顶部不变,而底部逐渐变暗下去。要做到这一点,需要用到一些OpenGL命令。在spriteWithColor函数里面,创建噪音精灵之前,添加如下代码:
|
1 2 3 4 5 6 7 8 9 10 11 12 13 14 15 16 17 18 19 20 21 22 23 24 25 |
this->setShaderProgram(CCshadercache::sharedshadercache()->programForKey(kCCShader_PositionColor)); CC_NODE_DRAW_SETUP(); // 3: Draw into the texture float gradientAlpha = 0.7f; CCPoint vertices[4]; ccColor4F colors[4]; int nVertices = 0; vertices[nVertices] = CCPointMake(0, 0); colors[nVertices++] = ccc4f(0, 0, 0, 0); vertices[nVertices] = CCPointMake(textureWidth, 0); colors[nVertices++] = ccc4f(0, 0, 0, 0); vertices[nVertices] = CCPointMake(0, textureHeight); colors[nVertices++] = ccc4f(0, 0, 0, gradientAlpha); vertices[nVertices] = CCPointMake(textureWidth, textureHeight); colors[nVertices++] = ccc4f(0, 0, 0, gradientAlpha); ccGLEnabLevertexAttribs(kCCVertexAttribFlag_Position | kCCVertexAttribFlag_Color); glVertexAttribPointer(kCCVertexAttrib_Position, 2, GL_FLOAT, GL_FALSE, 0, vertices); glVertexAttribPointer(kCCVertexAttrib_Color, 4, GL_FLOAT, GL_FALSE, 0, colors); glBlendFunc(CC_BLEND_SRC, CC_BLEND_DST); glDrawArrays(GL_TRIANGLE_STRIP, 0, (GLsizei)nVertices); |
绘制纹理时,左上角是(0,0)点,而不是Cocos2D中的左下角。因此,以上代码首先定义了纹理的四个顶点,顺序为左上、右上、左下、右下,还定义了每个点的颜色。以这样的顺序来绘制顶点,是因为将绘制两个三角形来形成一个矩形,如下图所示:

使用GL_TRIANGLE_STRIP来绘制这些三角形,这意味着,第一个三角形由顶点数组中的前三个顶点组成,其余的三角形由前一个三角形的后两个顶点和下一个顶点组成。因此,这里第一个三角形由V0、V1、V2组成,第二个三角形由V1、V2、V3组成。定义完顶点数组和颜色数组之后,传递顶点数组和kCCVertexAttrib_Position常量给glVertexAttribPointer,同样传递颜色数组和kCCVertexAttrib_Color常量给glVertexAttribPointer。编译运行,可以看到一个整齐的渐变纹理,如下图所示:
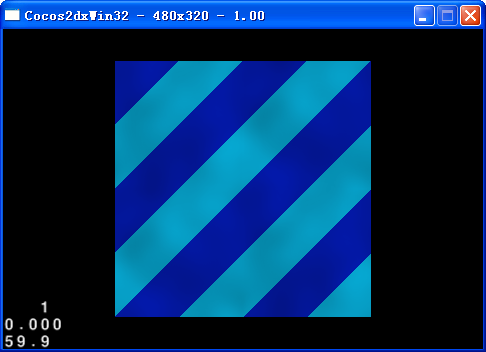
7.创建条纹纹理。将以一种颜色(如蓝色)着色纹理开始,然后绘制一些条纹(如绿色)斜穿过它,如下图所示:
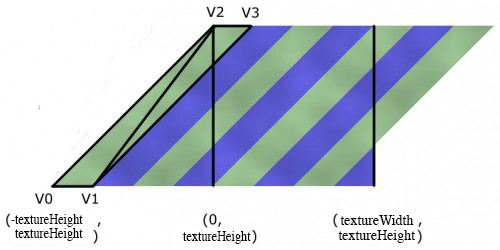
注意,因为条纹是斜向的,实际上要在纹理的边界之外就开始绘制,并且在纹理的边界之外继续绘制一些条纹。另外还要注意,为了得到一个不错的45度角,把V0偏移纹理的高度,这样两边都是纹理高度,因此,可以得到一个45度角。添加一个新的方法,代码如下:
|
1 2 3 4 5 6 7 8 9 10 11 12 13 14 15 16 17 18 19 20 21 22 23 24 25 26 27 28 29 30 31 32 33 34 35 36 37 38 39 40 41 42 43 44 45 46 47 48 49 50 51 52 53 54 55 56 57 58 59 60 61 62 63 64 65 66 67 68 |
CCSprite * HelloWorld::spriteWithColor1(ccColor4F c1, ccColor4F c2, float textureWidth, float textureHeight, int nStripes) { // 1: Create new CCRenderTexture CCRenderTexture *rt = CCRenderTexture::create(textureWidth, textureHeight); // 2: Call CCRenderTexture:begin rt->beginWithClear(c1.r, c1.g, c1.b, c1.a); // 3: Draw into the texture this->setShaderProgram(CCshadercache::sharedshadercache()->programForKey(kCCShader_PositionColor)); CC_NODE_DRAW_SETUP(); // Layer 1: Stripes CCPoint *vertices = new CCPoint[nStripes * 6]; ccColor4F *colors = new ccColor4F[nStripes * 6]; int nVertices = 0; float x1 = -textureHeight; float x2; float y1 = textureHeight; float y2 = 0; float dx = textureWidth / nStripes * 2; float stripeWidth = dx / 2; for (int i = 0; i < nStripes; ++i) { x2 = x1 + textureHeight; vertices[nVertices] = ccp(x1, y1); colors[nVertices++] = ccc4f(c2.r, c2.g, c2.b, c2.a); vertices[nVertices] = ccp(x1 + stripeWidth, y1); colors[nVertices++] = ccc4f(c2.r, c2.g, c2.b, c2.a); vertices[nVertices] = ccp(x2, y2); colors[nVertices++] = ccc4f(c2.r, c2.g, c2.b, c2.a); vertices[nVertices] = vertices[nVertices - 2]; colors[nVertices++] = ccc4f(c2.r, c2.g, c2.b, c2.a); vertices[nVertices] = vertices[nVertices - 2]; colors[nVertices++] = ccc4f(c2.r, c2.g, c2.b, c2.a); vertices[nVertices] = ccp(x2 + stripeWidth, y2); colors[nVertices++] = ccc4f(c2.r, c2.g, c2.b, c2.a); x1 += dx; } ccGLEnabLevertexAttribs(kCCVertexAttribFlag_Position | kCCVertexAttribFlag_Color); glVertexAttribPointer(kCCVertexAttrib_Position, 2, GL_FLOAT, GL_FALSE, 0, vertices); glVertexAttribPointer(kCCVertexAttrib_Color, 4, GL_FLOAT, GL_TRUE, 0, colors); glDrawArrays(GL_TRIANGLES, 0, (GLsizei)nVertices); CC_SAFE_DELETE_ARRAY(vertices); CC_SAFE_DELETE_ARRAY(colors); // Layer 4: Noise CCSprite *noise = CCSprite::create("Noise.png"); ccBlendFunc blendFunc = {GL_DST_COLOR, GL_ZERO}; noise->setBlendFunc(blendFunc); noise->setPosition(ccp(textureWidth / 2, textureHeight / 2)); noise->visit(); // 4: Call CCRenderTexture:end rt->end(); // 5: Create a new Sprite from the texture return CCSprite::createWithTexture(rt->getSprite()->getTexture()); } |
|
1 2 3 4 5 6 7 8 9 10 11 12 13 14 15 16 17 18 19 |
void HelloWorld::genBackground() { if (_background) { _background->removeFromParentAndCleanup(true); } ccColor4F bgColor = this->randomBrightColor(); ccColor4F color2 = this->randomBrightColor(); //_background = this->spriteWithColor(bgColor, 512, 512); int nStripes = ((rand() % 4) + 1) * 2; _background = this->spriteWithColor1(bgColor, color2, 512, 512, nStripes); this->setScale(0.5f); CCSize winSize = CCDirector::sharedDirector()->getWinSize(); _background->setPosition(ccp(winSize.width / 2, winSize.height / 2)); this->addChild(_background); } |
这里调用新的方法,并且还设置了层的缩放为0.5,使其更容易地看到整个纹理。编译运行,每当触摸屏幕都可以看到随机生成的条纹纹理,如下图所示:
8.重复背景。对于条纹背景和渐变背景,都希望能够平铺整个区域空间,这可能比纹理更宽。一种简单的方式是创建多个CCSprites,让它们链接在一起。但那太疯狂了,因为还有一种更简单的方式,设置纹理重复。修改genBackground函数,在addChild之前添加如下代码:
|
1 2 |
ccTexParams tp = {GL_LINEAR, GL_LINEAR, GL_REPEAT, GL_REPEAT}; _background->getTexture()->setTexParameters(&tp); |
| 1 | this->scheduleUpdate(); |
|
1 2 3 4 5 6 7 8 9 |
void HelloWorld::update(float dt) { float PIXELS_PER_SECOND = 100; static float offset = 0; offset += PIXELS_PER_SECOND * dt; CCSize textureSize = _background->getTextureRect().size; _background->setTextureRect(CCRectMake(offset, 0, textureSize.width, textureSize.height)); } |
这里最重要的部分就是纹理的参数:
此外,安装一个定时器,定时更新纹理的可见部分,使其沿着X轴不断地向前移动。这会使得纹理随着时间的推移,不断地重复。编译运行,可以看到一个不断滚动和重复的纹理,如下图所示:
也可以用渐变纹理来尝试一下,也是如此。
9.光照效果。为了使它看起来更佳,让它在顶部有一些轻微的光照,并且还有从上到下的渐变。修改前面的条纹纹理,在spriteWithColor1函数里面,glDrawArrays代码之后,添加如下代码:
|
1 2 3 4 5 6 7 8 9 10 11 12 13 14 15 16 17 18 19 20 21 22 23 24 25 26 27 28 29 30 31 32 33 34 35 36 37 38 39 40 41 42 |
// Layer 2: gradient float gradientAlpha = 0.7f; nVertices = 0; vertices[nVertices] = ccp(0, 0); colors[nVertices++] = ccc4f(0, 0, 0, 0); vertices[nVertices] = ccp(textureWidth, 0); colors[nVertices++] = ccc4f(0, 0, 0, 0); vertices[nVertices] = ccp(0, textureHeight); colors[nVertices++] = ccc4f(0, 0, 0, gradientAlpha); vertices[nVertices] = ccp(textureWidth, textureHeight); colors[nVertices++] = ccc4f(0, 0, 0, gradientAlpha); glVertexAttribPointer(kCCVertexAttrib_Position, 2, GL_FLOAT, GL_FALSE, 0, vertices); glVertexAttribPointer(kCCVertexAttrib_Color, 4, GL_FLOAT, GL_TRUE, 0, colors); glBlendFunc(CC_BLEND_SRC, CC_BLEND_DST); glDrawArrays(GL_TRIANGLE_STRIP, 0, (GLsizei)nVertices); // Layer 3: top highlight float borderHeight = textureHeight / 16; float borderAlpha = 0.3f; nVertices = 0; vertices[nVertices] = ccp(0, 0); colors[nVertices++] = ccc4f(1, 1, 1, borderAlpha); vertices[nVertices] = ccp(textureWidth, 0); colors[nVertices++] = ccc4f(1, 1, 1, borderAlpha); vertices[nVertices] = ccp(0, borderHeight); colors[nVertices++] = ccc4f(0, 0, 0, 0); vertices[nVertices] = ccp(textureWidth, borderHeight); colors[nVertices++] = ccc4f(0, 0, 0, 0); glVertexAttribPointer(kCCVertexAttrib_Position, 2, GL_FLOAT, GL_FALSE, 0, vertices); glVertexAttribPointer(kCCVertexAttrib_Color, 4, GL_FLOAT, GL_TRUE, 0, colors); glBlendFunc(CC_BLEND_SRC, CC_BLEND_DST); glDrawArrays(GL_TRIANGLE_STRIP, 0, (GLsizei)nVertices); |

参考资料:
1.How To Create Dynamic Textures with CCRenderTexture in Cocos2D 2.Xhttp://www.raywenderlich.com/33266/how-to-create-dynamic-textures-with-ccrendertexture-in-cocos2d-2-x
2.(译)如何使用CCRenderTexture来创建动态纹理 http://www.cnblogs.com/zilongshanren/archive/2011/07/01/2095479.html
非常感谢以上资料,本例子源代码附加资源下载地址:http://download.csdn.net/detail/akof1314/5664815
如文章存在错误之处,欢迎指出,以便改正。
再分享一下我老师大神的人工智能教程吧。零基础!通俗易懂!风趣幽默!还带黄段子!希望你也加入到我们人工智能的队伍中来!http://www.captainbed.net


