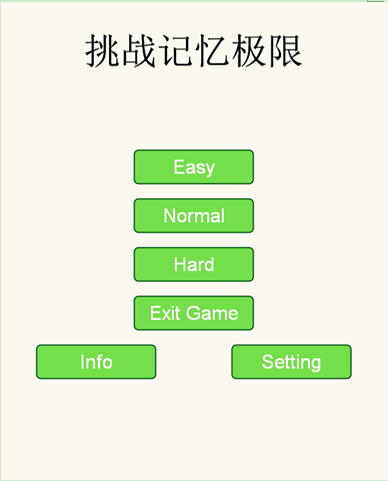
在我点游戏界面中放置两个按钮:Start,Exit,代表开始游戏,和结束游戏,如下:
看到了吧,妹妹不错吧,嘿,百度搜的。。
那么怎么做到的呢?
首先导入资源ExitButton.jpg 和StartButton.jpg, 然后创建精灵如:
auto start = Sprite::create("StartButton.jpg");
start->setPosition(Vec2(start->getContentSize().width / 2 + 20,visibleSize.height / 2));
addChild(start);
接下来给创建事件监听器,并绑定回调函数:
auto startListener = EventListenerTouchOneByOne::create();
startListener->onTouchBegan =[&](cocos2d::Touch* touch,cocos2d::Event* event)
{
cocos2d::Vec2 p = touch->getLocation();
auto target = event->getCurrentTarget();
cocos2d::Rect rect = target->getBoundingBox(); // 判断触摸点是否在该按钮里面
if(rect.containsPoint(p))
{
return true; // to indicate that we have consumed it.
}
return false; // we did not consume this event,pass thru.
};
startListener->onTouchEnded = [=](cocos2d::Touch* touch,cocos2d::Event* event)
{
StartLayer::StartGame(nullptr); //开始游戏
};
Director::getInstance()->getEventdispatcher()->addEventListenerWithSceneGraPHPriority(startListener,start);
这个是一般的方法,但是缺点比较明显,就是添加了许多东西,接下来我要介绍另一种方法,我将其封装到自定义到精灵中如下:
CustomSprite.h头文件
//
// CustomSprite.h
// DontSaveMe
// Created by Mr Gan on 12/23/14.
//
#ifndef __DontSaveMe__CustomSprite__
#define __DontSaveMe__CustomSprite__
#include "cocos2d.h"
#include <string>
#include <stdio.h>
#include <functional>
USING_NS_CC;
class CustomSprite : public Sprite
{
public:
virtual ~CustomSprite(){}
static CustomSprite* createWithPath(const std::string &path);
std::function<bool(Touch*,Event*)> onTouchBegan;
std::function<void(Touch*,Event*)> onTouchMoved;
std::function<void(Touch*,Event*)> onTouchEnded;
std::function<void(Touch*,Event*)> onTouchCancelled;
protected:
CustomSprite():onTouchBegan(nullptr),onTouchEnded(nullptr) {}
virtual bool initWithFile(const std::string& filename) override;
};
#endif /* defined(__DontSaveMe__CustomSprite__) */
// CustomSprite.cpp
//
#include "CustomSprite.h"
CustomSprite *CustomSprite::createWithPath(const std::string &path)
{
auto sprite = new CustomSprite();
if(sprite && sprite->initWithFile(path))
{
sprite->autorelease();
return sprite;
}
else
{
delete sprite;
sprite = nullptr;
return nullptr;
}
}
bool CustomSprite::initWithFile(const std::string& filename)
{
if(!Sprite::initWithFile(filename))
{
return false;
}
auto listener = cocos2d::EventListenerTouchOneByOne::create();
listener->setSwallowtouches(true);
listener->onTouchBegan = [&](cocos2d::Touch* touch,cocos2d::Event* event)
{
cocos2d::Vec2 p = touch->getLocation();
cocos2d::Rect rect = this->getBoundingBox();
if(rect.containsPoint(p))
{
if(onTouchBegan)
onTouchBegan(touch,event);
return true; // to indicate that we have consumed it.
}
ottom:0px; font-size:15px; font-family:Menlo; color:rgb(0,pass thru.
};
listener->onTouchEnded = [=](cocos2d::Touch* touch,cocos2d::Event* event)
{
if(onTouchEnded)
onTouchEnded(touch,event);
};
cocos2d::Director::getInstance()->getEventdispatcher()->addEventListenerWithSceneGraPHPriority(listener,this);
return true;
}
怎么用呢很简单如下:
auto start = CustomSprite::createWithPath("StartButton.jpg");
start->setPosition(Vec2(start->getContentSize().width / 2 + 20,visibleSize.height / 2));
start->onTouchEnded = CC_CALLBACK_2(StartLayer::onBeginTouchStartButton,this);
addChild(start);
auto exit = CustomSprite::createWithPath("ExitButton.jpg");
exit->setPosition(Vec2(start->getPositionX(),start->getPositionY() - 70));
exit->onTouchEnded = CC_CALLBACK_2(StartLayer::onBeginTouchExitButton,this);
addChild(exit);
在定义onBeginTouchStartButton,和onBeginTouchExitButton
void StartLayer::onBeginTouchStartButton(Touch* touch,Event* event)
{
StartGame(nullptr);
}
void StartLayer::onBeginTouchExitButton(Touch* touch,Event* event)
{
ExitGame);
}


