游戏运行时候会不断按照游戏逻辑规则重新绘图,反复处理用户输入、处理定时事件、绘图,直到游戏结束。
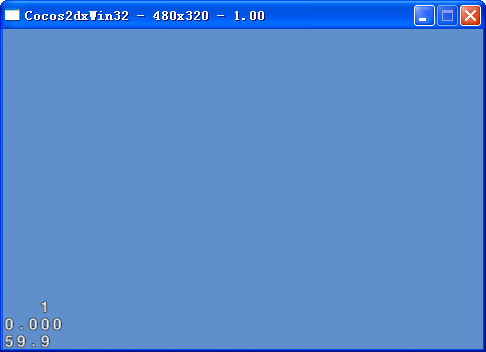
Cocos2d-x引擎也是通过不断绘图来进行游戏的,默认的帧率在AppDelegate.cpp中显示为60帧每秒,也就是每秒执行了60次用户输入、定时时间、绘图等。
抄录Cocos2d-x高级教程中内容如下:
游戏乃至图形界面的本质是不断地绘图,然而绘图并不是随意的,任何游戏都需要遵循一定的规则来呈现出来,这些规则就体现为游戏逻辑。
游戏逻辑会控制游戏内容,使其根据用户输入和时间流逝而改变。因此,游戏可以抽象为不断地重复以下动作:
处理用户输入
处理定时事件
绘图
游戏主循环就是这样的一个循环,它会反复执行以上动作,保持游戏进行下去,直到玩家退出游戏。
CCDirector::mainLoop()方法,这个方法负责调用定时器,绘图,发送全局通知,并处理内存回收池。
该方法按帧调用,每帧调用一次,而帧间间隔取决于两个因素,一个是预设的帧率,默认为60 帧每秒;
另一个是每帧的计算量大小。当逻辑处理与绘图计算量过大时,设备无法完成每秒60 次绘制,此时帧率就会降低。
通过Cocos2d-x高级教程中介绍可知,CCDirector::mainLoop()负责调用定时器,绘图,发送全局通知,那么CCDirector::mainLoop()是在那里开始执行的呢?就是在
CCApplication中,CCApplication中创建游戏对象并初始化,之后开始执行游戏主循环,代码如下:
CCApplication * CCApplication::sm_pSharedApplication = 0;
CCApplication* CCApplication::sharedApplication()
{
	return sm_pSharedApplication;
}
int CCApplication::run()
{
	while (1)
	{
		....
		if (!PeekMessage(&msg,NULL,PM_REMOVE))
		{
			....
				// If it's the time to draw next frame,draw it,else sleep a while.
			if (nNow.QuadPart - nLast.QuadPart > m_nAnimationInterval.QuadPart)
			{
				nLast.QuadPart = nNow.QuadPart;
				CCDirector::sharedDirector()->mainLoop();
			}
			....
		}
		.....
		if (!m_hAccelTable || !TranslateAccelerator(msg.hwnd,m_hAccelTable,&msg))
		{
			TranslateMessage(&msg);
			dispatchMessage(&msg);
		}
	}
	return xxx;
}
上面这段代码就是开始游戏主循环,while中调用了CCDirector::mainLoop(),之后游戏帧循环开始;
另外复习一下,在main.cpp中有调用CCApplication::run():
int APIENTRY _tWinMain(...)
{
	...
	AppDelegate app;
	CCEGLView* eglView = CCEGLView::sharedOpenGLView();
	eglView->setViewName("HelloWorld");
	eglView->setFrameSize(480,320);
	return CCApplication::sharedApplication()->run();
}
CCApplication::sharedApplication()->run();后游戏开始运行。
之后看看CCDirector::mainLoop()中内容,代码如下:
class CC_DLL CCDirector : public CCObject,public TypeInfo
{
public:
	virtual void mainLoop(void) = 0;
}在CCDirector中mainLoop为一个纯虚函数,没有具体实现。而具体实现mainLoop的则是在CCDirector子类CCdisplayLinkDirector中,精简后的CCdisplayLinkDirector类如下:
class CCdisplayLinkDirector : public CCDirector { public: virtual void mainLoop(void); } void CCdisplayLinkDirector::mainLoop(void) { if (m_bPurgeDirecotorInNextLoop) { m_bPurgeDirecotorInNextLoop = false; purgeDirector(); } else if (!m_bInvalid) { drawScene(); // release the objects CCPoolManager::sharedPoolManager()->pop();完成内存清理 } }在CCdisplayLinkDirector中的mainLoop中可以看到有个drawScene()函数,这个函数在程序中完成定时与图片渲染工作,看看drawScene()的定义,如下:
void CCDirector::drawScene(void)
{
	if (!m_bPaused)
	{
		m_pScheduler->update(m_fDeltaTime);
	}
	// draw the scene
	if (m_pRunningScene)
	{
		m_pRunningScene->visit();
	}
}首先m_pScheduler->update(m_fDeltaTime);这句代码完成了定时器事件的处理;
之后m_pRunningScene->visit();这句代码遍历每个节点,完成渲染工作。
以上就是drawScene()中我们关注的功能;
然后在看看drawScene()下面的CCPoolManager::sharedPoolManager()->pop(),这句代码完成内存清理的功能。
之后再返回CCApplication中继续往下看,有两句代码如下:
int CCApplication::run()
{
	while (1)
	{
		.....
		if (!m_hAccelTable || !TranslateAccelerator(msg.hwnd,&msg))
		{
			TranslateMessage(&msg);
			dispatchMessage(&msg);
		}
	}
	return xxx;
}TranslateMessage(&msg)和dispatchMessage(&msg)在Win32中完成事件的收集与分发,在这个游戏中则是处理触摸消息。
到此为止,游戏中主循环执行玩一遍,下面精简一下描述,方便以后复习:
CCApplication::applicationDidFinishLaunching();//游戏内容设计
int CCApplication::run()
{
	while (1)
	{	....
		if (!PeekMessage(&msg,PM_REMOVE))
		{	....
				// If it's the time to draw next frame,else sleep a while.
			if (nNow.QuadPart - nLast.QuadPart > m_nAnimationInterval.QuadPart)
			{
				CCDirector::sharedDirector()->mainLoop()
					{
						void CCDirector::drawScene(void)
							{
								m_pScheduler->update(m_fDeltaTime);//定时器事件处理
								m_pRunningScene->visit();//完成图片的渲染
							}
						CCPoolManager::sharedPoolManager()->pop();// 完成内存清理
					}
			}....
		}.....
		if (!m_hAccelTable || !TranslateAccelerator(msg.hwnd,&msg))
		{
			TranslateMessage(&msg);//
			dispatchMessage(&msg);//处理触摸消息
		}
	}
	return xxx;
}


