之前在vue页面中引入axios使用,本篇在mainjs中引入
1、mainjs中引入axios,设置基础url
import axios from 'axios'
axios.defaults.baseURL = 'https://localhost:8080/'
Vue.prototype.axios = axios
2、在vue页面中,注意axios前需要加this.
methods: {
    login () {
      let that = this
      console.log(this.userName)
      console.log(this.password)
      this.axios
        .get('/api/login', {
          params: {
            userName: that.userName,
            password: that.password
          }
        })
        .then(function (response) {
          console.log(response)
          if (response.data.data.result === 'success') {
            that.$router.push('second')
          } else {
            alert(response.data.data.message)
          }
        })
        .catch(function (error) {
          console.log(error)
        })
    }
  }
3、function (response)中必须使用that才能获取到$router对象,有没有办法直接获取到呢,代码如下
 methods: {
    login () {
      let that = this
      console.log(this.userName)
      console.log(this.password)
      this.axios
        .get('/api/login', {
          params: {
            userName: that.userName,
            password: that.password
          }
        })
        .then((response) => {
          console.log(response)
          if (response.data.data.result === 'success') {
            this.$router.push('second')
          } else {
            alert(response.data.data.message)
          }
        })
        .catch(function (error) {
          console.log(error)
        })
    }
  }
ES6中的 箭头函数 "=>" 内部的this是词法作用域,由上下文确定(也就是由外层调用者vue来确定)。
4、关于api/login,api login是模拟的一个json数据
4.1在项目根目录下添加data.json,内容如下
{
    "loginresult": {
      "result": "success",
      "message": ""
    }
}
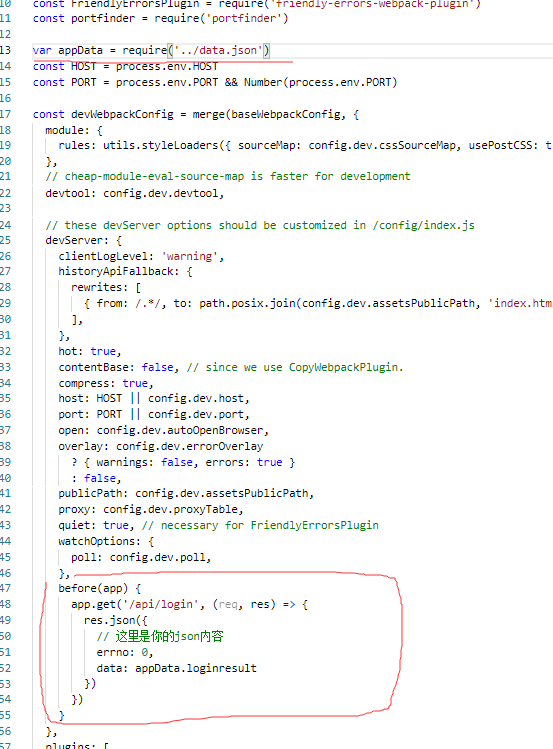
4.2修改webpack.dev.conf.js文件,添加红色部分代码,关闭服务器重新npm run dev.
4.3、点击登录按钮就可以工作了。