在我们开发的uni-app的过程中,页面跳转及提示框往往是我们做数据交互及结果反馈所要使用的功能,这里分享下我收集的一些方法及看法。
一:页面跳转
事件跳转 :指通过tap等事件来实现页面的跳转,跳转的方法分三类,直接跳转,关闭当前页面后跳转,标题页面跳转。
直接跳转(uni.navigateTo),具体参数如下:

案例:
//在起始页面跳转到test.vue页面并传递参数
uni.navigateTo({
    url: 'test?id=1&name=uniapp'
});
// 在test.vue页面接受参数
export default {
    onLoad: function (option) { //option为object类型,会序列化上个页面传递的参数
        console.log(option.id); //打印出上个页面传递的参数。
        console.log(option.name); //打印出上个页面传递的参数。
    }
}
关闭当前页面后跳转(uni.redirectTo),具体参数如下:

案例:
uni.redirectTo({
    url: 'test?id=1'
});
备注:关闭所有页面后跳转的方法为uni.reLaunch,直接替换uni.redirectTo即可使用。
如果你使用了上述方法后,你会发现,其实你无法调整到标题页面,这里就需要一个标题页面的跳转方法,标题页面跳转(uni.switchTab),具体参数如下:
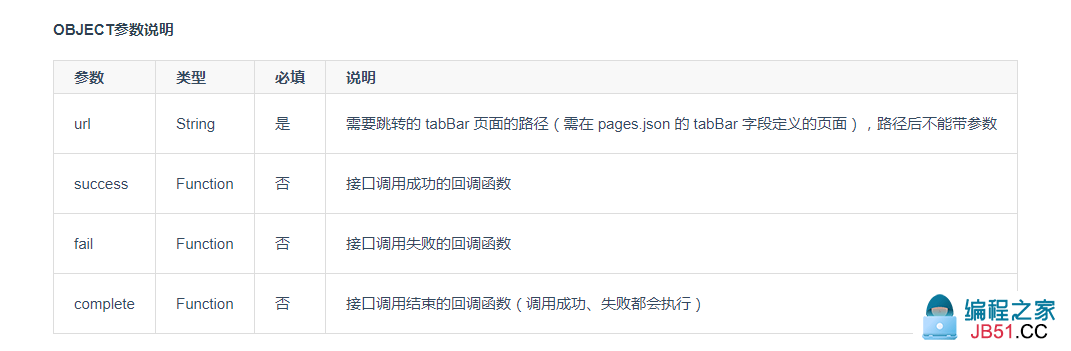
案例:
page.json
{
  "tabBar": {
    "list": [{
      "pagePath": "pages/index/index","text": "首页"
    },{
      "pagePath": "pages/other/other","text": "其他"
    }]
  }
}
页面:
uni.switchTab({
    url: '/pages/index/index'
});
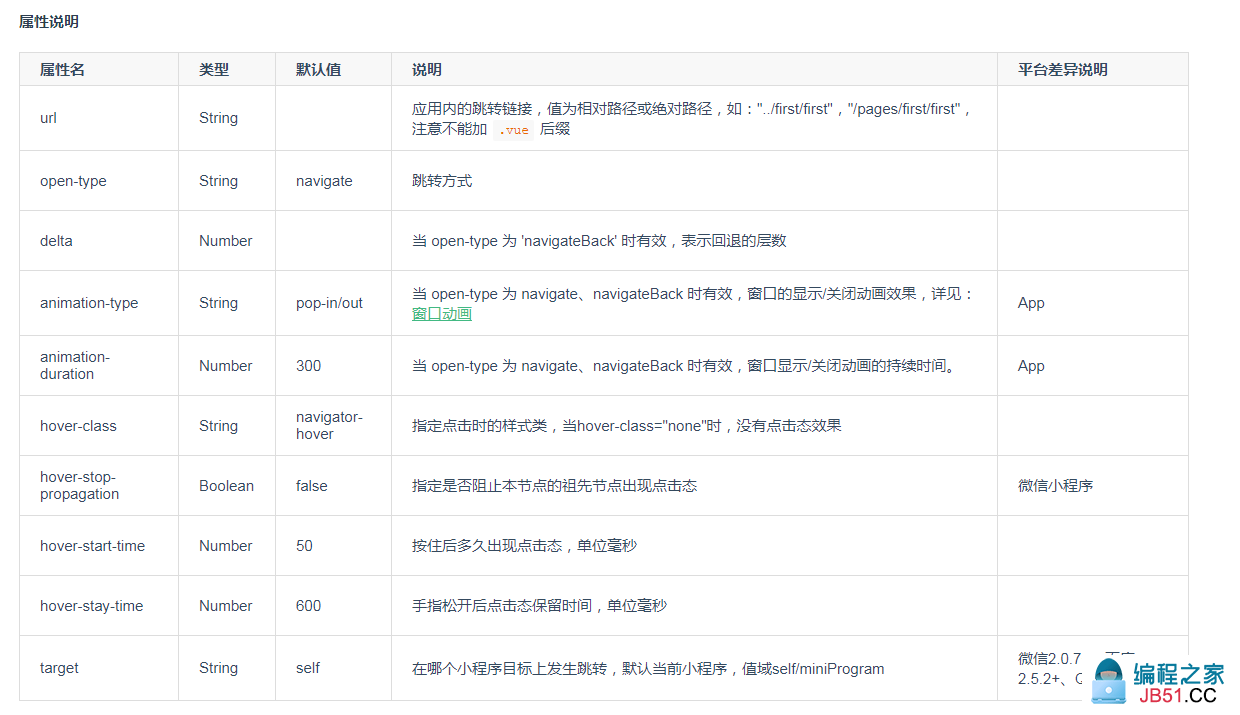
标签跳转:指使用navigator来进行跳转。
案例:
<template>
    <view>
        <view class="page-body">
            <view class="btn-area">
                <navigator url="navigate/navigate?title=navigate" hover-class="navigator-hover">
                    <button type="default">跳转到新页面</button>
                </navigator>
                <navigator url="redirect/redirect?title=redirect" open-type="redirect" hover-class="other-navigator-hover">
                    <button type="default">在当前页打开</button>
                </navigator>
                <navigator url="/pages/tabBar/extUI/extUI" open-type="switchTab" hover-class="other-navigator-hover">
                    <button type="default">跳转tab页面</button>
                </navigator>
            </view>
        </view>
    </view>
</template>
提示框:这里记录官方的提示框,自定义的提示框等之后做自定义组件解析的时候一起制作
uni.showLoading(OBJECT):
显示 loading 提示框,需主动调用 uni.hideLoading 才能关闭提示框。
案例:
uni.showLoading({
    title: '加载中'
});

setTimeout(function () {
    uni.hideLoading();
},2000);
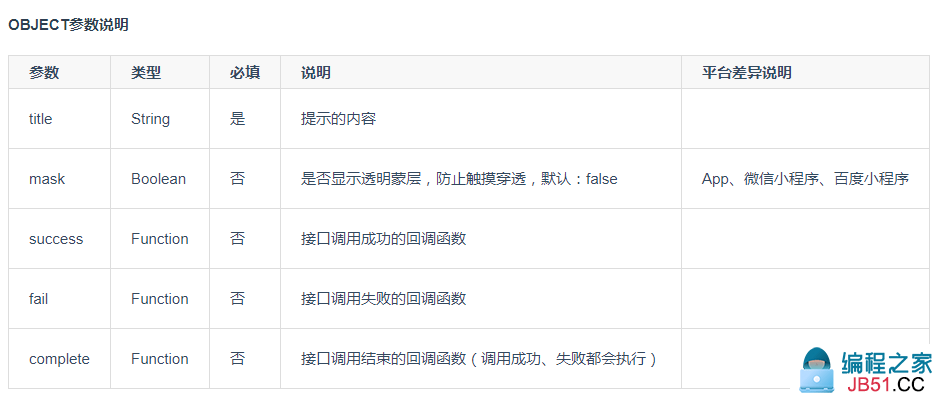
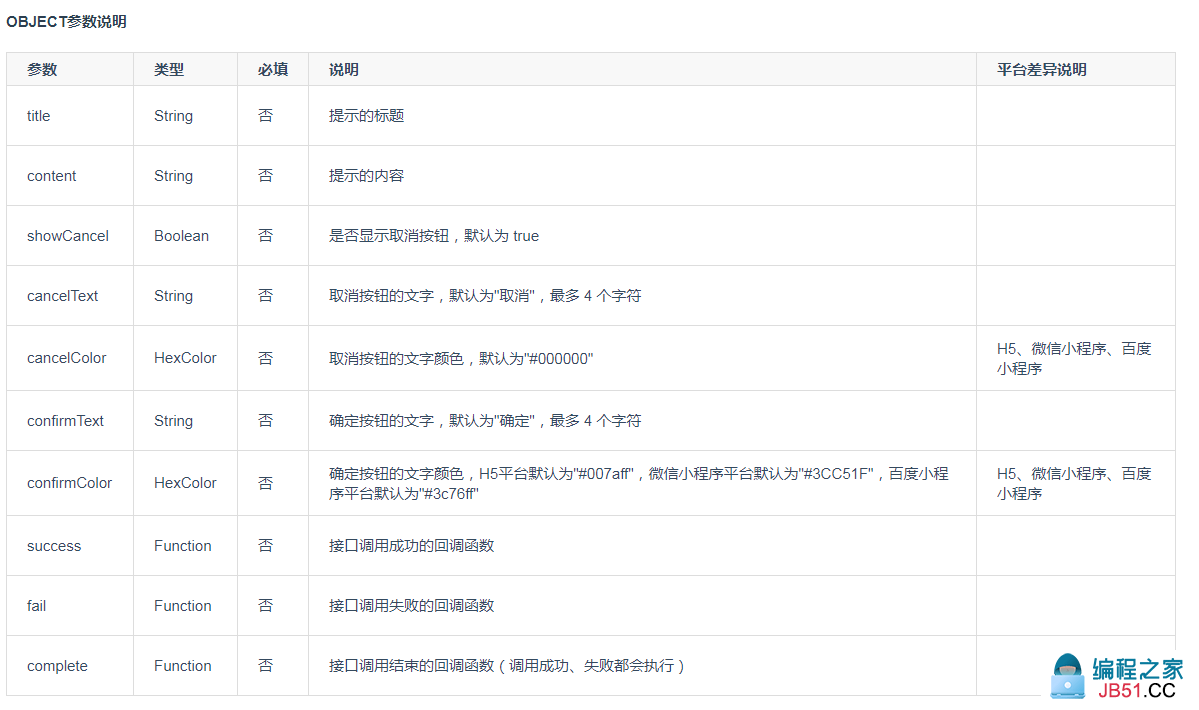
uni.showModal(OBJECT):
显示模态弹窗,类似于标准 html 的消息框:alert、confirm。

案例:
uni.showModal({
    title: '提示',content: '这是一个模态弹窗',success: function (res) {
        if (res.confirm) {
            console.log('用户点击确定');
        } else if (res.cancel) {
            console.log('用户点击取消');
        }
    }
});
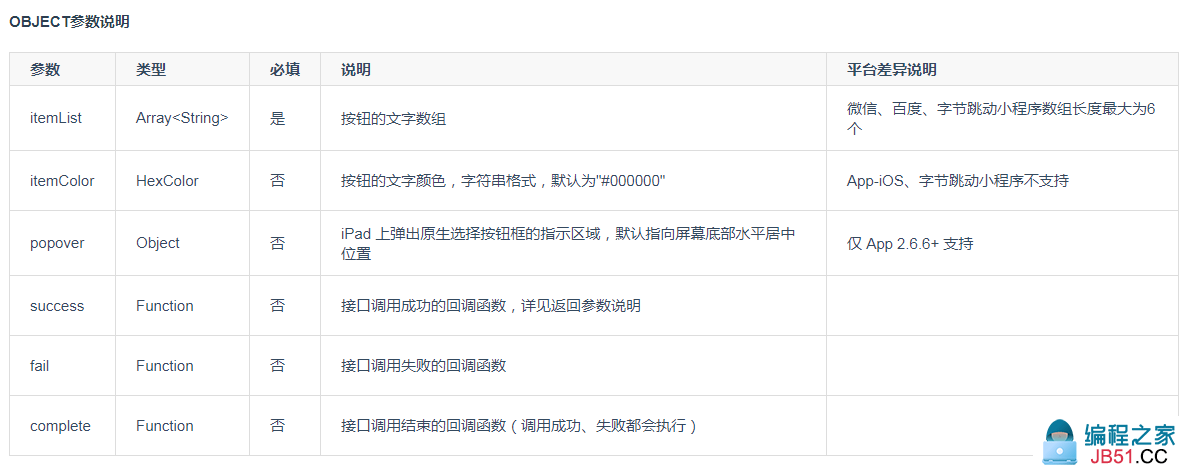
uni.showActionSheet(OBJECT):
显示操作菜单

案例:
uni.showActionSheet({
    itemList: ['A','B','C'],success: function (res) {
        console.log('选中了第' + (res.tapIndex + 1) + '个按钮');
    },fail: function (res) {
        console.log(res.errMsg);
    }
});
本文大量借鉴官网文档,如果有什么疑问欢迎分享到评论区一起讨论。