文章目录
云原生,DevOps,CI/CD 等概念在当下非常火,我自己也想试试,碰巧知道 CODING.NET 免费提供了这个能力,所以来尝试一把,好在最终有所成果,对托管在 CODING.NET 上的项目,实现了提交代码自动构建并发布到我自己的阿里云服务器的效果,果然非常舒适
CreatedAt: 20210609
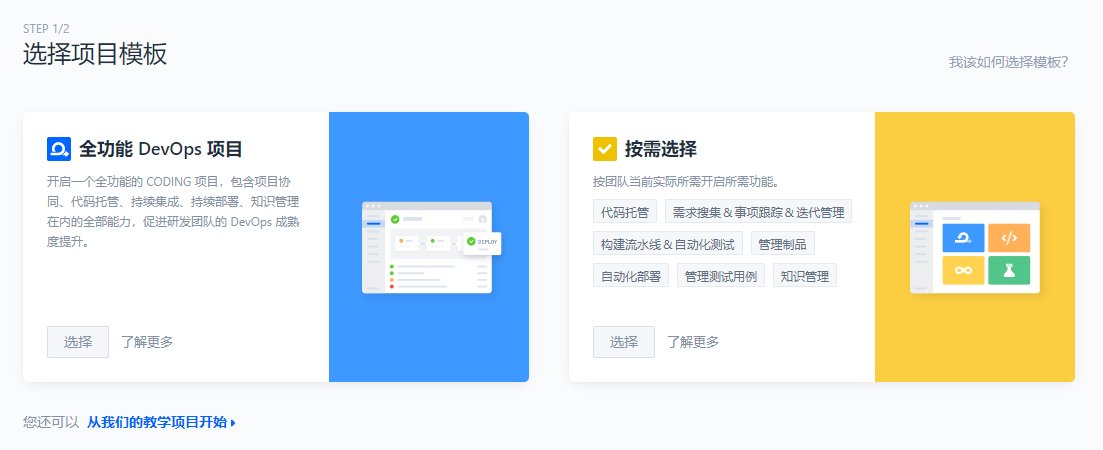
创建项目
创建一个 全功能 DevOps 项目,项目标识为 coding.devops.test. 如果是已有项目,可以在 项目设置 - 功能开关 中打开 持续集成 这个开关
创建代码仓库
在该项目下,创建一个名为 code 的 GIT 仓库,仓库地址为 [email protected]:mrathena/coding.devops.test/code.git
完成工程代码并提交推送到仓库
我创建了一个最简单的 Maven SpringBoot 工程,只有一个 Controller,其他配置如下
application.properties
server.port=8888
server.servlet.context-path=/
pom.xml
<?xml version="1.0" encoding="UTF-8"?>
<project xmlns="http://maven.apache.org/POM/4.0.0" xmlns:xsi="http://www.w3.org/2001/XMLSchema-instance"
         xsi:schemaLocation="http://maven.apache.org/POM/4.0.0 https://maven.apache.org/xsd/maven-4.0.0.xsd">
    <modelVersion>4.0.0</modelVersion>
    <groupId>com.mrathena</groupId>
    <artifactId>coding.devops.test</artifactId>
    <version>1.0.0</version>
    <properties>
        <project.build.sourceEncoding>UTF-8</project.build.sourceEncoding>
        <java.version>1.8</java.version>
        <maven.compiler.source>1.8</maven.compiler.source>
        <maven.compiler.target>1.8</maven.compiler.target>
    </properties>
    <dependencyManagement>
        <dependencies>
            <dependency>
                <groupId>org.springframework.boot</groupId>
                <artifactId>spring-boot-dependencies</artifactId>
                <version>2.5.0</version>
                <type>pom</type>
                <scope>import</scope>
            </dependency>
        </dependencies>
    </dependencyManagement>
    <dependencies>
        <dependency>
            <groupId>org.springframework.boot</groupId>
            <artifactId>spring-boot-starter-web</artifactId>
        </dependency>
    </dependencies>
    <build>
    	<!-- 为了方便 CODING.NET 构建计划 pipeline 脚本的编写,特意定义打包后不加版本号 -->
        <finalName>${project.artifactId}</finalName>
        <plugins>
            <plugin>
                <groupId>org.springframework.boot</groupId>
                <artifactId>spring-boot-maven-plugin</artifactId>
                <version>2.5.0</version>
                <!-- 因为我们没有继承 spring-boot-starter-parent,所以需要执行 repackage,才能生成可执行 jar -->
                <!-- https://docs.spring.io/spring-boot/docs/2.3.0.RELEASE/maven-plugin/reference/html/#repackage -->
                <executions>
                    <execution>
                        <goals>
                            <goal>repackage</goal>
                        </goals>
                    </execution>
                </executions>
            </plugin>
        </plugins>
    </build>
    <distributionManagement>
        <repository>
            <!--在本地执行 mvn deploy 时可以将工程 jar 包推送到 CODING.NET 的制品库中(估计是个 Maven 私服). 必须与 settings.xml 中配置的 id 一致-->
            <id>mrathena-coding.devops.test-maven</id>
            <name>maven</name>
            <url>https://mrathena-maven.pkg.coding.net/repository/coding.devops.test/maven/</url>
        </repository>
    </distributionManagement>
</project>
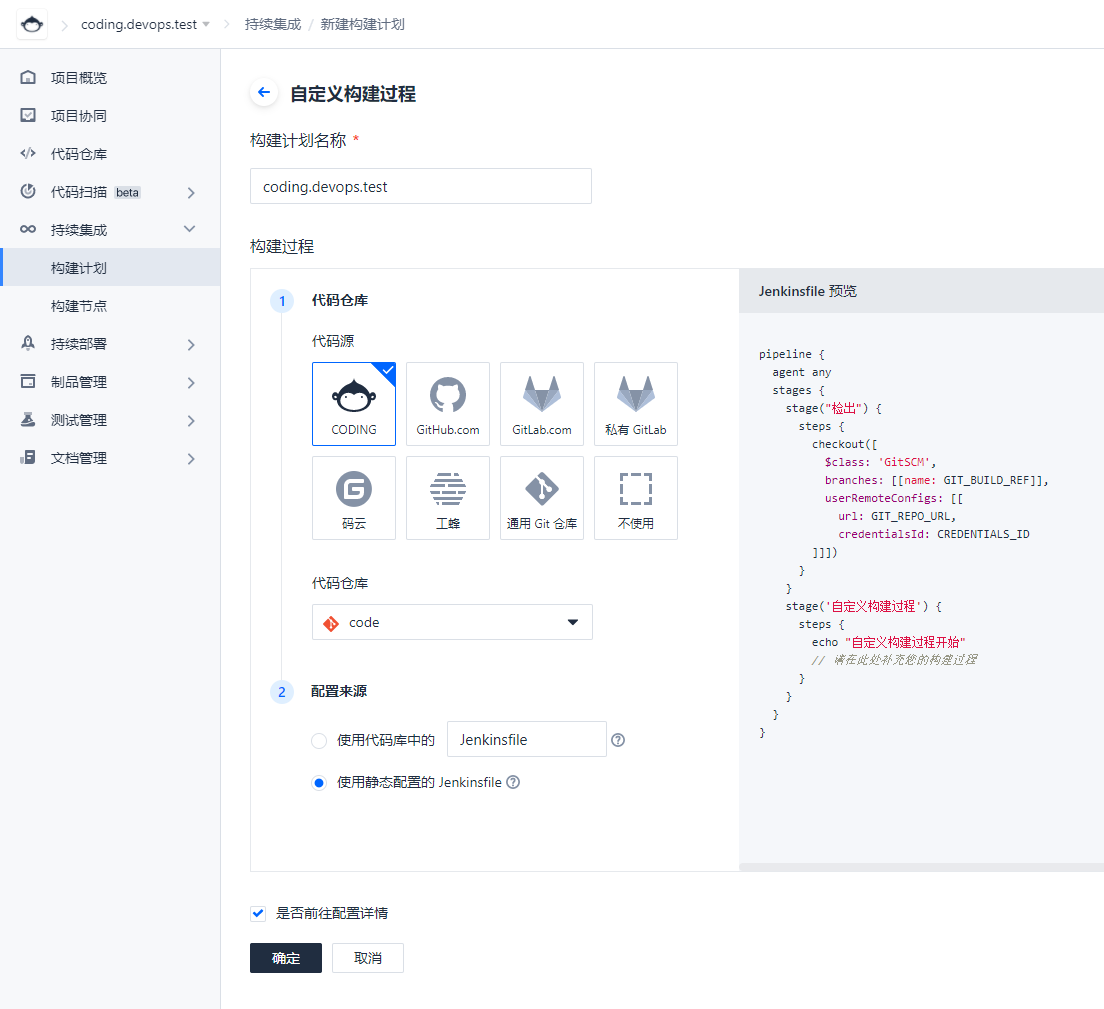
创建构建计划
在该项目下,选择 持续集成 - 构建计划 - 创建构建计划 - 自定义构建过程 - 按需填写 代码仓库 和 配置来源(我这里选 CODING 代码源 和刚刚创建的 名为 code 的代码仓库,构建计划名为 coding.devops.test),构建计划配置好后可以保存成为模板,方便后续项目配置
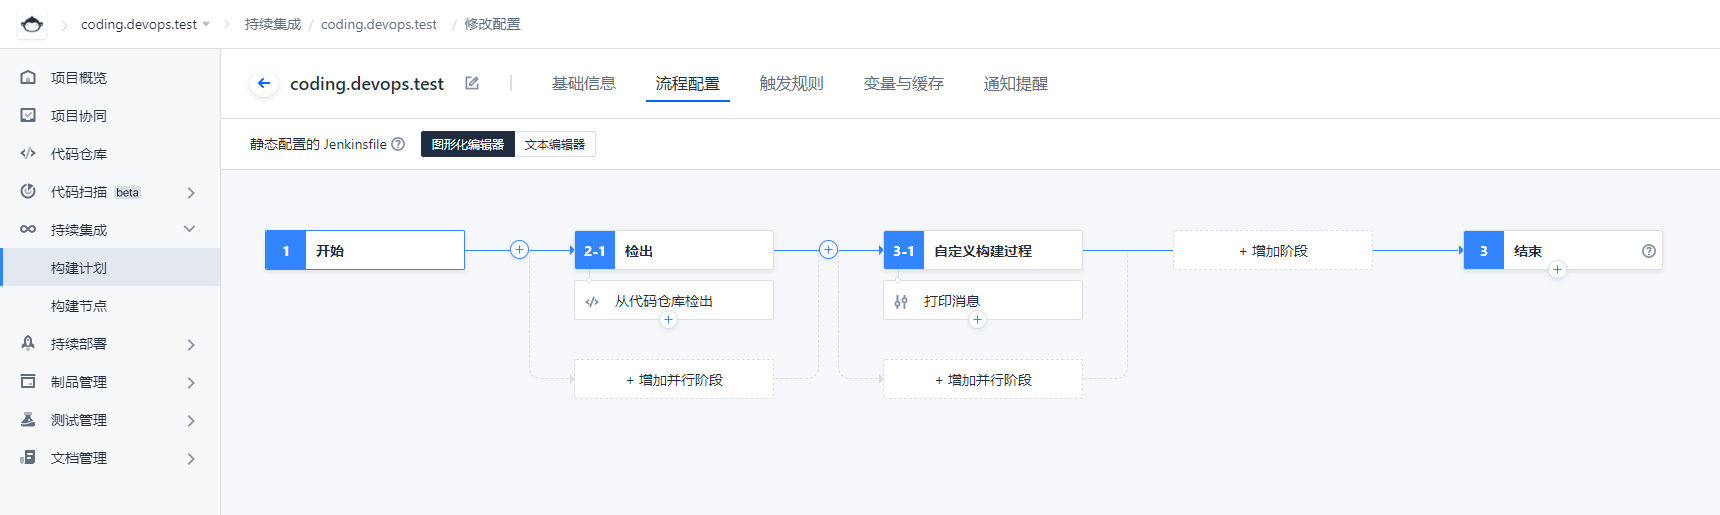
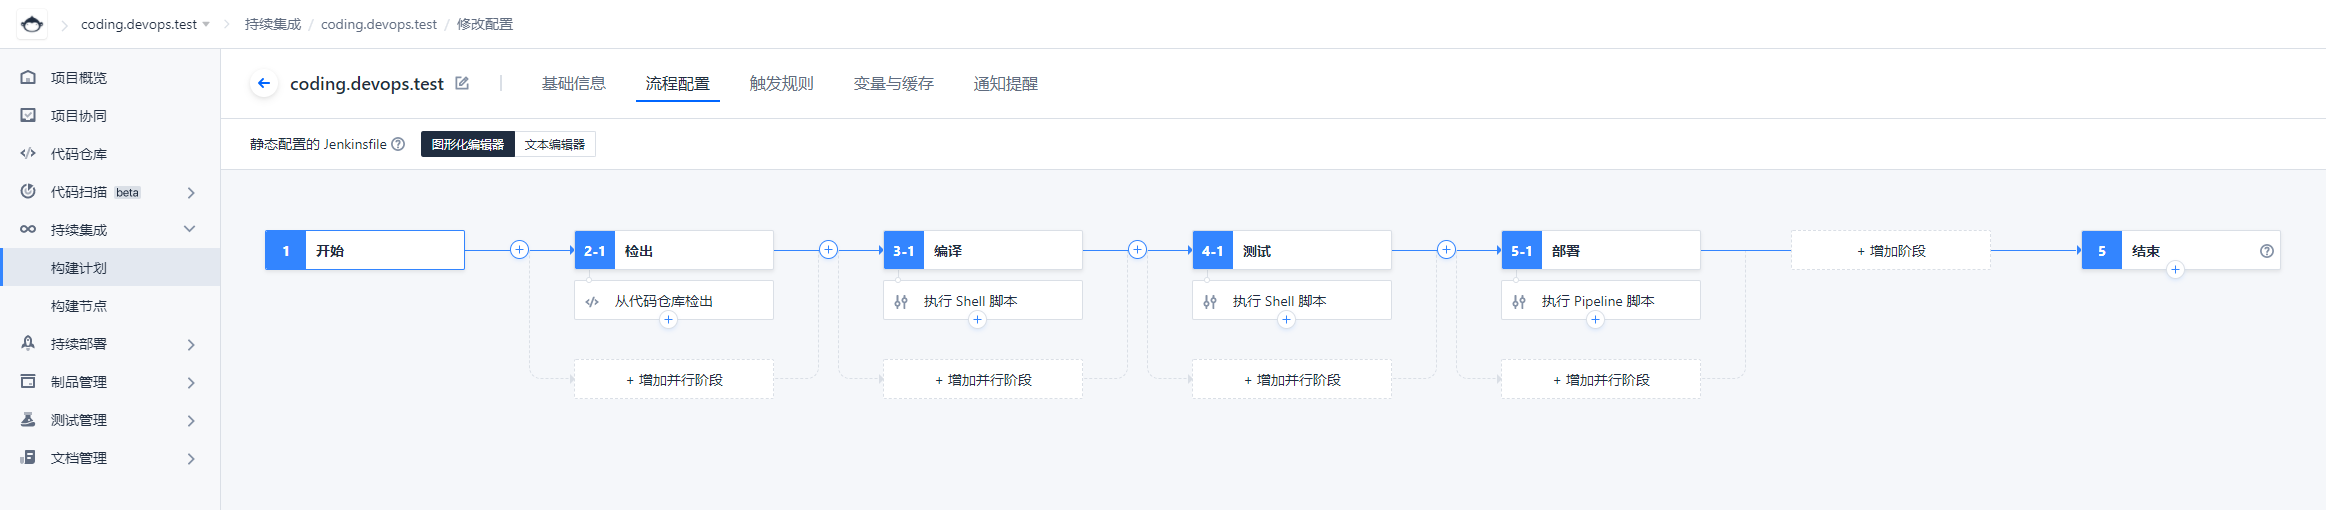
设置流程配置
自定义的构建流程,其流程配置默认是这个样子,切换到文本编辑器,将下面的 pipeline 脚本复制进去,保存
pipeline {
  agent any
  stages {
    stage('检出') {
      steps {
        checkout([
          $class: 'GitSCM',
          branches: [[name: GIT_BUILD_REF]],
          userRemoteConfigs: [[
            url: GIT_REPO_URL,
            credentialsId: CREDENTIALS_ID
          ]]
        ])
      }
    }
    stage('编译') {
      steps {
        sh 'mvn clean package -Dmaven.test.skip=true'
      }
    }
    stage('测试') {
      steps {
        sh 'mvn test'
      }
    }
    stage('部署') {
      steps {
        script {
          def remote = [:]
          remote.name = "mrathena"
          remote.host = "116.62.xxx.xx"
          remote.port = 22
          remote.user = "root"
          remote.allowAnyHosts = true

		  // 留着防丢失
          withCredentials([ usernamePassword(credentialsId:'09f2156e-3706-493c-9f2c-xxxxxxxxxxxx',usernameVariable:'USERNAME',passwordVariable:'PASSWORD')]) {
            echo "${USERNAME}"
            echo "${PASSWORD}"
          }

          withCredentials([sshUserPrivateKey(credentialsId: "1619ca47-988e-4647-a143-xxxxxxxxxxxx",keyFileVariable: "id_rsa")]) {
            remote.identityFile = id_rsa
            echo '终止进程'
            // 一开始想到的是下面的命令1,但是如果程序没有在运行,则命令1会报错,会阻断构建计划,后来找到了命令2,在linux不会报错,但是该构建计划里报错,最终还是用了命令1,但是加了一个 try-catch,这样即使没有运行程序,也不会阻断构建计划了
            // 命令1: [[[[sshCommand remote: remote,command: "ps -ef | grep coding.devops.test.jar | grep -v grep | awk '{print \$2}' | xargs kill -9"]]]],$ 要用 \$ 替换,不然该构建计划不认
            // 命令2: [[[[sshCommand remote: remote,command: "n=`ps -ef | grep coding.devops.test.jar | grep -v grep | awk '{print \$2}'`; [[ $n ]] && kill -9 $n"]]]],一行写下所有逻辑(包括判断),参考 https://www.cnblogs.com/shiyiwen/p/8509417.html
            try {
              sshCommand remote: remote, command: "ps -ef | grep coding.devops.test.jar | grep -v grep | awk '{print \$2}' | xargs kill -9"
            } catch (t) {
              echo 'coding.devops.test.jar 没有运行'
            }
            echo '删除程序'
            sshCommand remote: remote, command: 'rm -rf /service/coding.devops.test.jar'
            echo '传输程序'
            // 多模块工程的话,这里可能会多加一层模块的目录,如 ./mrathena-web/target/mrathena.jar,可以点击部署节点,从日志里面找一下 jar 包的路径
            sshPut remote: remote, from: './target/coding.devops.test.jar', into: '/service'
            echo "修改权限"
            sshCommand remote: remote, command: 'chmod 777 /service/coding.devops.test.jar'
            // nohup ./program >/dev/null 2>&1 &
            // sshCommand remote: remote,command: 'nohup java -jar coding.devops.test.jar >/dev/null 2>&1 &'
            // sshCommand remote: remote,command: 'nohup java -jar coding.devops.test.jar 2>&1 &'
            echo '启动程序'
            sshCommand remote: remote, command: 'nohup java -jar /service/coding.devops.test.jar >> /service/coding.devops.test.log 2>&1 &'
            echo '部署成功'
          }
        }
      }
    }
  }
}
阶段说明 测试
不需要则删除即可
阶段说明 部署
核心内容就在这里了,原理很简单,就是将编译好的可执行 jar 传到指定远程服务器,然后执行一系列命令将该 jar 跑起来即可,因为我在相关方面知识和经验比较薄弱,花了不少时间才成功
定义远程服务器信息
要连接其他服务器,需要先定义远程服务器信息,该信息在后续远程操作服务器都有使用到,猜测是用于连接和鉴权,注意,该配置目前还不完整,需要在鉴权后补充鉴权信息
def remote = [:]
remote.name = "mrathena"
remote.host = "116.62.xxx.xx"
remote.port = 22
remote.user = "root"
remote.allowAnyHosts = true
远程服务器鉴权
这里让 CODING.NET 通过 SSH 的方式连接远程服务器,官方文档讲的不清不楚的,差评
创建 SSH 密钥
在远程服务器上执行 ssh-keygen -m PEM -t rsa -b 4096 -C "[email protected]" 可在 ~/.ssh 目录下生成公私钥文件,私钥口令可以不用输入,直接回车跳过,id_rsa 是私钥,id_rsa.pub 是公钥,需要把公钥内容复制到 authorized_keys 中 cp id_rsa.pub authorized_keys (a通过ssh远程链接b,在a端生成公私钥对,把公钥内容复制到b端的authorized_keys文件中,a端通过私钥即可访问b了)
ssh-keygen -m PEM -t rsa -b 4096 -C "[email protected]"
cat ~/.ssh/id_rsa
-----BEGIN RSA PRIVATE KEY-----
JvKE3WXugDp2YuswF4MAJq/o+R9kRKZzNfeM9A6NWjwjnIYP4yUVwqa/20MYmVpT
......
录入凭据
在该项目下,选择项目设置 - 开发者选项 - 凭据管理 - 录入凭据,凭据类型是 SSH 私钥,将 id_rsa 私钥的内容拷贝到指定位置,按需填写私钥口令,勾选 授权所有持续集成构建计划,创建
在 凭据管理 页面可以复制 凭据 ID,用于在 持续集成 的 构建脚本 中使用
在 持续集成 的 构建脚本 中做 SSH 鉴权
// 根据凭据做SSH鉴权,并把鉴权信息保存到 id_rsa 这个变量中,然后赋值到 remote 远程服务器信息的 identifyFile 属性中
withCredentials([sshUserPrivateKey(credentialsId: "这里填写刚刚创建的SSH私钥凭据的凭据ID",keyFileVariable: "id_rsa")]) {
  // 补充鉴权信息,不然的话,sshCommand 和 sshPut 等都无法正确鉴权
  remote.identityFile = id_rsa
  // ...
}
还有一种 用户名/密码 的鉴权方式,没有仔细研究,大概如下
// 做鉴权,把用户名和密码保存到 USERNAME 和 PASSWORD 这两个变量中,同样需要赋值到 remote 中,具体字段需要百度
withCredentials([ usernamePassword(credentialsId:'这里填写刚刚创建的SSH私钥凭据的凭据ID',passwordVariable:'PASSWORD')]) {
  echo "${USERNAME}"
  echo "${PASSWORD}"
}
操作远程服务器
echo '终止进程'
// 一开始想到的是下面的命令1,也不会阻断构建计划了
// 命令1: [[[[sshCommand remote: remote,不然该构建计划不认
// 命令2: [[[[sshCommand remote: remote,参考 https://www.cnblogs.com/shiyiwen/p/8509417.html
try {
  sshCommand remote: remote, command: "ps -ef | grep coding.devops.test.jar | grep -v grep | awk '{print \$2}' | xargs kill -9"
} catch (t) {
  echo 'coding.devops.test.jar 没有运行'
}
echo '删除程序'
sshCommand remote: remote, command: 'rm -rf /service/coding.devops.test.jar'
echo '传输程序'
sshPut remote: remote, into: '/service'
echo "修改权限"
sshCommand remote: remote, command: 'chmod 777 /service/coding.devops.test.jar'
// nohup ./program >/dev/null 2>&1 &
// sshCommand remote: remote,command: 'nohup java -jar coding.devops.test.jar >/dev/null 2>&1 &'
// sshCommand remote: remote,command: 'nohup java -jar coding.devops.test.jar 2>&1 &'
echo '启动程序'
sshCommand remote: remote, command: 'nohup java -jar /service/coding.devops.test.jar >> /service/coding.devops.test.log 2>&1 &'
echo '部署成功'
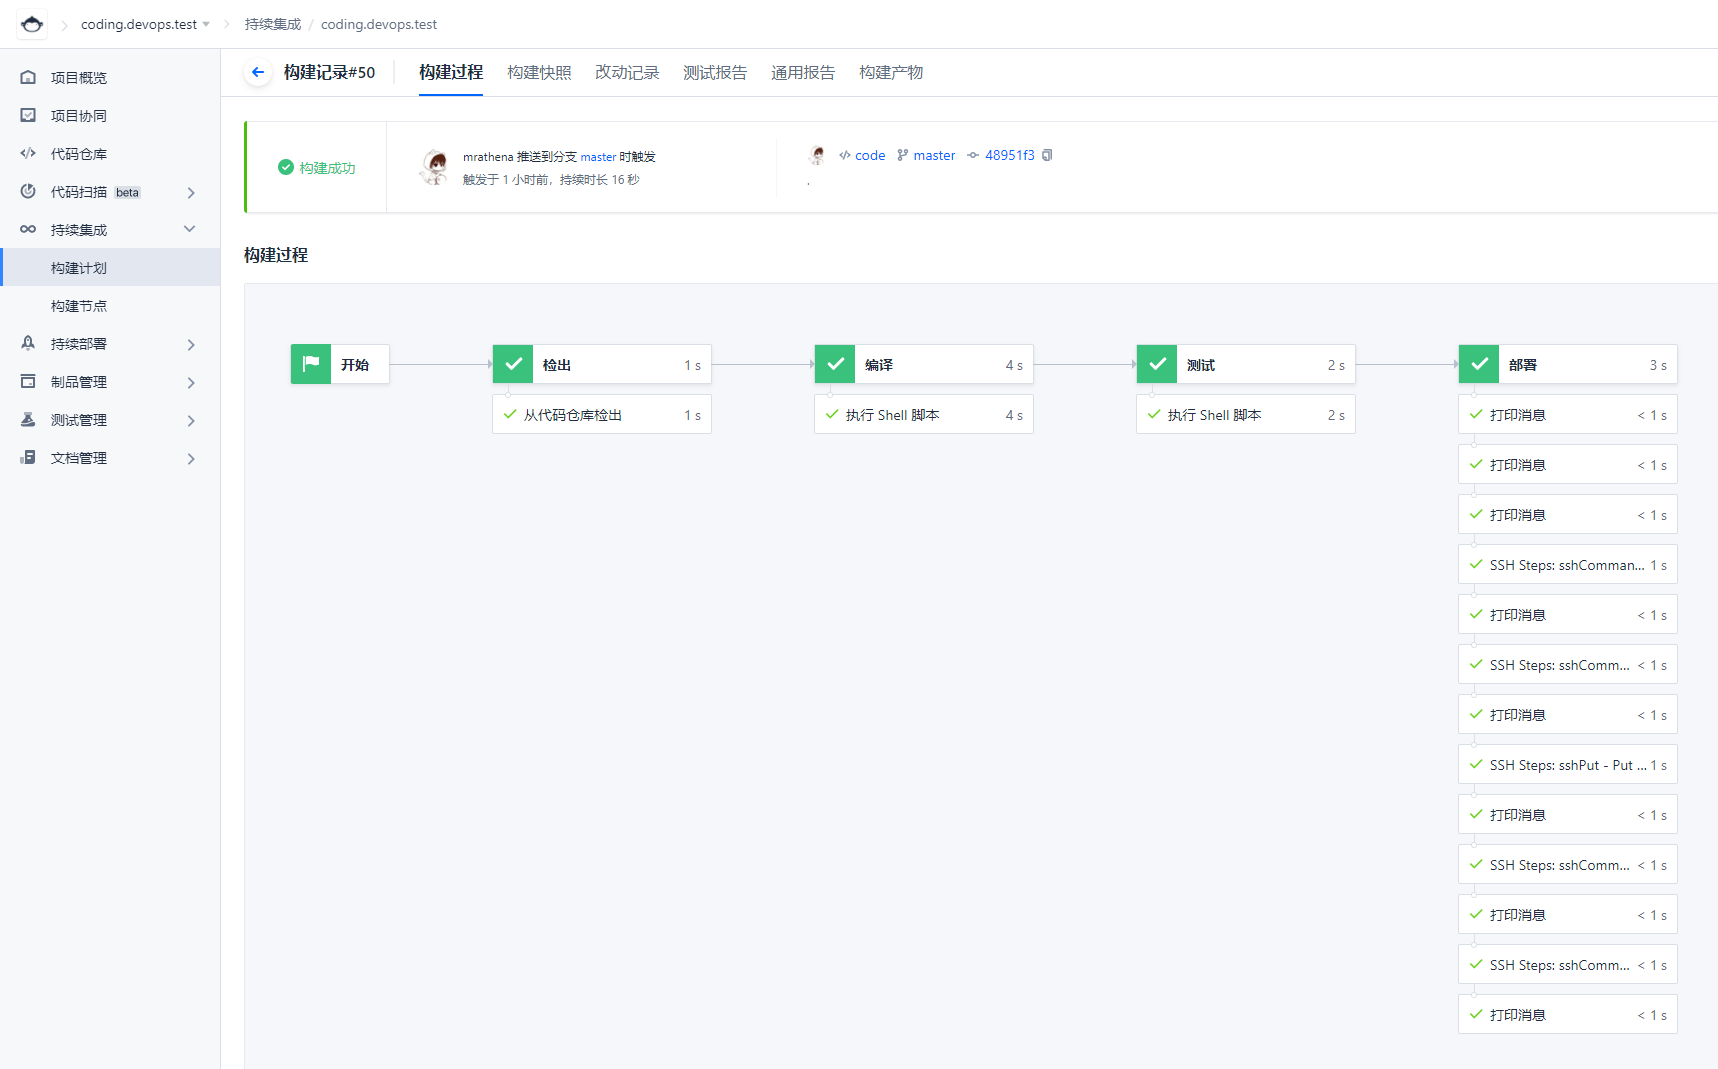
部署完成后需要自行验证是否成功,可以自行完善相关功能,成品和构建大概是这个样子
设置触发规则
按需自行配置
设置变量与缓存
Maven 工程照下图配置即可

使用限制
DODING.NET 提供的免费能力在并行数(代码扫描和构建计划都算)和构建时长是有限制的
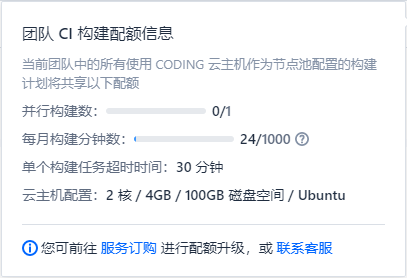
CODING.NET 同样也提供了接入自己机器来作为构建节点的能力,可以在构建节点池中配置,这样就没有限制了. 我目前在使用免费能力