前言
这一篇博客应该是我花时间最多的一次了,从2022年1月底至2022年4月底。
我已经将这篇博客的内容写为论文,上传至arxiv:https://arxiv.org/pdf/2204.10160.pdf
欢迎大家指出我论文中的问题,特别是语法与用词问题
在github上,我也上传了完整的项目:https://github.com/Whiffe/Custom-ava-dataset_Custom-Spatio-Temporally-Action-Video-Dataset
关于自定义ava数据集,也是后台私信我最多的,也是我想完成的。
下面是我在知乎、B站的同步内容:
知乎:https://zhuanlan.zhihu.com/p/503031957
B站:https://www.bilibili.com/video/BV1j3411M7Ba/
目录
1 最终要产生的标注文件
我将标注3个视频,每个视频10秒,作为简单的例子。
我们最终需要如下文件:
train.csv
test.csv

train_excluded_timestamps.csv
test_excluded_timestamps.csv
val_excluded_timestamps.csv

avaMin_included_timestamps.csv

avaMin_dense_proposals_train.pkl
avaMin_dense_proposals_test.pkl
avaMin_dense_proposals_val.pkl

avaMin_action_list_v2.2.pbtxt
avaMin_action_list_v2.2_for_activitynet_2019.pbtxt
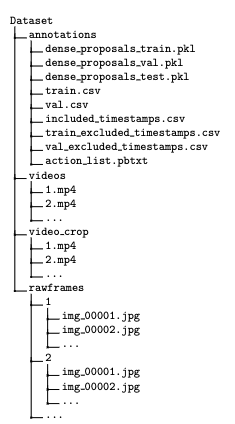
数据集文件结构如下:
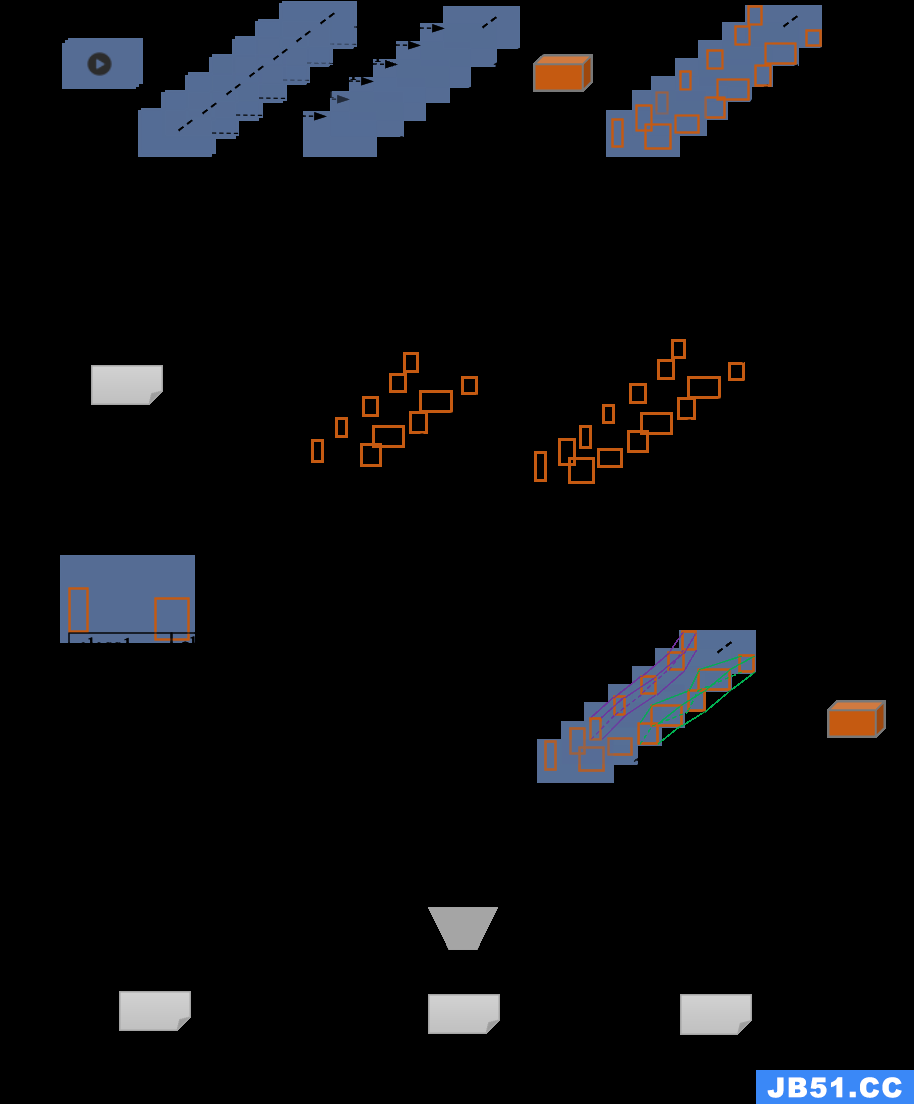
下图是本文的数据集制作的总流程图
2 AI平台 与 项目下载
2.1 AI 平台
我使用的AI平台:https://cloud.videojj.com/auth/register?inviter=18452&activityChannel=student_invite
以下的操作均在该平台的基础上完成
实例镜像选择:Pytorch 1.8.0,python 3.8,CUDA 11.1.1

2.2 项目下载
为了让项目可以快速下载,我将项目同步到了码云:https://gitee.com/YFwinston/Custom-ava-dataset_Custom-Spatio-Temporally-Action-Video-Dataset.git
cd /home
git clone https://gitee.com/YFwinston/Custom-ava-dataset_Custom-Spatio-Temporally-Action-Video-Dataset.git
3 数据集视频准备
视频是从AVA数据集中随机选择了1个,我会从这个视频中裁剪出3个10秒的片段:
https://s3.amazonaws.com/ava-dataset/trainval/2DUITarasWQ.mp4
将视频下载到极链AI平台的镜像实例,代码如下:
(如果速度慢了,可以现采用迅雷下载,然后上传)
在AI平台执行:
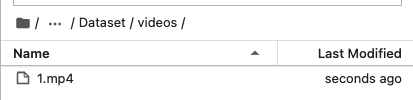
cd /home/Custom-ava-dataset_Custom-Spatio-Temporally-Action-Video-Dataset/Dataset/videos
wget https://s3.amazonaws.com/ava-dataset/trainval/2DUITarasWQ.mp4 -O ./1.mp4
4 视频裁剪与抽帧
4.1 安装ffmpeg
本文使用ffmpeg进行视频裁剪与抽帧,所以先安装ffmpeg
conda install x264 ffmpeg -c conda-forge -y
4.2 视频裁剪
在/home/Custom-ava-dataset_Custom-Spatio-Temporally-Action-Video-Dataset/Dataset下执行:
cd /home/Custom-ava-dataset_Custom-Spatio-Temporally-Action-Video-Dataset/Dataset
sh cut_video.sh

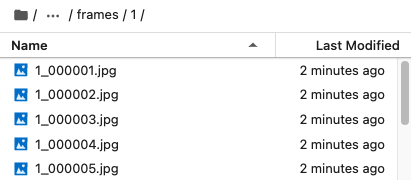
4.3 视频抽帧
参考ava数据集,每秒裁剪30帧
在/home/Custom-ava-dataset_Custom-Spatio-Temporally-Action-Video-Dataset/Dataset 下执行:
cd /home/Custom-ava-dataset_Custom-Spatio-Temporally-Action-Video-Dataset/Dataset
bash cut_frames.sh
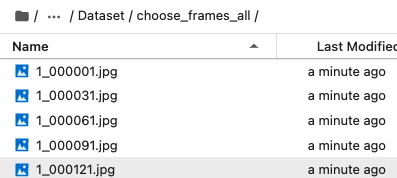
4.4 整合与缩减帧
4.3节中产生的frames文件夹的结构,在后续yolov5检测时会出现不方便,所以我采用下面的方式,将所有的图片放在了一个文件夹(choose_frames_all)中。
同时,并不是,所有图片都需要检测与标注,在10秒的视频中,检测标注:x_000001.jpg、x_000031.jpg、x_000061.jpg、x_000091.jpg、x_0000121jpg、x_000151.jpg、x_000181.jpg、x_000211.jpg、x_000241.jpg、x_000271.jpg、x_000301.jpg。
在/home/Custom-ava-dataset_Custom-Spatio-Temporally-Action-Video-Dataset/Dataset 下执行:
cd /home/Custom-ava-dataset_Custom-Spatio-Temporally-Action-Video-Dataset/Dataset
python choose_frames_all.py 10 0
其中10代表视频长度,0代表从第0秒开始
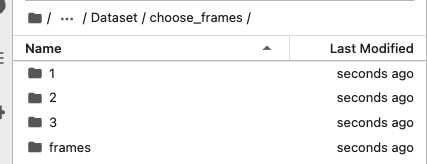
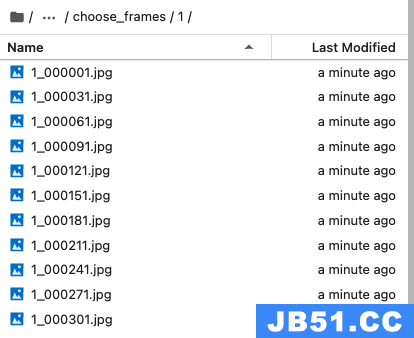
4.5 不整合的缩减
4.4的整合与缩减是为了yolov5的检测,这里的不整合的缩减是为了via的标注。
在/home/Custom-ava-dataset_Custom-Spatio-Temporally-Action-Video-Dataset/Dataset 下执行:
cd /home/Custom-ava-dataset_Custom-Spatio-Temporally-Action-Video-Dataset/Dataset
python choose_frames.py 10 0
5 yolov5与deep sort 安装
5.1 安装
运行以下命令:
cd /home/Custom-ava-dataset_Custom-Spatio-Temporally-Action-Video-Dataset/yolovDeepsort
pip install -r requirements.txt
pip install opencv-python-headless==4.1.2.30

wget https://github.com/ultralytics/yolov5/releases/download/v6.1/yolov5s.pt -O /home/Custom-ava-dataset_Custom-Spatio-Temporally-Action-Video-Dataset/yolovDeepsort/yolov5/yolov5s.pt
mkdir -p /root/.config/Ultralytics/
wget  https://ultralytics.com/assets/Arial.ttf -O /root/.config/Ultralytics/Arial.ttf
采用deep sort的原因:为生成[train/val].csv做准备,dense_proposals_[train/val/test].pkl不会用到deep sort的检测结果。
5.2 对choose_frames_all进行检测
在/home/yolov5_deepsort_pytorch_-yf中
进行检测
cd /home/Custom-ava-dataset_Custom-Spatio-Temporally-Action-Video-Dataset/yolovDeepsort
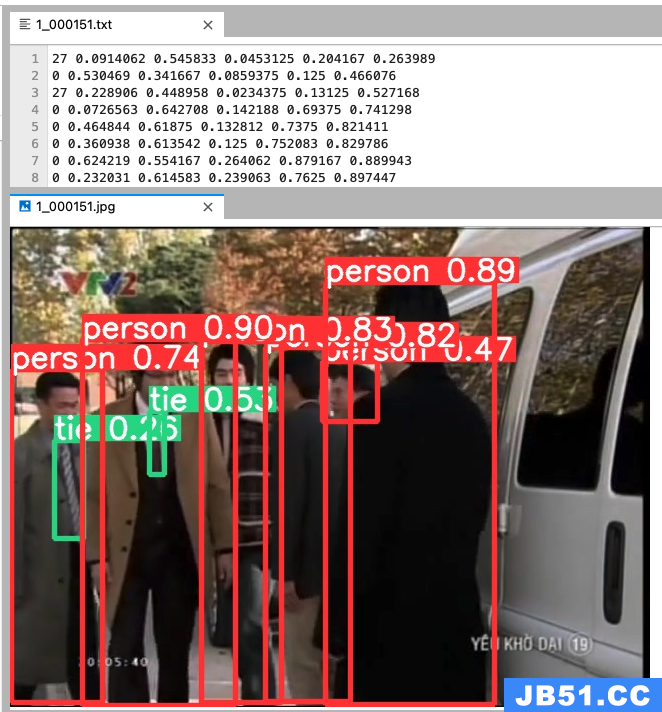
python ./yolov5/detect.py --source ../Dataset/choose_frames_all/ --save-txt --save-conf
结果存储在:/home/Custom-ava-dataset_Custom-Spatio-Temporally-Action-Video-Dataset/yolovDeepsort/yolov5/runs/detect/exp
6 生成dense_proposals_train.pkl
在 /home/Custom-ava-dataset_Custom-Spatio-Temporally-Action-Video-Dataset/yolovDeepsort/mywork下运行:
cd /home/Custom-ava-dataset_Custom-Spatio-Temporally-Action-Video-Dataset/yolovDeepsort/mywork
python dense_proposals_train.py ../yolov5/runs/detect/exp/labels ./dense_proposals_train.pkl show
7 导入via
7.1 choose_frames_all_middle
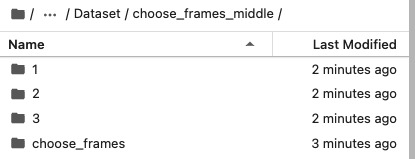
/home/Custom-ava-dataset_Custom-Spatio-Temporally-Action-Video-Dataset/Dataset 下的 choose_frames 文件夹中包含10秒视频中11张图片,但是在最后生成的标注文件,不包含前2张图片和后2张图片。所以需要创建一个choose_frames_middle文件夹,存放不含前2张图片与后2张图片的文件夹。
cd /home/Custom-ava-dataset_Custom-Spatio-Temporally-Action-Video-Dataset/Dataset/
python choose_frames_middle.py
7.2 生成via标注文件
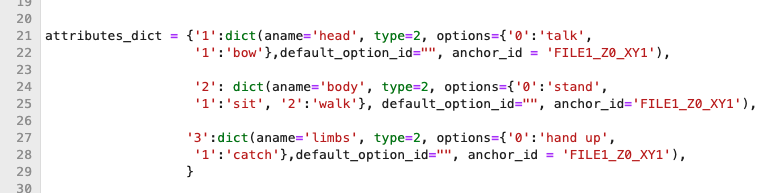
自定义动作在:/home/Custom-ava-dataset_Custom-Spatio-Temporally-Action-Video-Dataset/yolovDeepsort/mywork/dense_proposals_train_to_via.py文件中,具体位置如下图:
在/home/Custom-ava-dataset_Custom-Spatio-Temporally-Action-Video-Dataset/yolovDeepsort/mywork/下执行
cd /home/Custom-ava-dataset_Custom-Spatio-Temporally-Action-Video-Dataset/yolovDeepsort/mywork/
python dense_proposals_train_to_via.py ./dense_proposals_train.pkl ../../Dataset/choose_frames_middle/
生成的标注文件保存在:/home/Custom-ava-dataset_Custom-Spatio-Temporally-Action-Video-Dataset/choose_frames_middle中

7.3 去掉via默认值
标注时有默认值,这个会影响我们的标注,需要取消掉。
我尝试了很多次,想在生成via标注文件时,去掉标注选项中的默认值,结果还是没有实现,那就在生成之后,直接对via的json文件进行操作,去掉默认值。
在:/home/Custom-ava-dataset_Custom-Spatio-Temporally-Action-Video-Dataset/下运行
cd /home/Custom-ava-dataset_Custom-Spatio-Temporally-Action-Video-Dataset/Dataset
python chang_via_json.py

7.5 下载choose_frames_middle与VIA标注
对choose_frames_middle文件压缩
在/home/Custom-ava-dataset_Custom-Spatio-Temporally-Action-Video-Dataset/Dataset中执行:
apt-get update
apt-get install zip
apt-get install unzip

cd /home/Custom-ava-dataset_Custom-Spatio-Temporally-Action-Video-Dataset/Dataset
zip -r choose_frames_middle.zip choose_frames_middle
下载:choose_frames_middle.zip
然后使用via进行标注
via官网:https://www.robots.ox.ac.uk/~vgg/software/via/
via标注工具下载链接:https://www.robots.ox.ac.uk/~vgg/software/via/downloads/via3/via-3.0.11.zip
点击 via_image_annotator.html

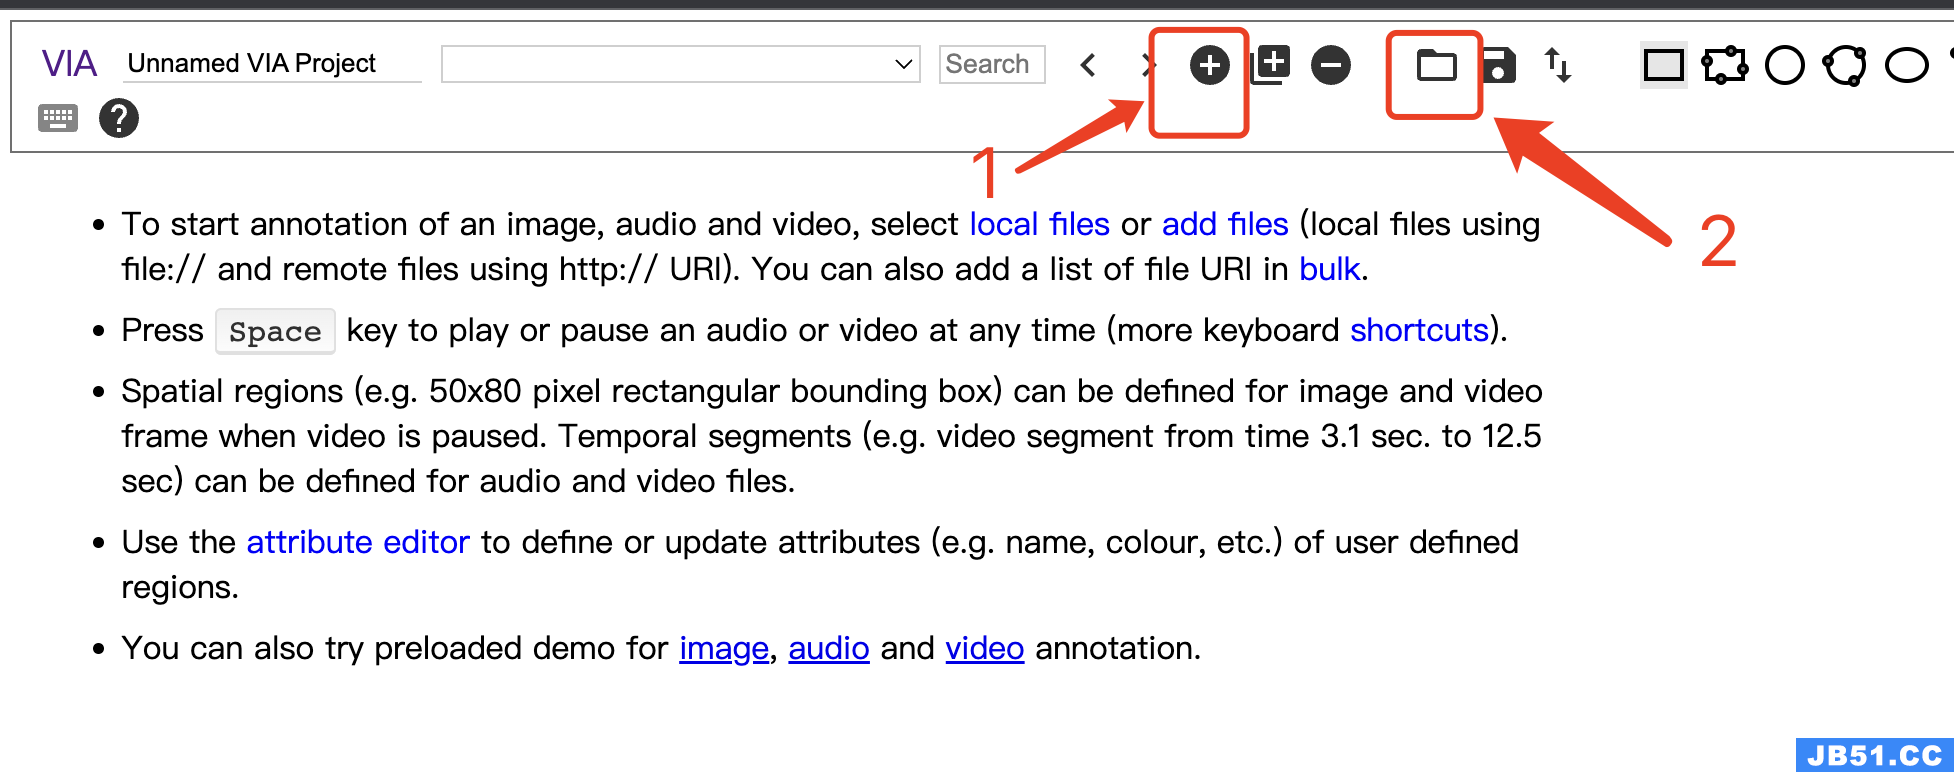
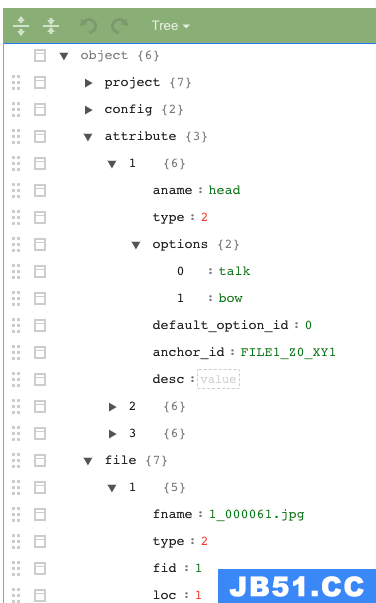
导入图片,打开标注文件(注意,打开x_proposal_s.json),最后结果:

8 via标注信息的提取
经过动作标注,via的标注信息保存为json文件,json文件中包含:视频的名字、视频帧的编号、人的坐标值、动作类别编号
这些信息都是标注文件所需要的,需要把json文件中的信息整合,这一节就是对via中信息做整合。
8.1 ava_train
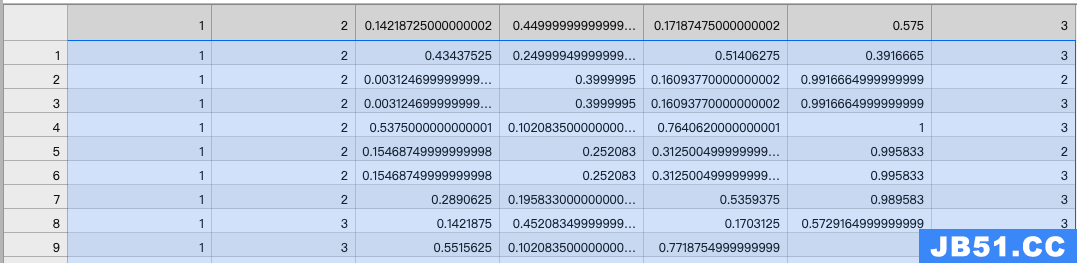
下图是ava标注文件(ava_train.csv)

第一列:视频的名字
第二列:视频帧ID,比如15:02这一帧,表示为902,15:03这一帧表示为903
第三列到第六列: 人的坐标值(x1,y1,x2,y2)
第七列:动作类别编号
第八列:人的ID
目前,我们的数据中没有最后一列的ID,其它都生成了,所以我们先将这些信息提取出来。
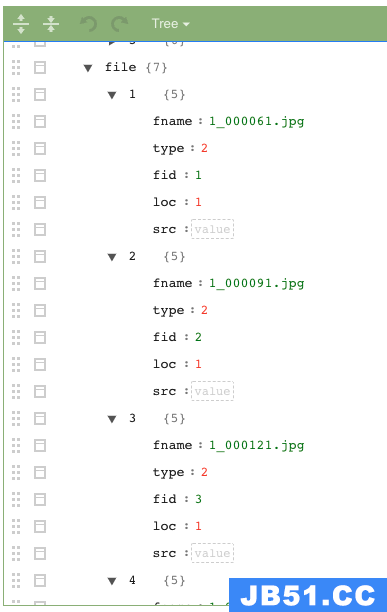
8.2 via Json 解析
解析使用菜鸟平台的json解析网站:https://c.runoob.com/front-end/53/
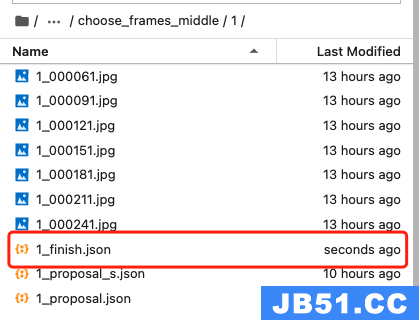
8.3 提取上传标注完成的json文件
这里需要注意的是,我给每个标注完成的文件取名:视频名_finish.json,如视频1,标注完成后的名字为:1_finish.json
在/home/Custom-ava-dataset_Custom-Spatio-Temporally-Action-Video-Dataset/Dataset/下执行
cd  /home/Custom-ava-dataset_Custom-Spatio-Temporally-Action-Video-Dataset/Dataset/
python json_extract.py
会在/home/Custom-ava-dataset_Custom-Spatio-Temporally-Action-Video-Dataset/Dataset/下生成:
train_without_personID.csv
9 deep sort
9.1 dense_proposals_train_deepsort.py
由于deepsort需要提前送入2帧图片,然后才能从第三帧开始标注人的ID,dense_proposals_train.pkl是从第三张开始的(即缺失了0,1),所以需要将0,1添加
在/home/Custom-ava-dataset_Custom-Spatio-Temporally-Action-Video-Dataset/yolovDeepsort/mywork下执行
cd /home/Custom-ava-dataset_Custom-Spatio-Temporally-Action-Video-Dataset/yolovDeepsort/mywork
python dense_proposals_train_deepsort.py ../yolov5/runs/detect/exp/labels ./dense_proposals_train_deepsort.pkl show
接下来使用deep sort来关联人的ID
将图片与yolov5检测出来的坐标,送入deep sort进行检测
在/home/Custom-ava-dataset_Custom-Spatio-Temporally-Action-Video-Dataset/yolovDeepsort/执行命令如下:
cd /home/Custom-ava-dataset_Custom-Spatio-Temporally-Action-Video-Dataset/yolovDeepsort/
wget https://drive.google.com/drive/folders/1xhG0kRH1EX5B9_Iz8gQJb7UNnn_riXi6 -O ./deep_sort_pytorch/deep_sort/deep/checkpoint/ckpt.t7
python yolov5_to_deepsort.py --source /home/Custom-ava-dataset_Custom-Spatio-Temporally-Action-Video-Dataset/Dataset/frames
ckpt.t7 可以单独下载后上传AI平台
结果在:/home/Custom-ava-dataset_Custom-Spatio-Temporally-Action-Video-Dataset/Dataset/train_personID.csv,如下图

9.2 融合actions与personID
目前已经有2个文件了:
1,train_personID.csv
包含 坐标、personID
2,train_without_personID.csv
包含 坐标、actions
所以现在需要将两者拼在一起
在/home/Custom-ava-dataset_Custom-Spatio-Temporally-Action-Video-Dataset/Dataset/下执行
cd  /home/Custom-ava-dataset_Custom-Spatio-Temporally-Action-Video-Dataset/Dataset/
python train_temp.py
最后结果:home/Custom-ava-dataset_Custom-Spatio-Temporally-Action-Video-Dataset/Dataset/train_temp.csv
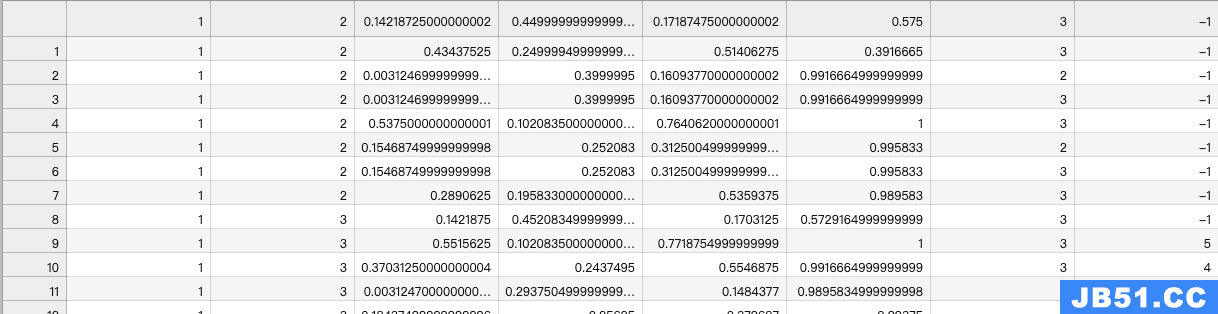
运行结束后,会发现有些ID是-1,这些-1是deepsort未检测出来的数据,原因是人首次出现或者出现时间过短,deepsort未检测出ID。
9.3 修正ava_train_temp.csv
针对train_temp.csv中存在-1的情况,需要进行修正
在/home/Custom-ava-dataset_Custom-Spatio-Temporally-Action-Video-Dataset/Dataset/下执行
cd /home/Custom-ava-dataset_Custom-Spatio-Temporally-Action-Video-Dataset/Dataset/
python train.py
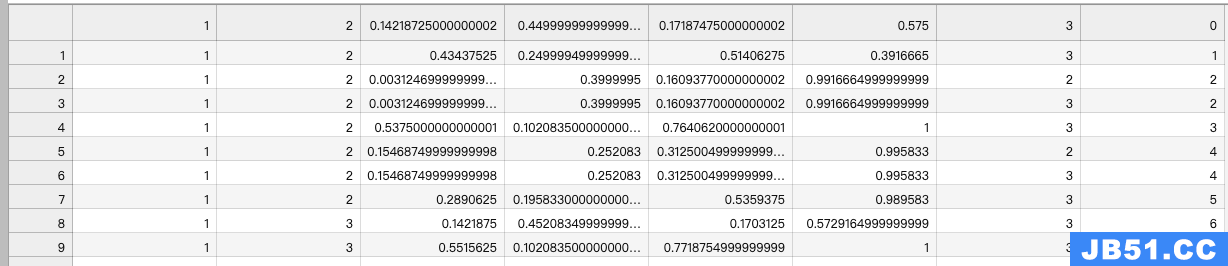
结果在:/home/Custom-ava-dataset_Custom-Spatio-Temporally-Action-Video-Dataset/Dataset/annotations/train.csv
10 其它标注文件的生成
这篇博客几乎花了85%的内容说了ava_train.csv的方法,其余的标注文件的生成方法相对来说都要简单需要
10.1 train_excluded_timestamps.csv
由于视频中没有需要排除的视频帧,所以这里就创建空的avaMin_train_excluded_timestamps.csv文件。
cd /home/Custom-ava-dataset_Custom-Spatio-Temporally-Action-Video-Dataset/Dataset/annotations
touch train_excluded_timestamps.csv
10.2 included_timestamps.txt
cd /home/Custom-ava-dataset_Custom-Spatio-Temporally-Action-Video-Dataset/Dataset/annotations
touch included_timestamps.txt
然后在included_timestamps.txt 中写入
02
03
04
05
06
07
08
10.3 action_list.pbtxt
cd /home/Custom-ava-dataset_Custom-Spatio-Temporally-Action-Video-Dataset/Dataset/annotations
touch action_list.pbtxt
item {
  name: "talk"
  id: 1
}
item {
  name: "bow"
  id: 2
}
item {
  name: "stand"
  id: 3
}
item {
  name: "sit"
  id: 4
}
item {
  name: "walk"
  id: 5
}
item {
  name: "hand up"
  id: 6
}
item {
  name: "catch"
  id: 7
}
10.4 dense_proposals_train.pkl
cp /home/Custom-ava-dataset_Custom-Spatio-Temporally-Action-Video-Dataset/yolovDeepsort/mywork/dense_proposals_train.pkl /home/Custom-ava-dataset_Custom-Spatio-Temporally-Action-Video-Dataset/Dataset/annotations
11 val文件的生成
val文件的生成
我只是做一个样例,所以我就把train与val设置为一样的
11.1 dense_proposals_val.pkl
cp /home/Custom-ava-dataset_Custom-Spatio-Temporally-Action-Video-Dataset/Dataset/annotations/dense_proposals_train.pkl /home/Custom-ava-dataset_Custom-Spatio-Temporally-Action-Video-Dataset/Dataset/annotations/dense_proposals_val.pkl
11.2 val.csv
cp /home/Custom-ava-dataset_Custom-Spatio-Temporally-Action-Video-Dataset/Dataset/annotations/train.csv /home/Custom-ava-dataset_Custom-Spatio-Temporally-Action-Video-Dataset/Dataset/annotations/val.csv
11.3 train_excluded_timestamps.csv
cp /home/Custom-ava-dataset_Custom-Spatio-Temporally-Action-Video-Dataset/Dataset/annotations/train_excluded_timestamps.csv /home/Custom-ava-dataset_Custom-Spatio-Temporally-Action-Video-Dataset/Dataset/annotations/val_excluded_timestamps.csv
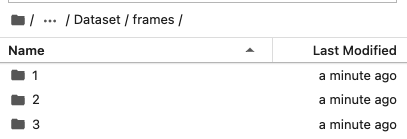
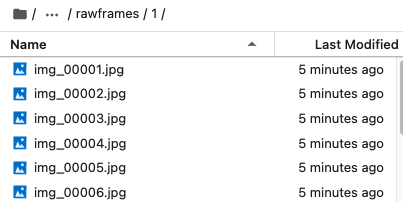
12 rawframes
在取名上,裁剪的视频帧存在与训练不匹配的问题,所以需要对/home/Dataset/frames中的图片进行名字修改
例如:
原本的名字:rawframes/1/1_000001.jpg
目标名字:rawframes/1/img_00001.jpg
cp -r /home/Custom-ava-dataset_Custom-Spatio-Temporally-Action-Video-Dataset/Dataset/frames/* /home/Custom-ava-dataset_Custom-Spatio-Temporally-Action-Video-Dataset/Dataset/rawframes
cd /home/Custom-ava-dataset_Custom-Spatio-Temporally-Action-Video-Dataset/yolovDeepsort/mywork/
python change_raw_frames.py
13 标注文件修正
有部分的标注文件在字段类型上有些问题
所以需要修正
13.1 dense_proposals_train
cd /home/Custom-ava-dataset_Custom-Spatio-Temporally-Action-Video-Dataset/yolovDeepsort/mywork
python change_dense_proposals_train.py
13.2 dense_proposals_val
cd /home/Custom-ava-dataset_Custom-Spatio-Temporally-Action-Video-Dataset/yolovDeepsort/mywork
python change_dense_proposals_val.py
14 mmaction2 安装
cd /home

git clone https://gitee.com/YFwinston/mmaction2_YF.git

pip install mmcv-full==1.3.17 -f https://download.openmmlab.com/mmcv/dist/cu111/torch1.8.0/index.html

pip install opencv-python-headless==4.1.2.30

pip install moviepy

cd mmaction2_YF
pip install -r requirements/build.txt
pip install -v -e .
mkdir -p ./data/ava

cd ..
git clone https://gitee.com/YFwinston/mmdetection.git
cd mmdetection
pip install -r requirements/build.txt
pip install -v -e .

cd ../mmaction2_YF

wget https://download.openmmlab.com/mmdetection/v2.0/faster_rcnn/faster_rcnn_r50_fpn_2x_coco/faster_rcnn_r50_fpn_2x_coco_bBox_mAP-0.384_20200504_210434-a5d8aa15.pth -P ./Checkpionts/mmdetection/

wget https://download.openmmlab.com/mmaction/recognition/slowfast/slowfast_r50_8x8x1_256e_kinetics400_rgb/slowfast_r50_8x8x1_256e_kinetics400_rgb_20200716-73547d2b.pth -P ./Checkpionts/mmaction/
15 训练与测试
15.1 配置文件
在 /mmaction2_YF/configs/detection/ava/下创建 my_slowfast_kinetics_pretrained_r50_4x16x1_20e_ava_rgb.py
cd /home/mmaction2_YF/configs/detection/ava/
touch my_slowfast_kinetics_pretrained_r50_4x16x1_20e_ava_rgb.py
# model setting
model = dict(
    type='FastRCNN',
    backbone=dict(
        type='resnet3dSlowFast',
        pretrained=None,
        resample_rate=8,
        speed_ratio=8,
        channel_ratio=8,
        slow_pathway=dict(
            type='resnet3d',
            depth=50,
            pretrained=None,
            lateral=True,
            conv1_kernel=(1, 7, 7),
            dilations=(1, 1, 1),
            conv1_stride_t=1,
            pool1_stride_t=1,
            inflate=(0, 0,
            spatial_strides=(1, 2, 1)),
        fast_pathway=dict(
            type='resnet3d',
            lateral=False,
            base_channels=8,
            conv1_kernel=(5, 1))),
    roi_head=dict(
        type='AVARoIHead',
        bBox_roi_extractor=dict(
            type='SingleRoIExtractor3D',
            roi_layer_type='RoIAlign',
            output_size=8,
            with_temporal_pool=True),
        bBox_head=dict(
            type='BBoxHeadAVA',
            in_channels=2304,
            num_classes=81,
            multilabel=True,
            dropout_ratio=0.5)),
    train_cfg=dict(
        rcnn=dict(
            assigner=dict(
                type='MaxIoUAssignerAVA',
                pos_IoU_thr=0.9,
                neg_IoU_thr=0.9,
                min_pos_IoU=0.9),
            sampler=dict(
                type='RandomSampler',
                num=32,
                pos_fraction=1,
                neg_pos_ub=-1,
                add_gt_as_proposals=True),
            pos_weight=1.0,
            debug=False)),
    test_cfg=dict(rcnn=dict(action_thr=0.002)))

dataset_type = 'AVADataset'
data_root = '/home/Custom-ava-dataset_Custom-Spatio-Temporally-Action-Video-Dataset/Dataset/rawframes'
anno_root = '/home/Custom-ava-dataset_Custom-Spatio-Temporally-Action-Video-Dataset/Dataset/annotations'


#ann_file_train = f'{anno_root}/ava_train_v2.1.csv'
ann_file_train = f'{anno_root}/train.csv'
#ann_file_val = f'{anno_root}/ava_val_v2.1.csv'
ann_file_val = f'{anno_root}/val.csv'

#exclude_file_train = f'{anno_root}/ava_train_excluded_timestamps_v2.1.csv'
#exclude_file_val = f'{anno_root}/ava_val_excluded_timestamps_v2.1.csv'

exclude_file_train = f'{anno_root}/train_excluded_timestamps.csv'
exclude_file_val = f'{anno_root}/val_excluded_timestamps.csv'

#label_file = f'{anno_root}/ava_action_list_v2.1_for_activitynet_2018.pbtxt'
label_file = f'{anno_root}/action_list.pbtxt'

proposal_file_train = (f'{anno_root}/dense_proposals_train.pkl')
proposal_file_val = f'{anno_root}/dense_proposals_val.pkl'

img_norm_cfg = dict(
    mean=[123.675, 116.28, 103.53], std=[58.395, 57.12, 57.375], to_bgr=False)

train_pipeline = [
    dict(type='SampleAVAFrames', clip_len=32, frame_interval=2),
    dict(type='RawFrameDecode'),
    dict(type='Randomrescale', scale_range=(256, 320)),
    dict(type='RandomCrop', size=256),
    dict(type='Flip', flip_ratio=0.5),
    dict(type='normalize', **img_norm_cfg),
    dict(type='FormatShape', input_format='NCTHW', collapse=True),
    # Rename is needed to use mmdet detectors
    dict(type='Rename', mapping=dict(imgs='img')),
    dict(type='ToTensor', keys=['img', 'proposals', 'gt_bBoxes', 'gt_labels']),
    dict(
        type='ToDataContainer',
        fields=[
            dict(key=['proposals', 'gt_labels'], stack=False)
        ]),
    dict(
        type='Collect',
        keys=['img',
        Meta_keys=['scores', 'entity_ids'])
]
# The testing is w/o. any cropping / flipping
val_pipeline = [
    dict(type='SampleAVAFrames',
    dict(type='Resize', scale=(-1, 256)), 'proposals']),
    dict(type='ToDataContainer', fields=[dict(key='proposals', stack=False)]), 'proposals'], 'img_shape'],
        nested=True)
]

data = dict(
    #videos_per_gpu=9,
    #workers_per_gpu=2,
    videos_per_gpu=5,
    workers_per_gpu=2,
    val_DataLoader=dict(videos_per_gpu=1),
    test_DataLoader=dict(videos_per_gpu=1),
    train=dict(
        type=dataset_type,
        ann_file=ann_file_train,
        exclude_file=exclude_file_train,
        pipeline=train_pipeline,
        label_file=label_file,
        proposal_file=proposal_file_train,
        person_det_score_thr=0.9,
        data_prefix=data_root,
        start_index=1,),
    val=dict(
        type=dataset_type,
        ann_file=ann_file_val,
        exclude_file=exclude_file_val,
        pipeline=val_pipeline,
        proposal_file=proposal_file_val,))
data['test'] = data['val']

#optimizer = dict(type='SGD',lr=0.1125,momentum=0.9,weight_decay=0.00001)
optimizer = dict(type='SGD', lr=0.0125, momentum=0.9, weight_decay=0.00001)
# this lr is used for 8 gpus

optimizer_config = dict(grad_clip=dict(max_norm=40, norm_type=2))
# learning policy

lr_config = dict(
    policy='step',
    step=[10, 15],
    warmup='linear',
    warmup_by_epoch=True,
    warmup_iters=5,
    warmup_ratio=0.1)
#total_epochs = 20
total_epochs = 100
checkpoint_config = dict(interval=1)
workflow = [('train', 1)]
evaluation = dict(interval=1, save_best='[email protected]IoU')
log_config = dict(
    interval=20, hooks=[
        dict(type='TextLoggerHook'),
    ])
dist_params = dict(backend='nccl')
log_level = 'INFO'
work_dir = ('./work_dirs/ava/'
            'slowfast_kinetics_pretrained_r50_4x16x1_20e_ava_rgb')
load_from = ('https://download.openmmlab.com/mmaction/recognition/slowfast/'
             'slowfast_r50_4x16x1_256e_kinetics400_rgb/'
             'slowfast_r50_4x16x1_256e_kinetics400_rgb_20200704-bcde7ed7.pth')
resume_from = None
find_unused_parameters = False
15.2 训练
cd /home/mmaction2_YF
python tools/train.py configs/detection/ava/my_slowfast_kinetics_pretrained_r50_4x16x1_20e_ava_rgb.py --validate
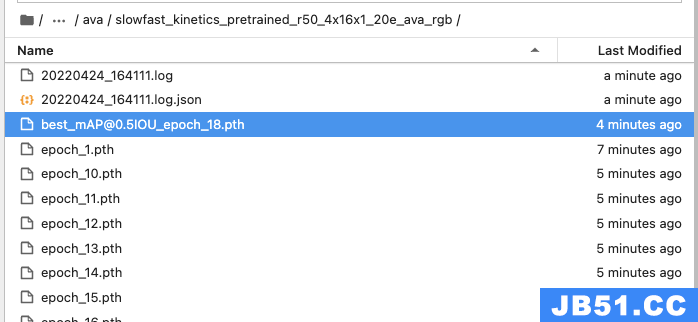
训练后的权重在:home/mmaction2_YF/work_dirs/ava/slowfast_kinetics_pretrained_r50_4x16x1_20e_ava_rgb:
15.3 测试
首先,创建新的label_map
cd /home/mmaction2_YF/tools/data/ava
touch label_map2.txt
label_map2.txt内容如下:
1: talk
2: bow
3: stand
4: sit
5: walk
6: hand up
7: catch
然后运行:
cd /home/mmaction2_YF
python demo/demo_spatiotemporal_det.py --config configs/detection/ava/my_slowfast_kinetics_pretrained_r50_4x16x1_20e_ava_rgb.py --checkpoint /home/mmaction2_YF/work_dirs/ava/slowfast_kinetics_pretrained_r50_4x16x1_20e_ava_rgb/best_mAP@0.5IoU_epoch_10.pth --det-config demo/faster_rcnn_r50_fpn_2x_coco.py  --det-checkpoint Checkpionts/mmdetection/faster_rcnn_r50_fpn_2x_coco_bBox_mAP-0.384_20200504_210434-a5d8aa15.pth   --video /home/Custom-ava-dataset_Custom-Spatio-Temporally-Action-Video-Dataset/Dataset/video_crop/1.mp4  --out-filename demo/det_1.mp4   --det-score-thr 0.5 --action-score-thr 0.5 --output-stepsize 4  --output-fps 6 --label-map tools/data/ava/label_map2.txt
其中 [email protected]IoU_epoch_10.pth 是训练后的权重,
检测结果在:/home/mmaction2_YF/demo/det_1.mp4
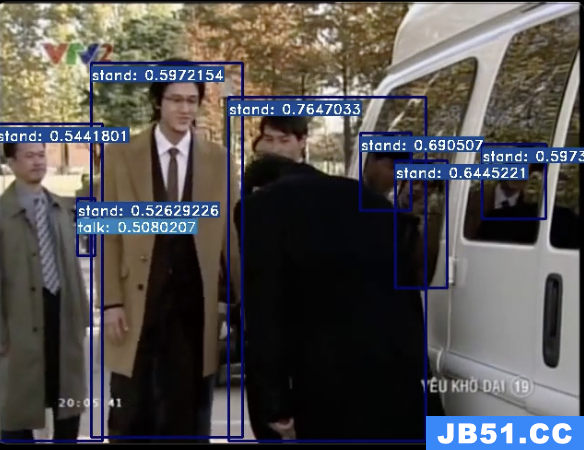
检测结果不好,原因有两个:
1,数据集非常小
2,几乎90%的标注为stand,造成了不平衡


