介绍
dubbo是阿里巴巴公司开源的一个高性能优秀的服务框架,使得应用可通过高性能的RPC(远程过程调用)实现服务的输出和输入功能,可以和Spring框架无缝集成。简单地说,dubbo是一个基于Spring的RPC框架,能够实现服务的远程调用、服务的治理。我以openEuler 20.03 LTS SP1为例,聊一下移植方法。也希望大家提供一些建议。
建议版本
建议使用dubbo 2.7.5版本。
环境要求
硬件要求如表1所示。
| 项目 | 说明 |
|---|---|
| cpu | 鲲鹏920处理器 |
| 网络 | 可访问外网 |
| 存储 | 无要求 |
| 内存 | 无要求 |
操作系统要求
操作系统要求如表2所示。
| 项目 | 版本 |
|---|---|
| openEuler | 20.03 LTS-SP1 aarch64 |
| Kernel | 4.19.90 |
配置编译环境
配置DNS服务器
# cat /etc/resolv.conf
nameserver 114.114.114.114
nameserver 8.8.8.8
安装依赖包
- 查看Java版本
yum install java-1.8.0* tcl git gcc gcc-c++ make cmake libtool autoconf automake -y
- 查看Java版本
[root@localhost ~]# java -version
openjdk version "1.8.0_272"
OpenJDK Runtime Environment Bisheng (build 1.8.0_272-b10)
OpenJDK 64-Bit Server VM Bisheng (build 25.272-b10, mixed mode)
- 配置Maven环境变量。
a. 在“/etc/profile” 文件末尾增加Maven路径
echo "MAVEN_HOME=/opt/apache-maven-3.6.3/" >> /etc/profile
echo 'export PATH=$MAVEN_HOME/bin:$PATH'  >> /etc/profile
b. 使修改的环境变量生效
source /etc/profile
- 检查配置是否生效。
[root@localhost ~]# mvn -v
Apache Maven 3.6.3 (cecedd343002696d0abb50b32b541b8a6ba2883f)
Maven home: /opt/apache-maven-3.6.3
Java version: 1.8.0_272, vendor: Bisheng, runtime: /usr/lib/jvm/java-1.8.0-openjdk-1.8.0.272.b10-7.oe1.aarch64/jre
Default locale: en_US, platform encoding: UTF-8
OS name: "linux", version: "4.19.90-2012.4.0.0053.oe1.aarch64", arch: "aarch64", family: "unix"
配置网络代理,其中host,port,username,password需要根据当前环境修改:
<proxies>
   <proxy>
     <id>my-proxy</id>
     <active>true</active>
     <protocol>https</protocol>
     <host>代理服务器网址</host>
     <port>代理服务器端口</port>
     <username>用户名</username>
     <password>密码</password>
     <nonProxyHosts>local.net|some.host.com</nonProxyHosts>
   </proxy>
   <proxy>
     <id>my-proxy1</id>
     <active>true</active>
     <protocol>http</protocol>
     <host>代理服务器网址</host>
     <port>代理服务器端口</port>
     <username>用户名</username>
     <password>密码</password>
     <nonProxyHosts>local.net|some.host.com</nonProxyHosts>
   </proxy>
</proxies>
配置远程仓库:
<mirrors>
         <mirror>
                <id>huaweicloud</id>
                <mirrorOf>*</mirrorOf>
                <url>https://mirrors.huaweicloud.com/repository/maven/</url>
         </mirror>
</mirrors>
编译
获取源码
mkdir /home/dubbo && cd /home/dubbo && wget https://github.com/apache/dubbo/archive/dubbo-2.7.5.tar.gz
&& tar -xvf dubbo-2.7.5.tar.gz
编译dubbo-common模块
编译dubbo-remoting-netty模块
a. 打开文件,将第76行中的“6000”改为“9000”。
vim /home/dubbo/dubbo-dubbo-2.7.5/dubbo-remoting/dubbo-remoting-netty/src/test/java/org/apache/dubbo/remoting/transport/netty/NettyClientTest.java

b. 编译dubbo-remoting-netty模块
cd /home/dubbo/dubbo-dubbo-2.7.5/dubbo-remoting/dubbo-remoting-netty && mvn install
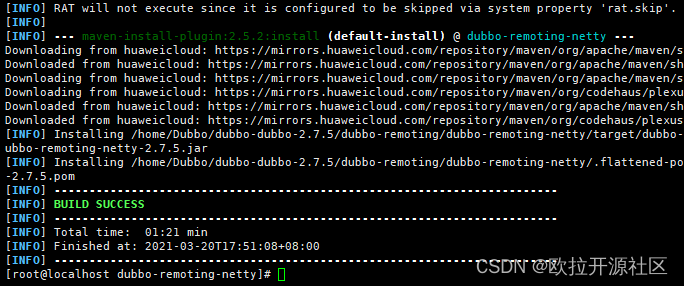
若显示 BUILD SUCCESS,则dubbo-remoting-netty模块编译成功。
编译dubbo-rpc-redis模块
mkdir -p /root/.m2/repository/com/github/kstyrc/embedded-redis/0.6/ && wget https://mirrors.huaweicloud.com/kunpeng/maven/com/github/kstyrc/embedded-redis/0.6/embedded-redis-0.6.jar -O /root/.m2/repository/com/github/kstyrc/embedded-redis/0.6/embedded-redis-0.6.jar
cd /home/dubbo/dubbo-dubbo-2.7.5/dubbo-rpc/dubbo-rpc-redis/ && mvn install
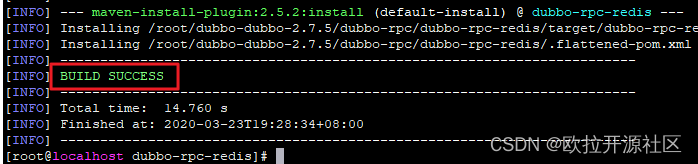
若显示 BUILD SUCCESS,则dubbo-rpc-redis模块编译成功。
编译dubbo-remoting-etcd3模块
- 安装docker
yum -y install docker
- 配置环境变量
echo "export TESTCONTAINERS_RYUK_disABLED=true" >> /etc/profile && source /etc/profile
echo "checks.disable=true" >> /root/.testcontainers.properties
wget https://mirrors.huaweicloud.com/kunpeng/maven/io/etcd/jetcd-launcher/0.3.0/jetcd-launcher-0.3.0.jar -O /root/.m2/repository/io/etcd/jetcd-launcher/0.3.0/jetcd-launcher-0.3.0.jar
- 编译dubbo-remoting-etcd3模块
cd /home/dubbo/dubbo-dubbo-2.7.5/dubbo-remoting/dubbo-remoting-etcd3/ && mvn install
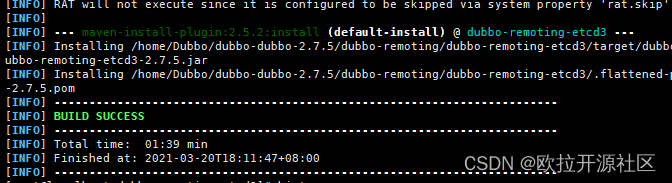
若显示 BUILD SUCCESS,则dubbo-remoting-etcd3模块编译成功。
编译dubbo- registry-consul模块
cd /home/dubbo/dubbo-dubbo-2.7.5/dubbo-registry/dubbo-registry-consul/ && mvn install
若编译过程中出现“EmbeddedConsul Could not start Consul process in…”的报错,则需要将ARM 64版本的consul_1.1.0_linux_arm64.zip包放在本地“/tmp/embedded-consul-1.1.0”目录下。
wget https://releases.hashicorp.com/consul/1.1.0/consul_1.1.0_linux_arm64.zip && unzip consul_1.1.0_linux_arm64.zip && mv consul /tmp/embedded-consul-1.1.0/consul
然后再重新编译

若显示 BUILD SUCCESS,则dubbo- registry-consul模块编译成功。
修改其余配置文件
-
替换本地仓库的netty-all-4.1.25.Final.jar包。
mkdir -p /root/.m2/repository/io/netty/netty-all/4.1.25.Final/ && wget https://mirrors.huaweicloud.com/kunpeng/maven/io/netty/netty-all/4.1.25.Final/netty-all-4.1.25.Final.jar -O /root/.m2/repository/io/netty/netty-all/4.1.25.Final/netty-all-4.1.25.Final.jar -
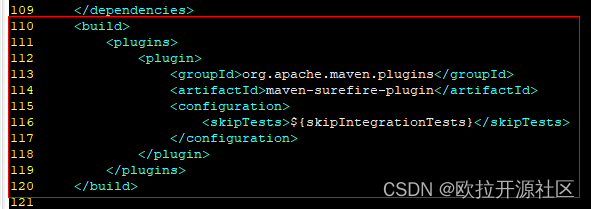
修改“/home/dubbo/dubbo-dubbo-2.7.5/dubbo-config/dubbo-config-api/pom.xml”文件。
-
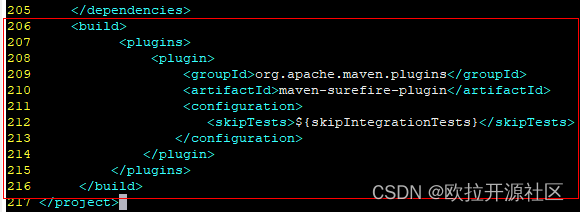
修改“/home/dubbo/dubbo-dubbo-2.7.5/dubbo-compatible/pom.xml”文件。
-
打开pom.xml文件。
-

-

编译dubbo 2.7.5
/home/dubbo/dubbo-dubbo-2.7.5/pom.xml文件592行后增加如下内容:
<configuration>
	<testFailureIgnore>true</testFailureIgnore>
</configuration>

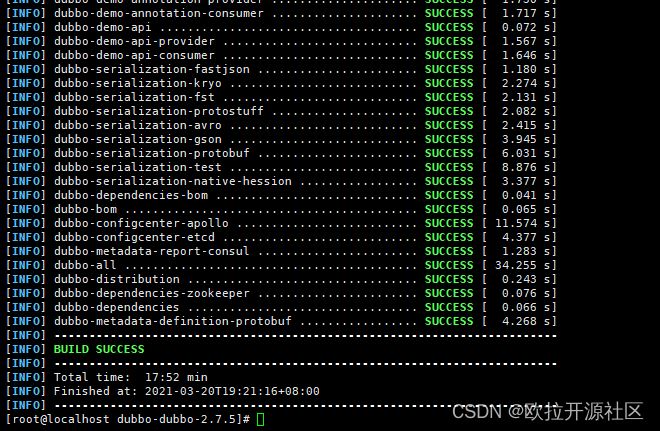
若显示 BUILD SUCCESS,则dubbo 2.7.5编译成功。
编译完成后的dubbo-2.7.5.jar包保存在“dubbo-all/target”目录
根据指导进行操作,整体还是比较流畅,遇到一些疑惑,也能在社区内寻求解决方式。感兴趣的伙伴可以尝试尝试,一起交流交流
参考资料:
openEuler 官网
https://www.openeuler.org/zh/other/migration/
openEuler兼容性列表
https://www.openeuler.org/zh/compatibility/
x2openEuler 用户指南
https://docs.openeuler.org/zh/docs/20.03_LTS_SP1/docs/thirdparty_migration/x2openEuleruseguide.html