- 携程apollo分布式配置中心介绍
携程apollo配置中心是基于eureka搭建的分布式配置中心,类似于百度的Disconf配置中心,可以与Spring,SpringBoot集成。能实时获取配置中心服务端最新的配置 - apollo总体技术架构
ConfigDB: 配置信息持久化到数据库
ConfigService:提供配置的读取、推送等功能,服务对象是Apollo客户端。默认8080端口。
AdminService:提供配置的修改、发布等功能,服务对象是Apollo Portal(管理界面),默认端口8070。
Eureka: 作为ConfigService服务和AdminService服务的注册中心
MetaServer:用于封装Eureka的服务发现接口,即业务项目客户端中使用apollo配置中心时,不依赖eureka。
Client: 项目的客户端,通过加载apollo client jar包,并指定MetaServer的地址(负载均衡地址),从而获取配置中心的项目配置。Client本地使用Guava缓存配置信息提高性能。Client还会生成本地配置文件,在apollo配置中心服务端不可用时,默认从本地配置文件加载配置。本地配置文件路径:
Mac/Linux: /opt/data/{appId}/config-cache
Windows: C:\opt\data{appId}\config-cache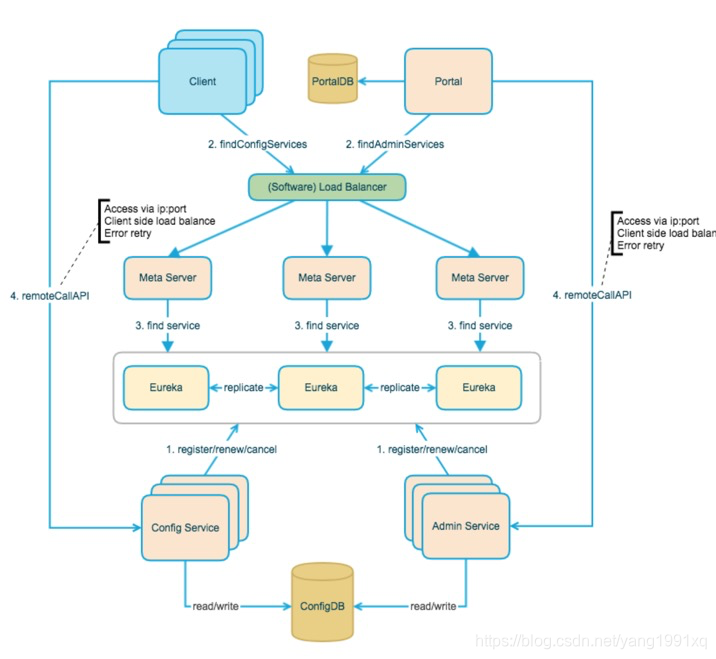
客户端与服务端同步配置信息: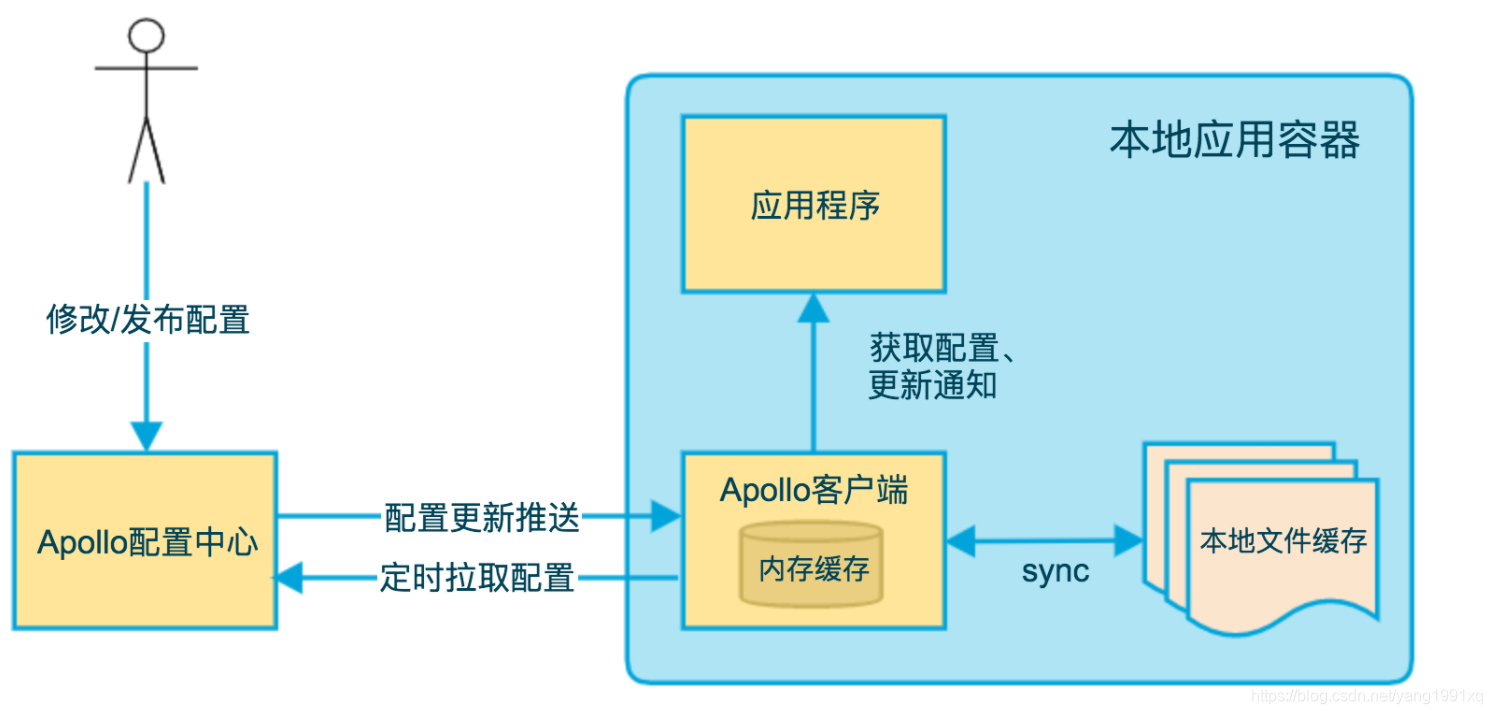
AdminService后台管理中心: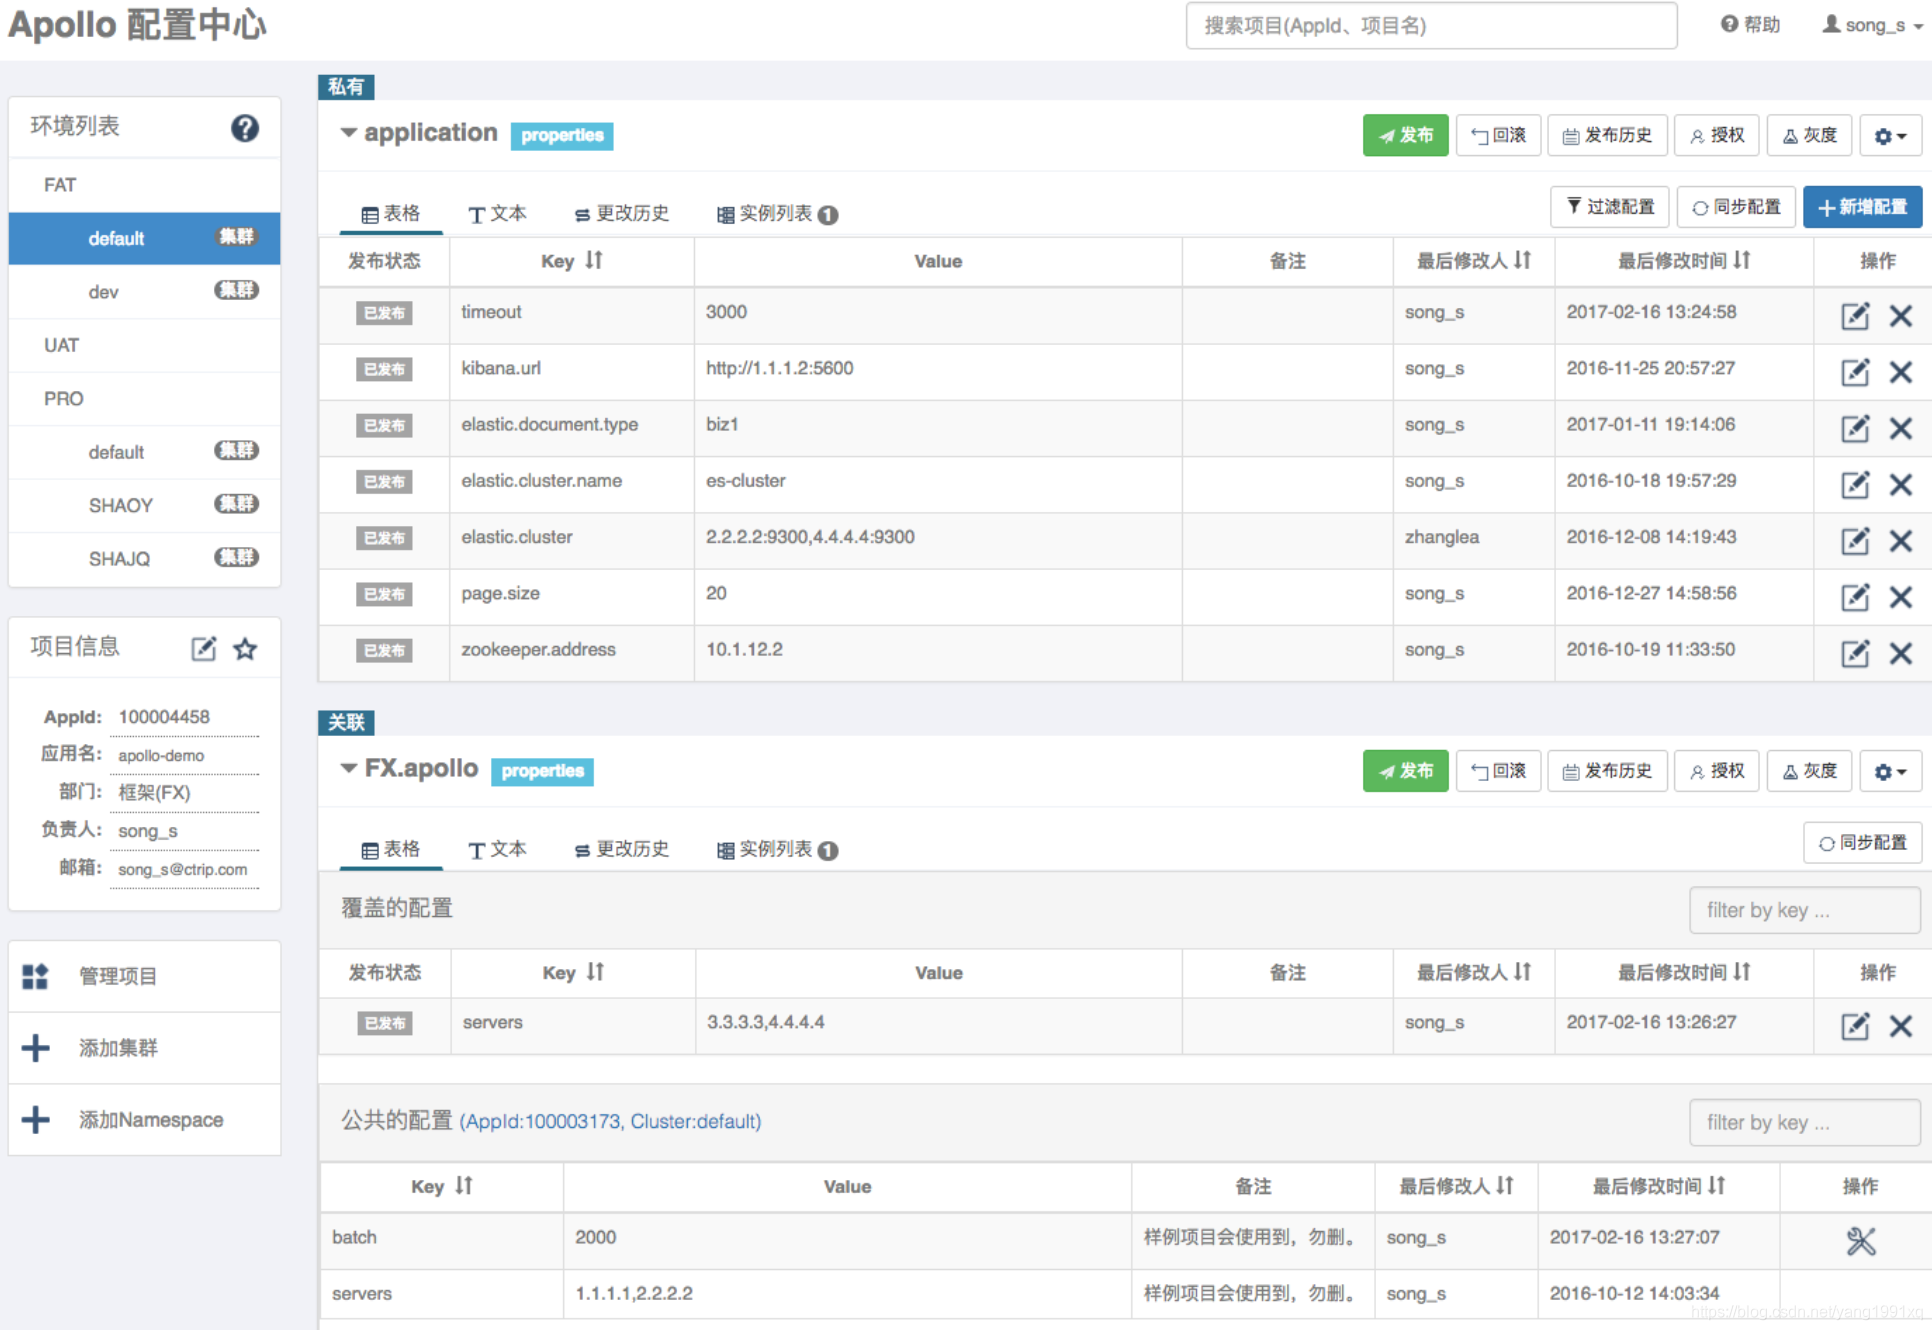
- apollo使用(不依赖spring)
1、maven依赖
 <dependency>
 	<groupId>com.ctrip.framework.apollo</groupId>
    <artifactId>apollo-client</artifactId>
    <version>1.1.0</version>
</dependency>
2、通过JVM启动参数指定metaServer的地址
-Dapollo.meta=http://localhost:8080
指定开发环境的metaServer地址:
-Ddev_meta=http://config-service-url
3、在项目中读取配置中心配置
  Config config = ConfigService.getAppConfig();
// 读取配置中心参数:timeout 的值
  String someKey = "timeout";
  String someDefaultValue = "112";
  String value = config.getProperty(someKey, someDefaultValue);

  System.out.println(value);

 // 实时监听配置中心属性的改变
  config.addChangeListener(new ConfigChangeListener() {

      public void onChange(ConfigChangeEvent changeEvent) {
          System.out.println("Changes for namespace " + changeEvent.getNamespace());
          for (String key : changeEvent.changedKeys()) {
              ConfigChange change = changeEvent.getChange(key);
              System.out.println(String.format("属性更新 - key: %s, oldValue: %s, newValue: %s, changeType: %s", change.getPropertyName(), change.getOldValue(), change.getNewValue(), change.getChangeType()));
          }
      }
  });
- apollo与springboot集成
1、maven配置同上
2、application.yml指定metaServer地址
apollo:
  meta: http://localhost:8080
  bootstrap:
    namespaces: dev
同时在application.yml中允许apollo配置的更新springIOC容器中的Bean的配置属性。
apollo:
  bootstrap:
    enabled: true
    eagerLoad:
      enabled: true
等价于在application.properties中配置:
apollo.bootstrap.enabled=true
# 把日志相关的配置(如logging.level.root=info或logback-spring.xml中的参数)也放在Apollo管理
apollo.bootstrap.eagerLoad=true
3、在spring bean中获取apollo配置中心配置
@Service
public class TestServiceImpl implements{
        TestService {
    //  获取apollo配置中心属性:weixin.pay.url的值
    @Value("${weixin.pay.url}")
    private String url;
}
4、apollo配置中心使用springboot自动配置原因分析
4.1 在apollo-client.jar包中,使用了springboot自动配置类
ApolloAutoConfiguration.java
package com.ctrip.framework.apollo.spring.boot;

import com.ctrip.framework.apollo.spring.config.ConfigPropertySourcesProcessor;
import com.ctrip.framework.apollo.spring.config.PropertySourcesConstants;
import com.ctrip.framework.apollo.spring.config.PropertySourcesProcessor;
import org.springframework.boot.autoconfigure.condition.ConditionalOnMissingBean;
import org.springframework.boot.autoconfigure.condition.ConditionalOnProperty;
import org.springframework.context.annotation.Bean;
import org.springframework.context.annotation.Configuration;

@Configuration
// 当springboot配置文件中配置属性apollo.bootstrap.enabled有值时才会注入ApolloAutoConfiguration类的实例
@ConditionalOnProperty(PropertySourcesConstants.APOLLO_BOOTSTRAP_ENABLED)
@ConditionalOnMissingBean(PropertySourcesProcessor.class)
public class ApolloAutoConfiguration {

  @Bean
  public ConfigPropertySourcesProcessor configPropertySourcesProcessor() {
    return new ConfigPropertySourcesProcessor();
  }
}
4.2 配置属性类:
package com.ctrip.framework.apollo.spring.config;

public interface PropertySourcesConstants {
  String APOLLO_PROPERTY_SOURCE_NAME = "ApolloPropertySources";
  String APOLLO_BOOTSTRAP_PROPERTY_SOURCE_NAME = "ApolloBootstrapPropertySources";
  // 默认启用apollo配置中心
  String APOLLO_BOOTSTRAP_ENABLED = "apollo.bootstrap.enabled";
  String APOLLO_BOOTSTRAP_EAGER_LOAD_ENABLED = "apollo.bootstrap.eagerLoad.enabled";
  String APOLLO_BOOTSTRAP_NAMESPACES = "apollo.bootstrap.namespaces";
}
4.3 在apollo-client.jar的路径META-INF/spring.factories中,指定了springboot扫描哪些自动配置类
org.springframework.boot.autoconfigure.EnableAutoConfiguration=\
com.ctrip.framework.apollo.spring.boot.ApolloAutoConfiguration
org.springframework.context.ApplicationContextInitializer=\
com.ctrip.framework.apollo.spring.boot.ApolloApplicationContextInitializer
org.springframework.boot.env.EnvironmentPostProcessor=\
com.ctrip.framework.apollo.spring.boot.ApolloApplicationContextInitializer
4.4 springboot启动项目时,会读取所有classpath下的META-INF/spring.factories,实例化包括apollo配置中心等所有自动配置的Bean,加入到IOC容器,包括类:ApolloApplicationContextInitializer。ApolloApplicationContextInitializer类,实现了spring上下文管理的接口:ApplicationContextInitializer,从而在实例化时会执行initialize()方法,通过获取apollo配置中心的配置信息,更新springIOC容器中的Bean的属性(使用了配置参数的属性)。
public class ApolloApplicationContextInitializer implements
    ApplicationContextInitializer<ConfigurableApplicationContext> , EnvironmentPostProcessor {
  @Override
  public void initialize(ConfigurableApplicationContext context) {
    ConfigurableEnvironment environment = context.getEnvironment();
	// 读取springboot配文件中的属性:apollo.bootstrap.eagerLoad.enabled
    String enabled = environment.getProperty(PropertySourcesConstants.APOLLO_BOOTSTRAP_ENABLED, "false");
    if (!Boolean.valueOf(enabled)) {
      logger.debug("Apollo bootstrap config is not enabled for context {}, see property: ${{}}", context, PropertySourcesConstants.APOLLO_BOOTSTRAP_ENABLED);
      return;
    }
    logger.debug("Apollo bootstrap config is enabled for context {}", context);
//如果springboot配文件中的属性:apollo.bootstrap.eagerLoad.enabled为true,则获取apollo配置中心的配置信息,并更新springIOC容器中的Bean的属性(使用了配置参数的属性)。
    initialize(environment);
  }
apollo server部署
我这里使用linux虚拟机(IP: 192.168.234.133)部署apolloserver,在本机(IP:192.168.68.1)中部署eureka server和mysql数据库。
下载github包:https://github.com/ctripcorp/apollo
或者码云包:https://gitee.com/nobodyiam/apollo
- db初始化
1.创建ApolloPortalDB
执行sqlscripts/db/migration/portaldb/V1.0.0__initialization.sql
然后初始化apolloportaldb角色权限相关表。
在源码包中\scripts\docker-quick-start\sql\apolloportaldb.sql 中执行Sample Data下面部分的sql。
2.创建ApolloConfigDB
执行scripts/db/migration/configdb/V1.0.0__initialization.sql
然后初始化apolloconfigdb角色权限相关表。
在源码包中\scripts\docker-quick-start\sql\apolloconfigdb.sql 中执行Sample Data下面部分的sql。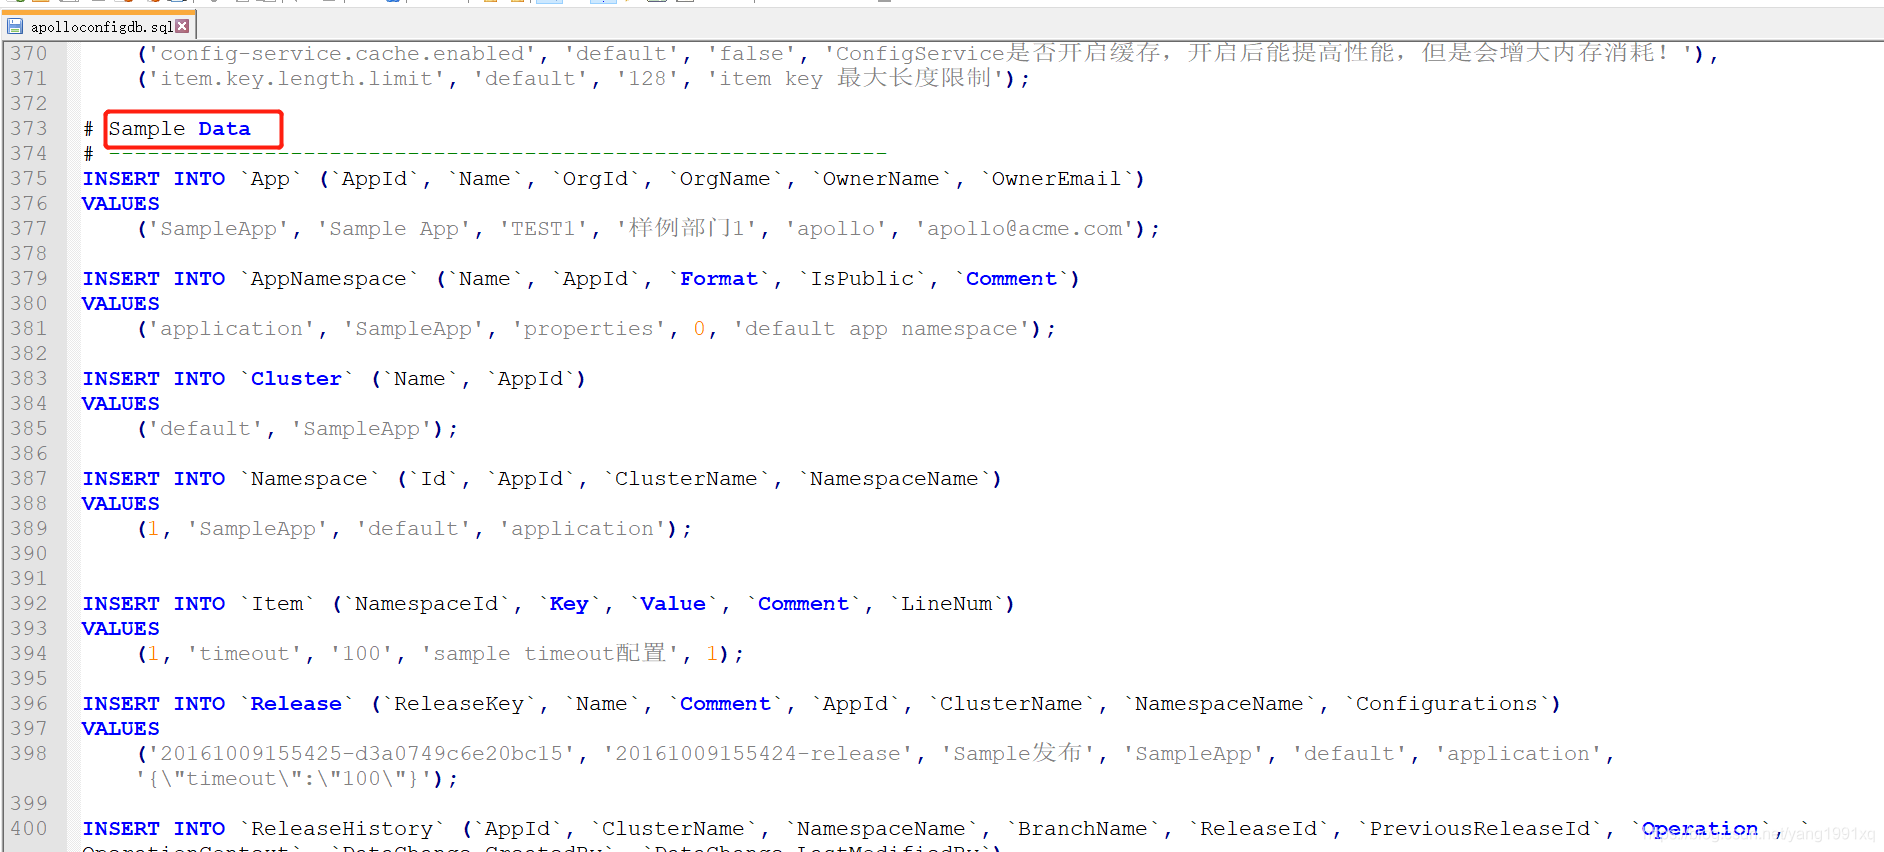
注意:配置apollo server连接数据库时,不要用使用默认的数据库管理员用户root,这样在虚拟机连接主机中的mysql时连接报错,应该使用创建一个新的管理员用户:
3.创建数据库连接用户
在数据库ApolloPortalDB和ApolloConfigDB中执行,创建新用户apollo/123456
GRANT ALL PRIVILEGES ON *.* TO 'apollo'@'%' IDENTIFIED BY '123456'
-
编译打包
1.修改\scripts\build.bat文件,设置数据库连接信息和启用的meta环境地址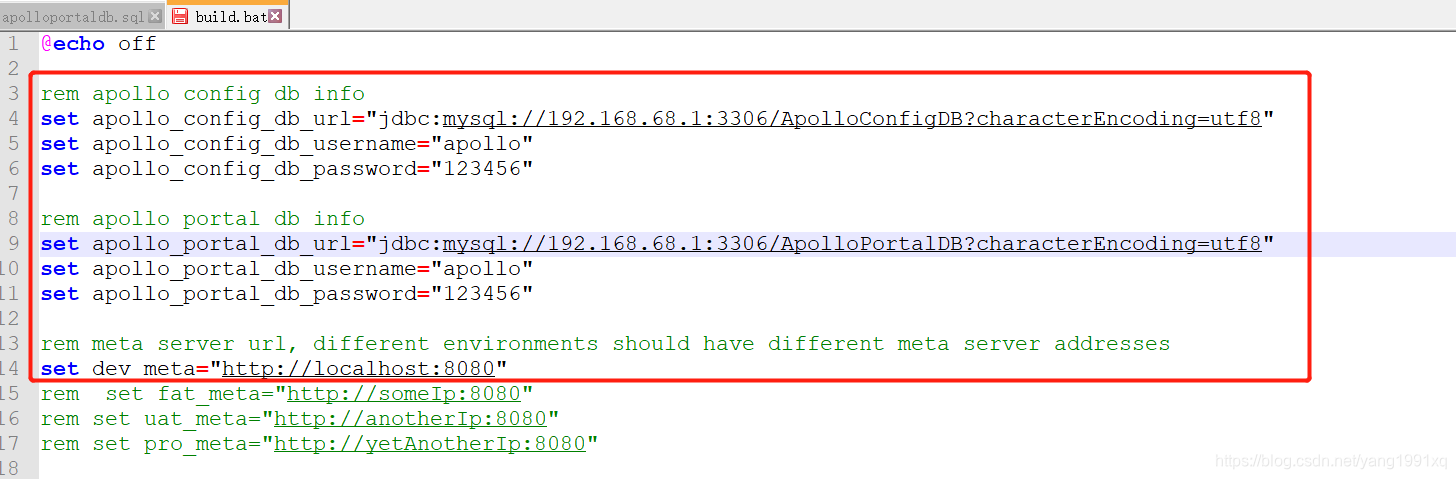
2.执行\scripts\build.bat,打包后生成zip文件:
\apollo-adminservice\target\apollo-adminservice-1.5.0-SNAPSHOT-github.zip,
\apollo-configservice\target\apollo-configservice-1.5.0-SNAPSHOT-github.zip
\apollo-portal\target\apollo-portal-1.5.0-SNAPSHOT-github.zip -
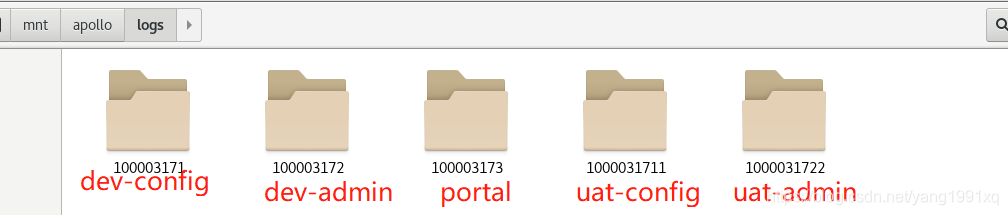
解压ZIP文件,设置logs目录
-
在configservice的解压目录下,修改apollo-configservice.conf,参数LOG_FOLDER设置为有文件创建权限的目录,比如:
LOG_FOLDER=/mnt/apollo/logs/100003171/,同时,修改scripts下的startup.sh文件里的LOG_FOLDER,改为相同的值。
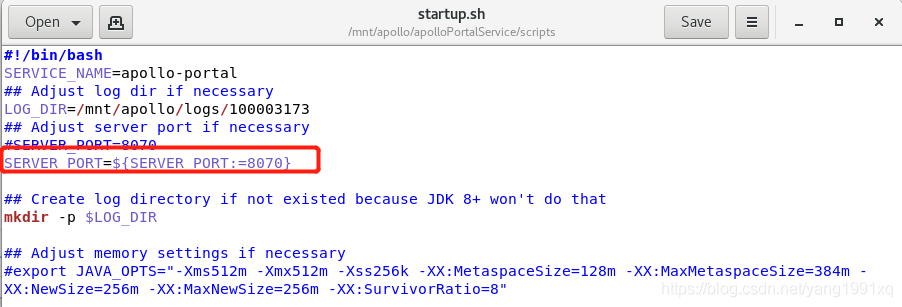
同理,在portal的解压目录下,修改apollo-portal.conf和scripts下的startup.sh文件里的LOG_FOLDER参数。
同理,在adminservice的解压目录下,修改apollo-adminservice.conf和scripts下的startup.sh文件里的LOG_FOLDER参数。 -
确认解压后的数据库地址维护正确
1.ConfigService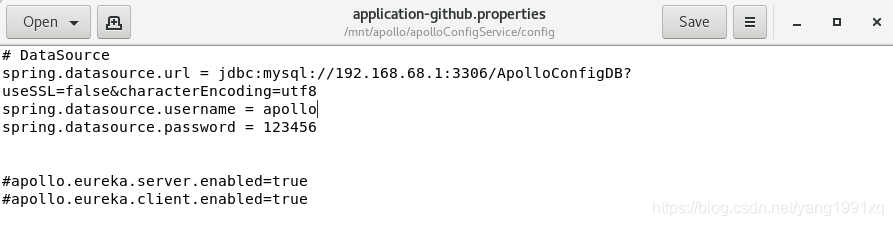
2.AdminService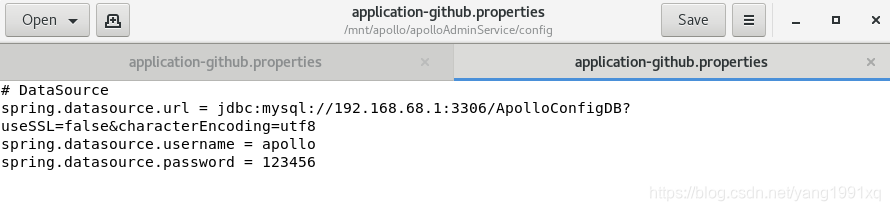
3.PortalService
-
调整JVM堆内存大小参数。
在虚拟机中,内存不够用时,修改startup.sh里的参数堆内存大小为512M。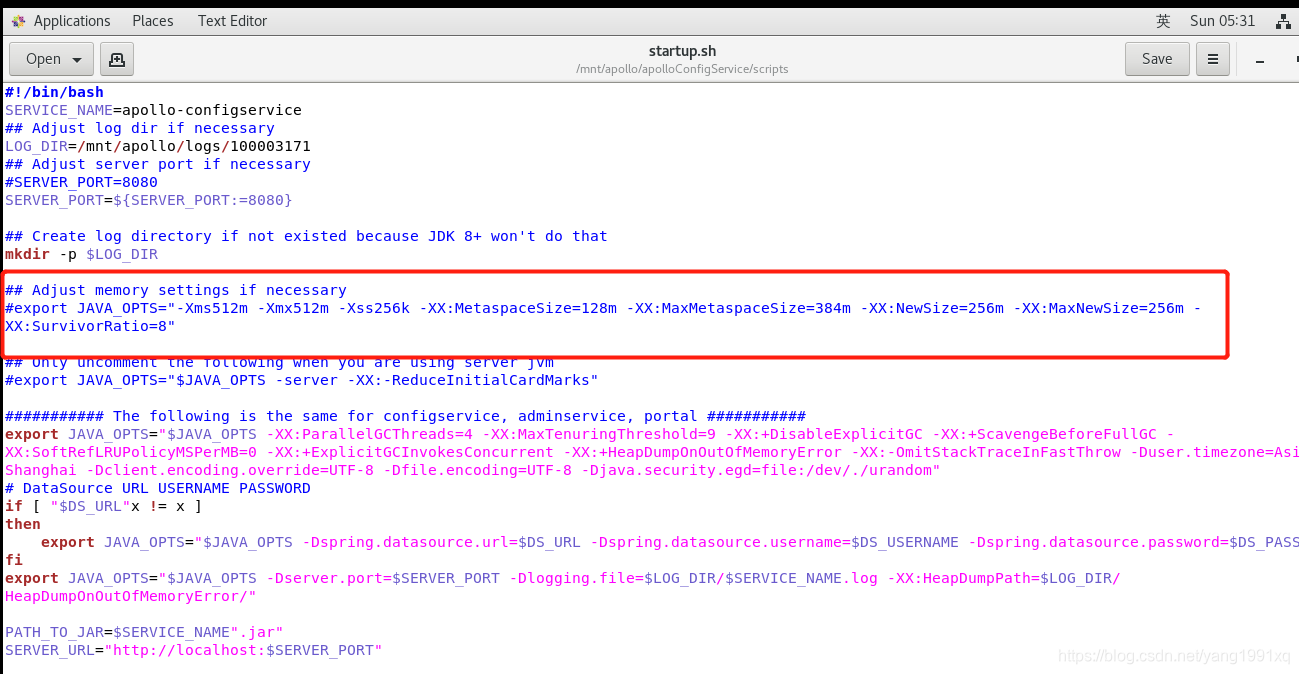
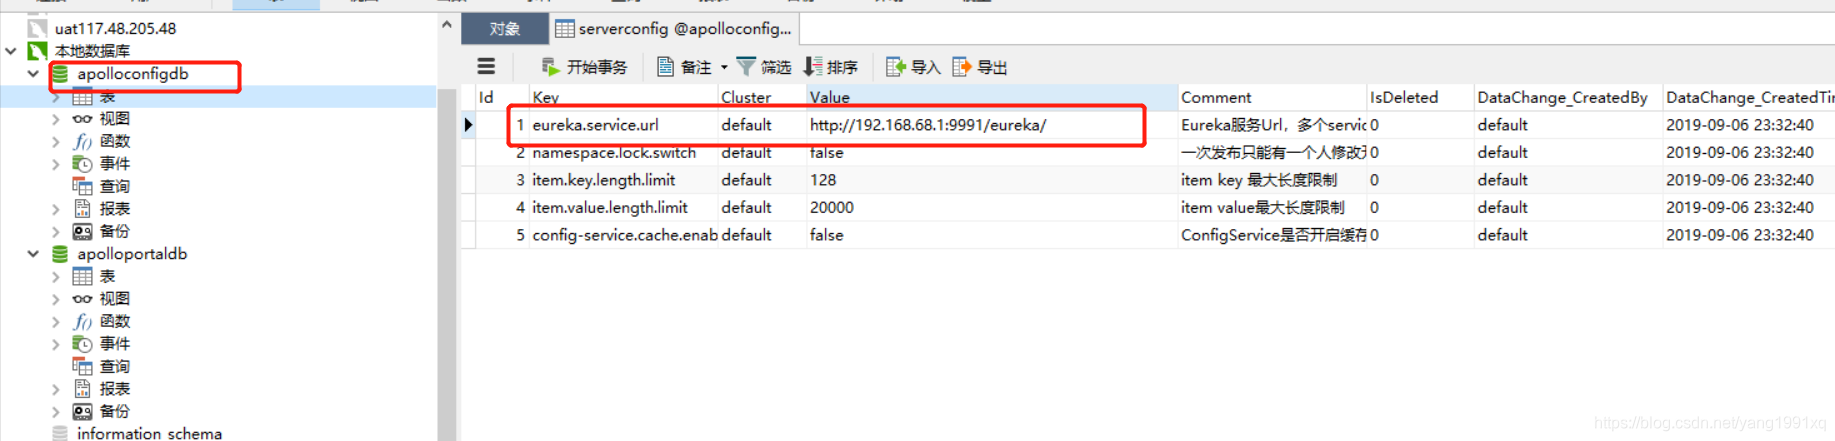
-
修改eureka服务地址。在apolloconfigdb.serverconfig表中,设置eureka server的注册地址。http://192.168.68.1:9991/eureka/是我本机中的eureka server地址。
-
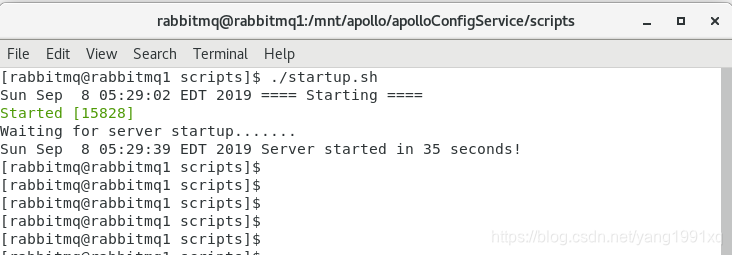
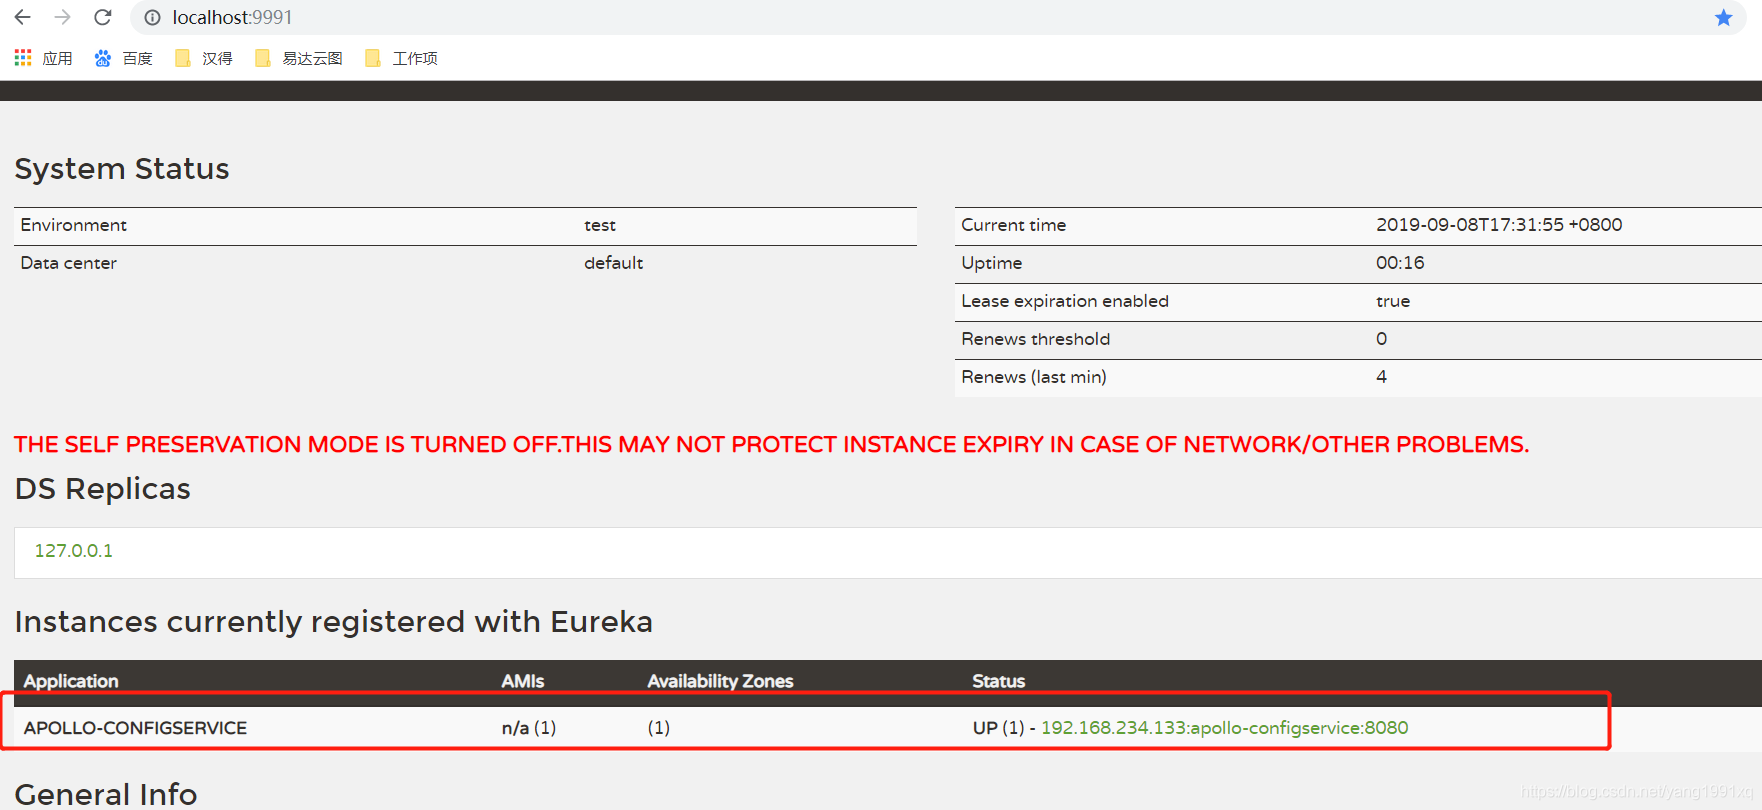
启动服务
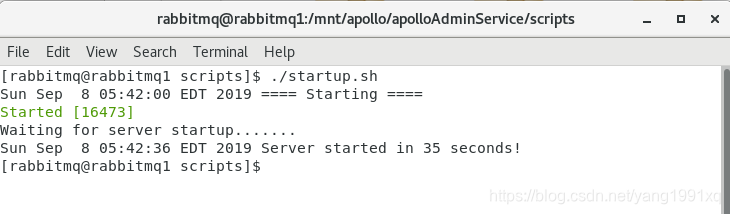
1.启动configservice。执行startup.sh后,在eurekaserver中可以看到,configserver注册成功。
configservice web默认使用端口8080:
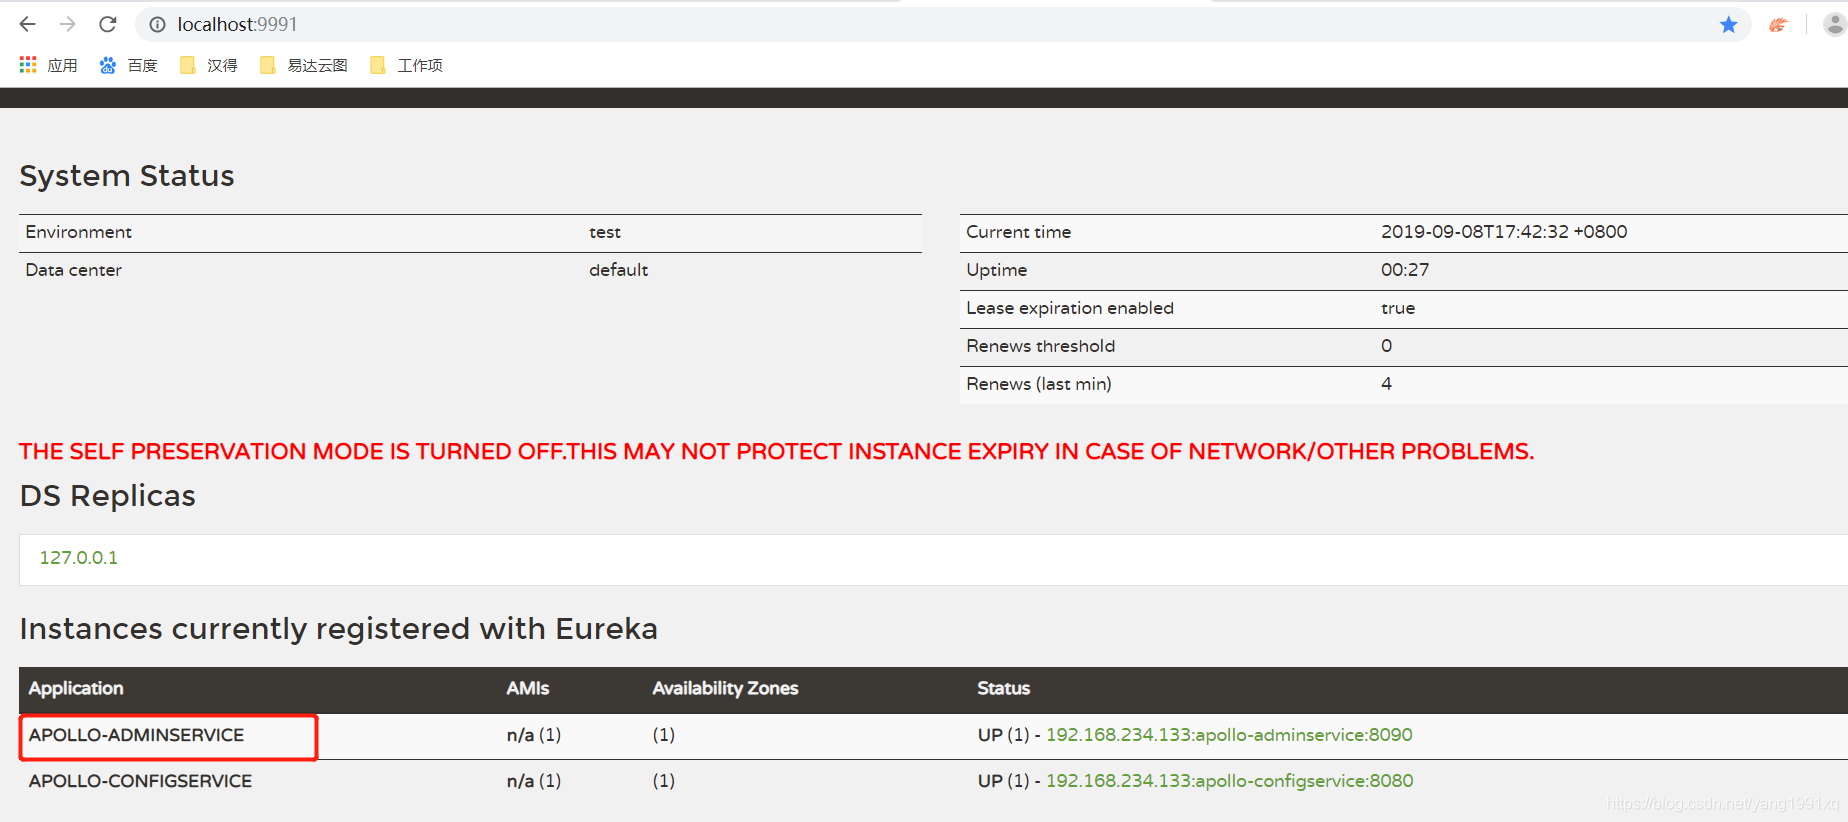
2.启动adminservice,启动后在eurekaserver注册中心可以看到adminservice。
adminservice web默认使用端口8090:
3.启动portal服务
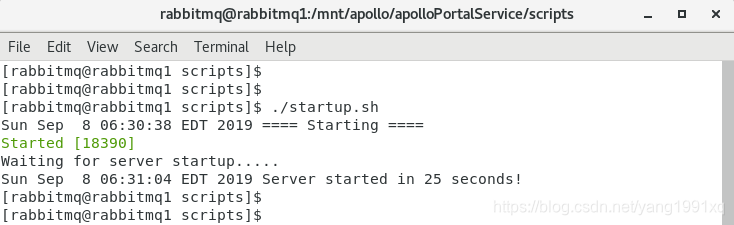
portal web默认使用端口8070:
-
访问portal
1.在本机中访问虚拟机中的portal web服务,需要关闭虚拟机的防火墙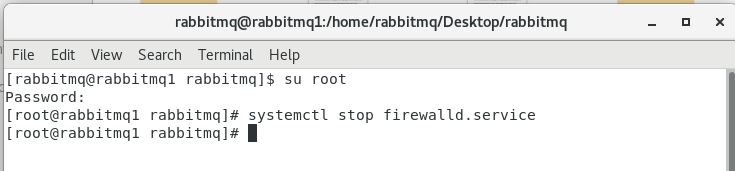
2.浏览器访问http://192.168.234.133:8070/signin(192.168.234.133为不是portal服务的虚拟机IP,8070为portal服务web端口)
默认用户名密码器:apollo/admin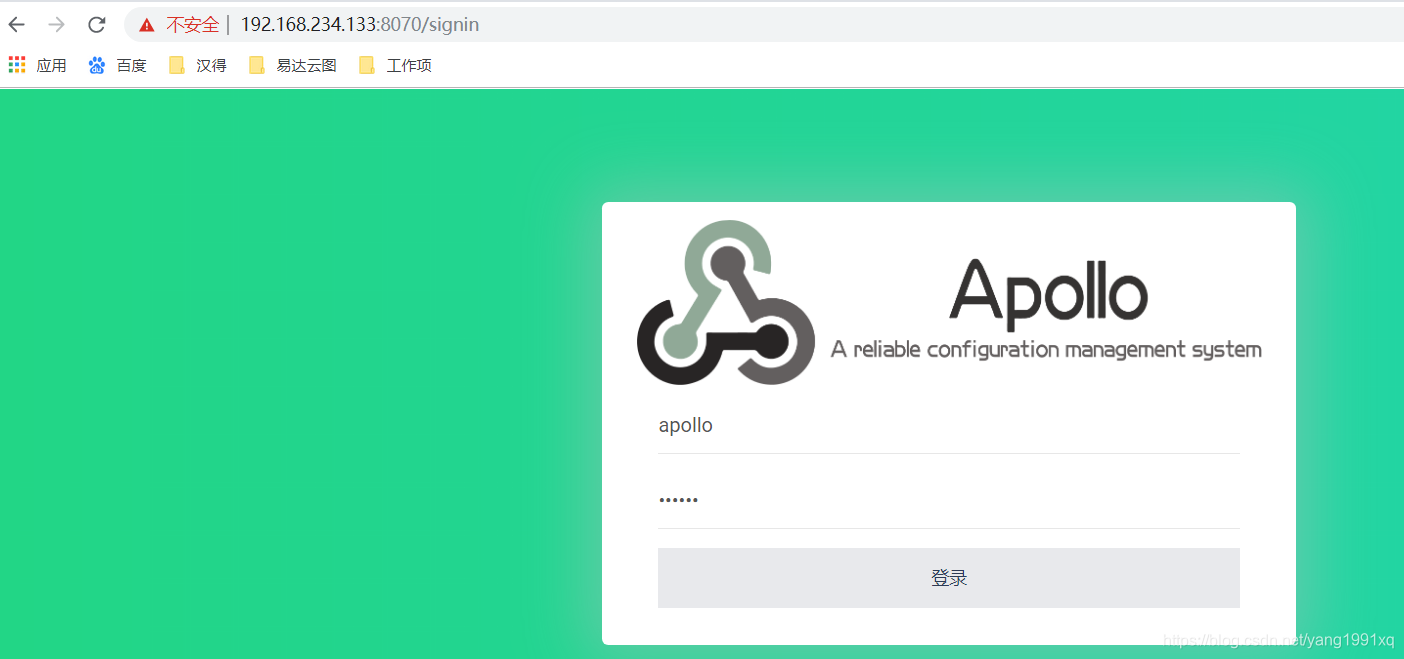
登录成功后: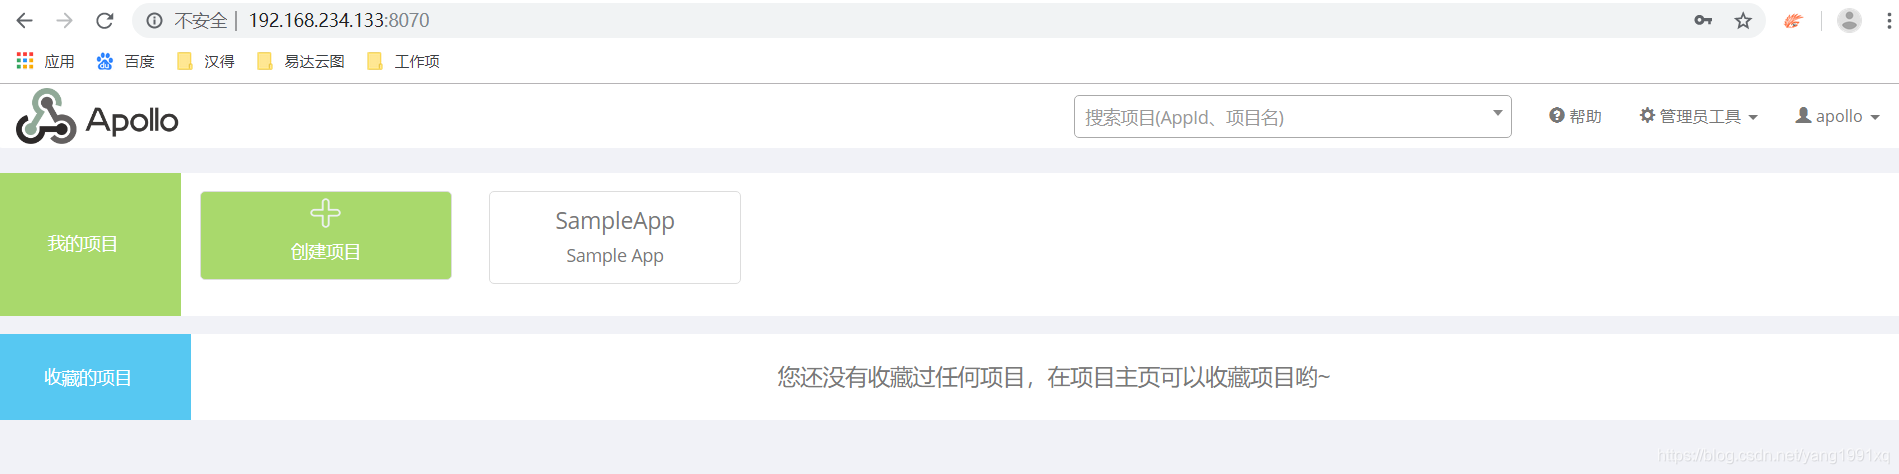
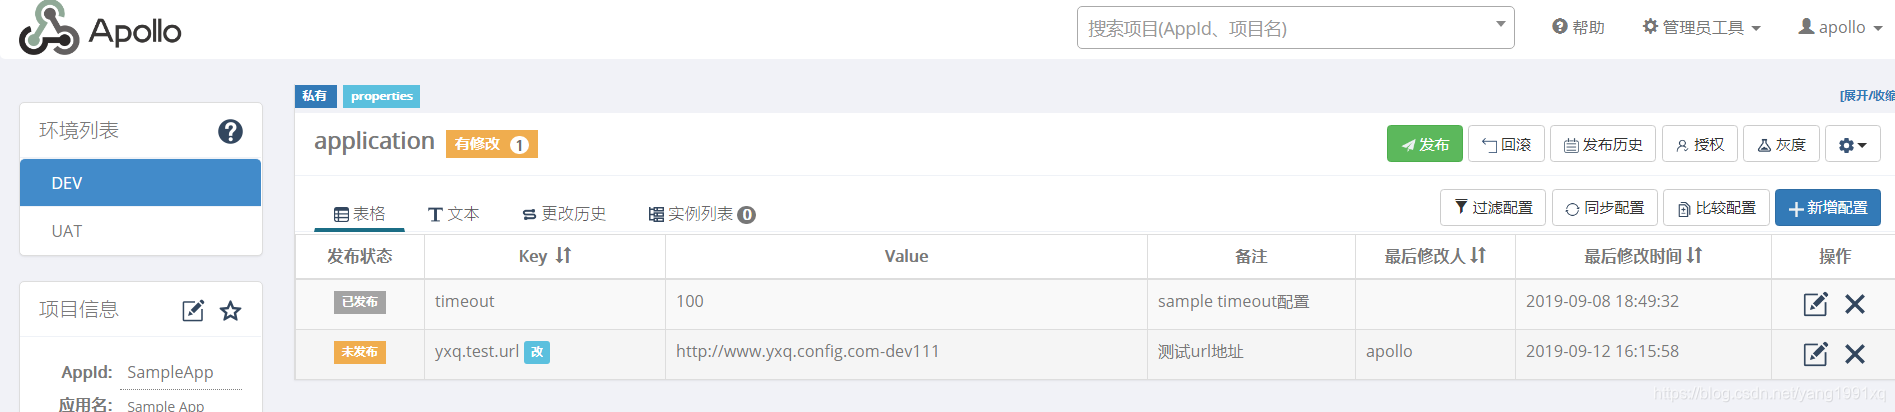
点击示例项目:SampleApp,进入它的配置界面:
DEV为环境名称,
application为namespace名称,
AppId为应用名称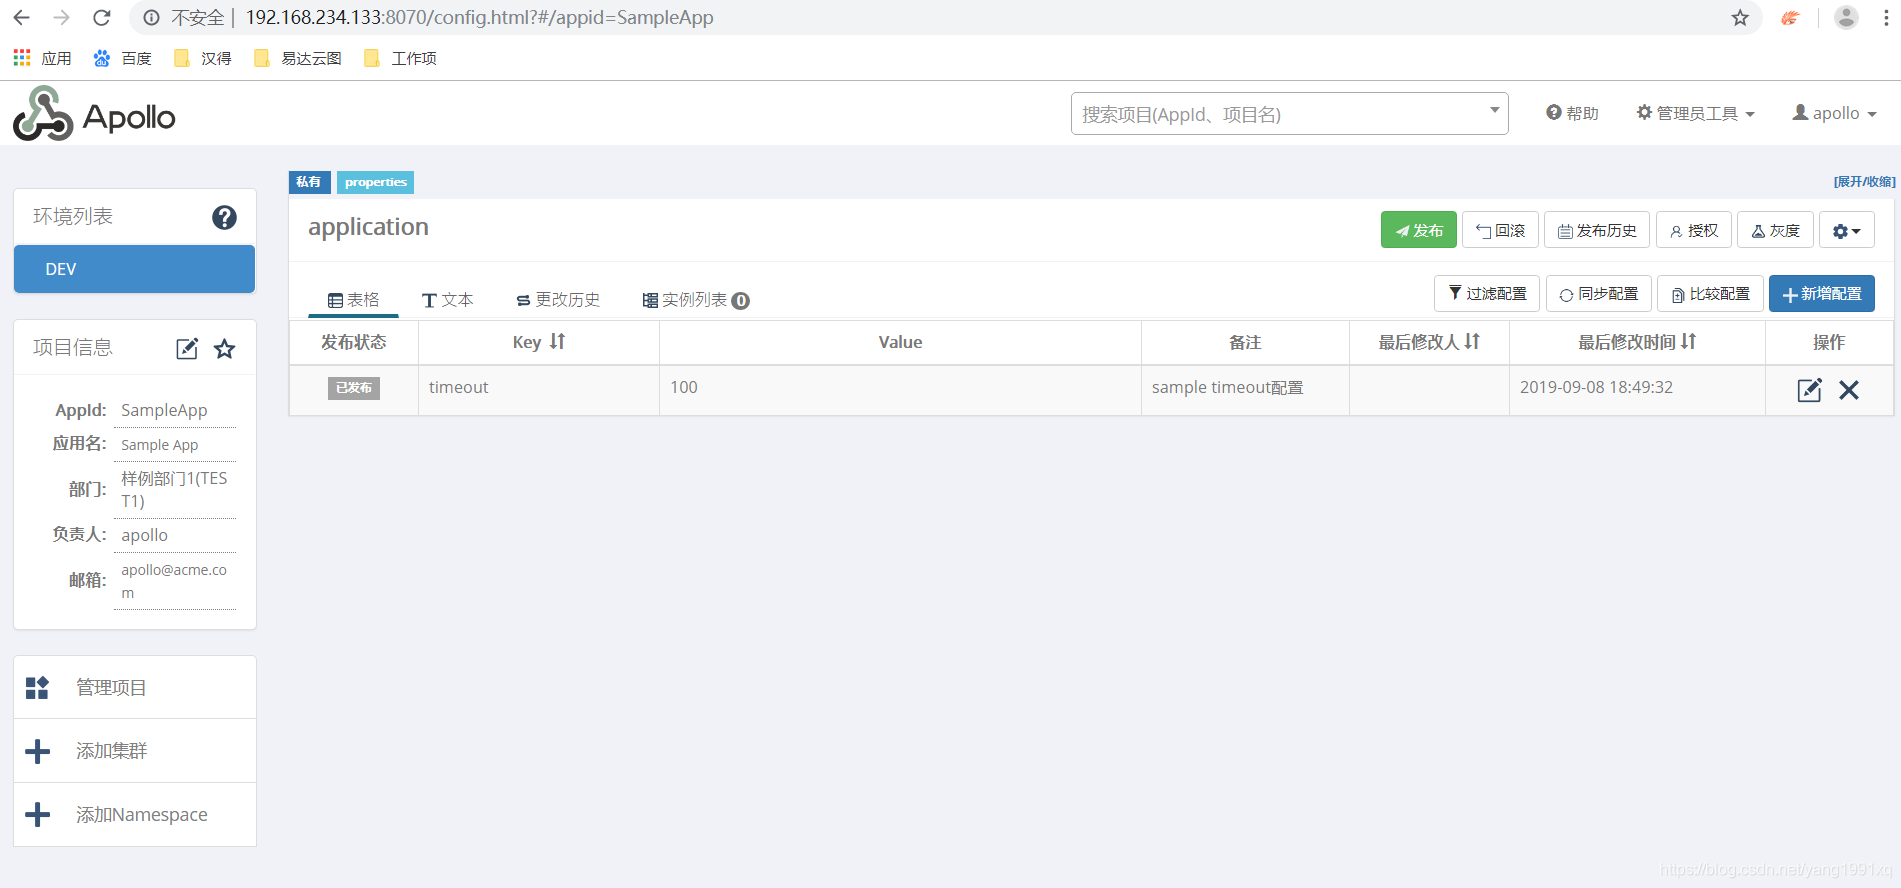
添加配置项,可以勾选多个环境,比如DEV,TEST,表示该配置项在DEV和TEST环境都会使用该配置项。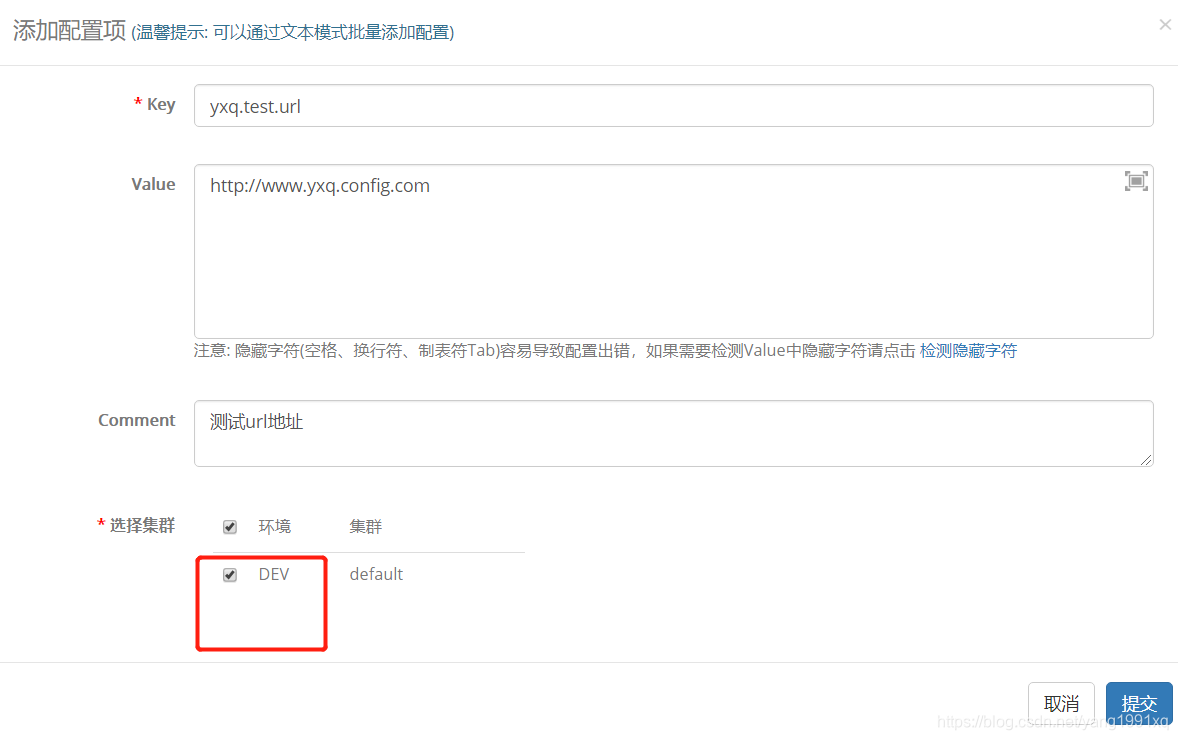
配置项会保存在apolloconfigdb.item表中:
配置项在点击发布后才会生效: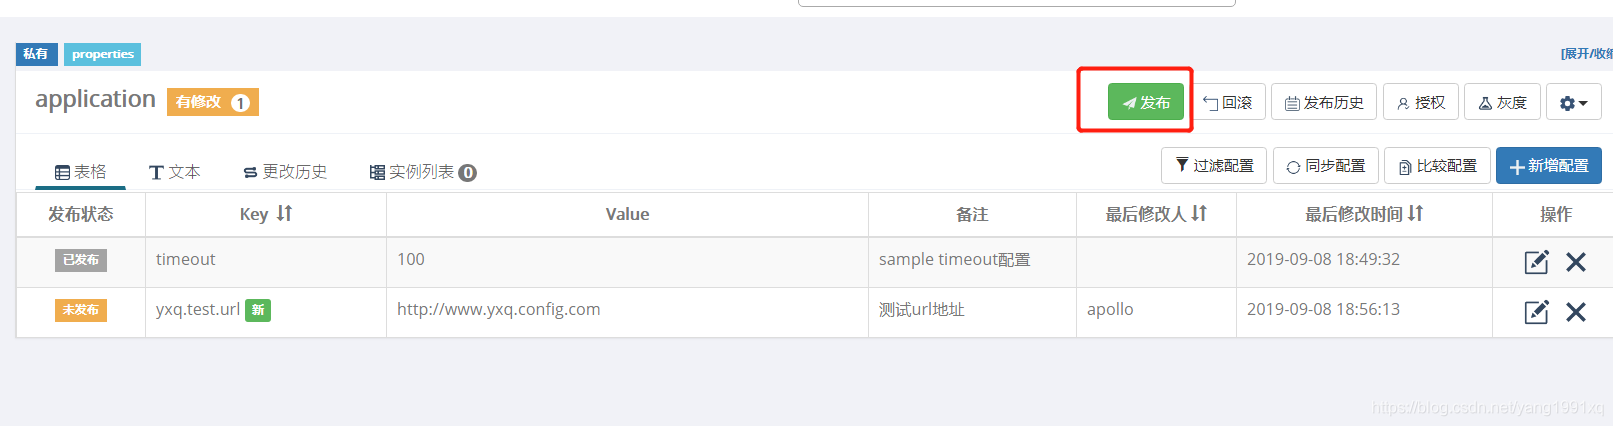
在变更历史页签中,可以查看配置项的变更历史记录:
对应数据库表apolloconfigdb.commit表: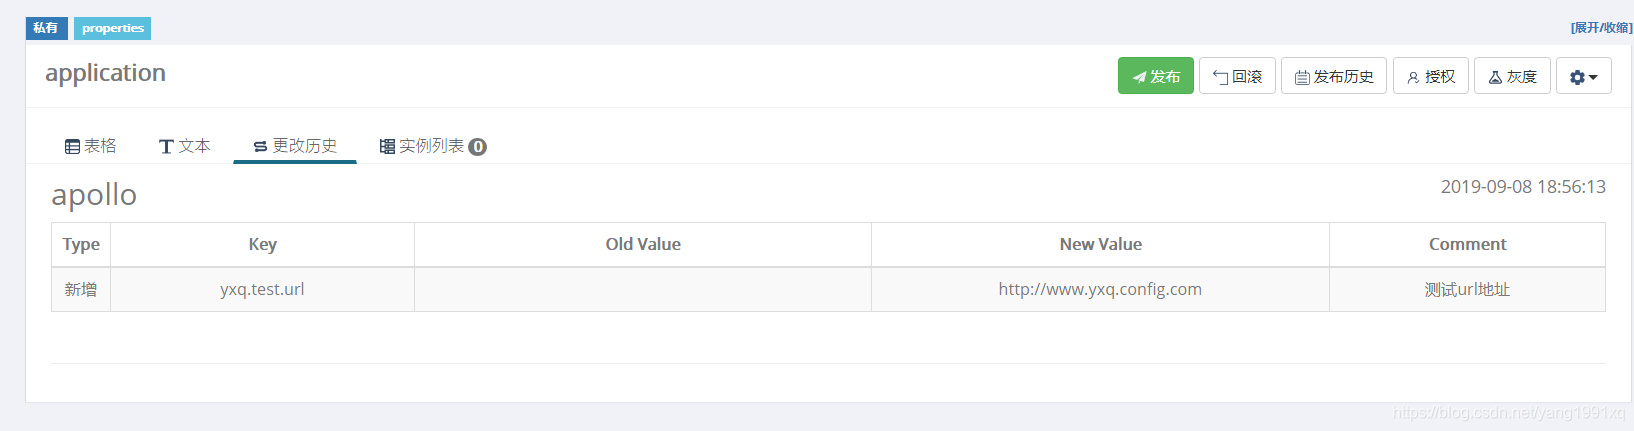
在发布历史中,可以查看配置项的发布历史记录:
对应数据库表apolloconfigdb.release表
-
apollo客户端验证
1.maven依赖与config配置
<?xml version="1.0" encoding="UTF-8"?>
<project xmlns="http://maven.apache.org/POM/4.0.0" xmlns:xsi="http://www.w3.org/2001/XMLSchema-instance"
         xsi:schemaLocation="http://maven.apache.org/POM/4.0.0 https://maven.apache.org/xsd/maven-4.0.0.xsd">
    <modelVersion>4.0.0</modelVersion>
    <parent>
        <groupId>org.springframework.boot</groupId>
        <artifactId>spring-boot-starter-parent</artifactId>
        <version>2.1.7.RELEASE</version>
        <relativePath/> <!-- lookup parent from repository -->
    </parent>
    <groupId>com.yxq</groupId>
    <artifactId>springcloud-configclient</artifactId>
    <version>0.0.1-SNAPSHOT</version>
    <name>springcloud-configclient</name>
    <description>Demo project for Spring Boot</description>

    <properties>
        <java.version>1.8</java.version>
        <spring-cloud.version>Greenwich.SR2</spring-cloud.version>
        <apollo.client.version>1.1.0</apollo.client.version>
    </properties>

    <dependencies>

        <dependency>
            <groupId>org.springframework.boot</groupId>
            <artifactId>spring-boot-starter-test</artifactId>
            <scope>test</scope>
        </dependency>

        <dependency>
            <groupId>org.springframework.boot</groupId>
            <artifactId>spring-boot-starter-web</artifactId>
        </dependency>

        <dependency>
            <groupId>com.ctrip.framework.apollo</groupId>
            <artifactId>apollo-client</artifactId>
            <version>${apollo.client.version}</version>
        </dependency>


    </dependencies>

    <dependencyManagement>
        <dependencies>
            <dependency>
                <groupId>org.springframework.cloud</groupId>
                <artifactId>spring-cloud-dependencies</artifactId>
                <version>${spring-cloud.version}</version>
                <type>pom</type>
                <scope>import</scope>
            </dependency>
        </dependencies>
    </dependencyManagement>

    <build>
        <plugins>
            <plugin>
                <groupId>org.springframework.boot</groupId>
                <artifactId>spring-boot-maven-plugin</artifactId>
            </plugin>
        </plugins>
    </build>

</project>
配置:application.yml
环境名称不区分大小写:dev=DEV
apollo.meta地址其实就是configserver的地址。但其作用是配置中心eureka client服务消费者,可以通过配置nginx域名转发做负载均衡,相当于通过网关访问配置中心接口。
spring:
  profiles:
    active: dev
app:
  id: SampleApp
apollo:
   bootstrap:
       enabled: true
   eagerLoad:
       enabled: true

---
spring:
   profiles: dev
apollo:
   meta: http://192.168.234.133:8080
   bootstrap:
      namespaces: application
---
2.java代码中测试配置中心
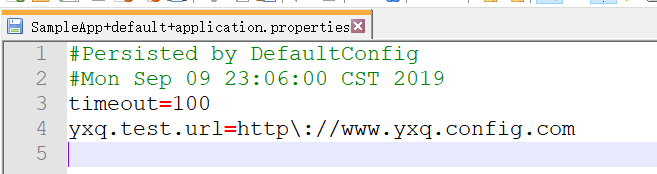
启动项目后,在本地电脑C:\opt\data\SampleApp\config-cache目录下生成SampleApp+default+application.properties本地配置文件,即apollo客户端缓存文件。在apollo配置中心服务端不可用时,客户端会使用本地缓存文件。
java测试代码:
package com.yxq.springcloudconfigclient;

import org.springframework.beans.factory.annotation.Value;
import org.springframework.web.bind.annotation.RequestMapping;
import org.springframework.web.bind.annotation.RestController;

@RestController
@RequestMapping("/apollo")
public class TestApolloConfigClientController {

    @Value("${yxq.test.url}")
    String testurl;

    @RequestMapping("/getTestUrl")
    public String from(){
        return "testurl="+testurl;
    }

}
3.接口验证读取配置

apollo多个环境配置
- 介绍
apollo多套环境配置条件:每套环境有各自的数据库实例,各自的configservice应用实例,各自的adminservice实例,各自的eureka server注册中心。而portal service是共用一套。
eureka server注册中心可以使用外部独立的注册中心服务,也可以使用configservice默认的eurekaserver(此时,eurekaserver,configservice,metaservice是同一个项目且部署在一个jvm进程中)
数据库配置:
apolloconfigdb.serverconfig配置DEV环境eureka注册中心地址:
apolloconfigdb_uat.serverconfig配置UAT环境eureka注册中心地址:
DEV环境的configservice,adminservice注册到8080端口: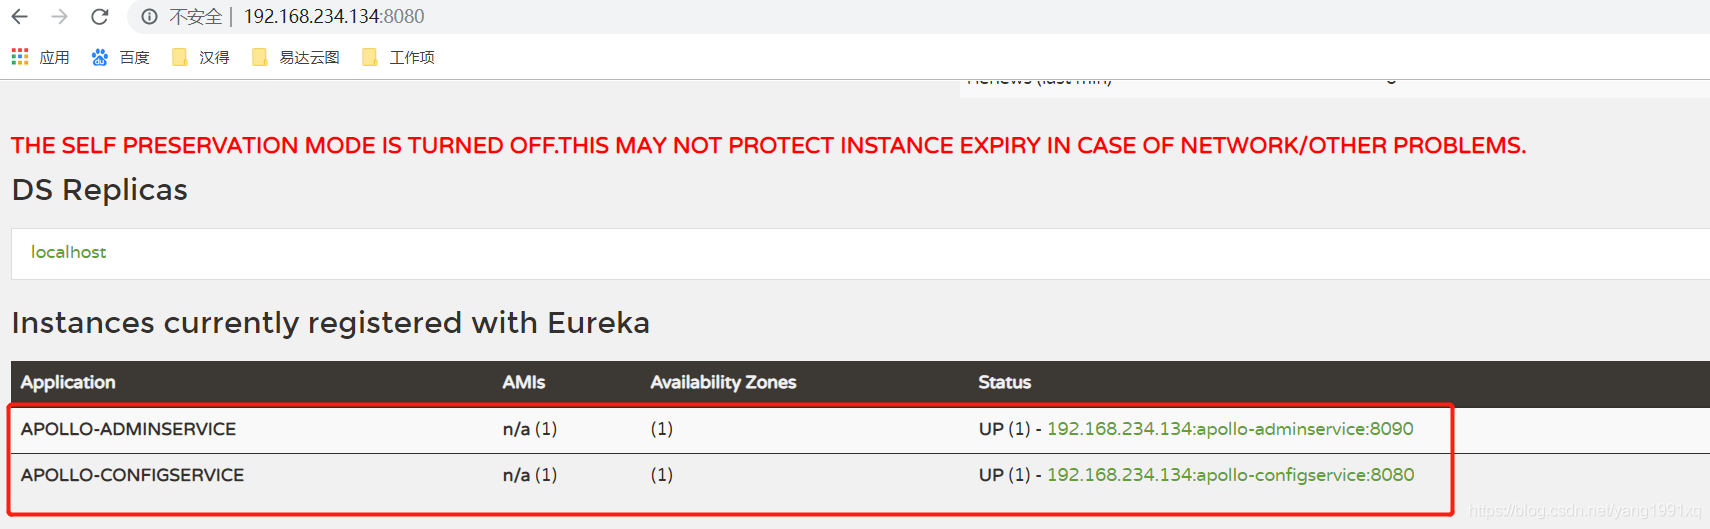
获取DEV环境adminservice在注册中心的实例:
UAT环境的configservice,adminservice注册到18080端口: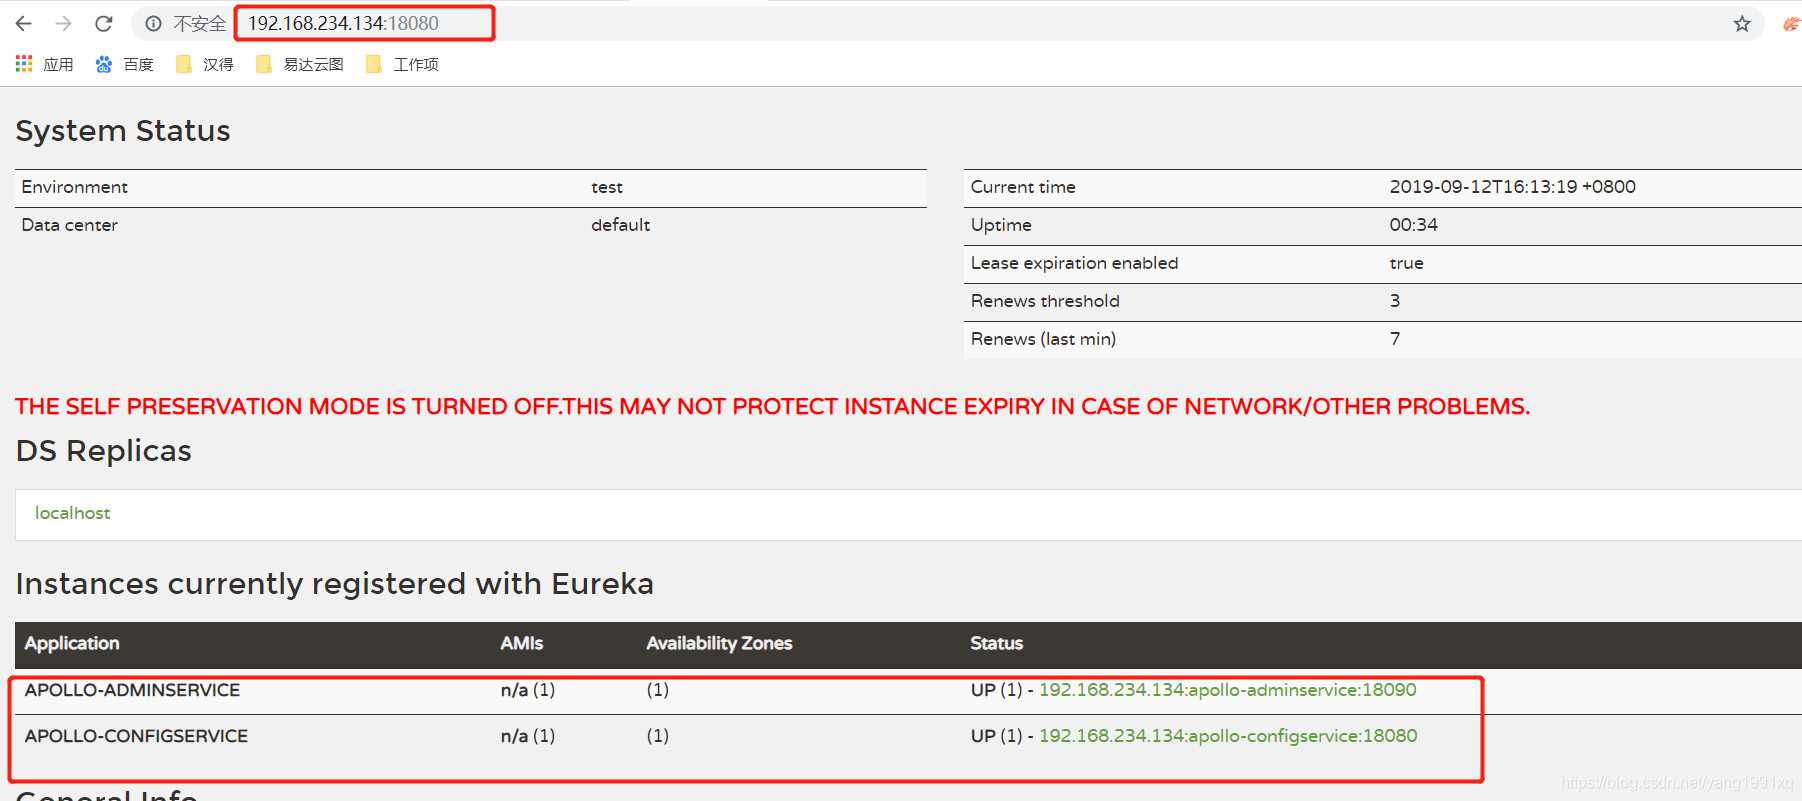
获取UAT环境adminservice在注册中心的实例:
通过Portal管理DEV,UAT等多套环境的配置信息。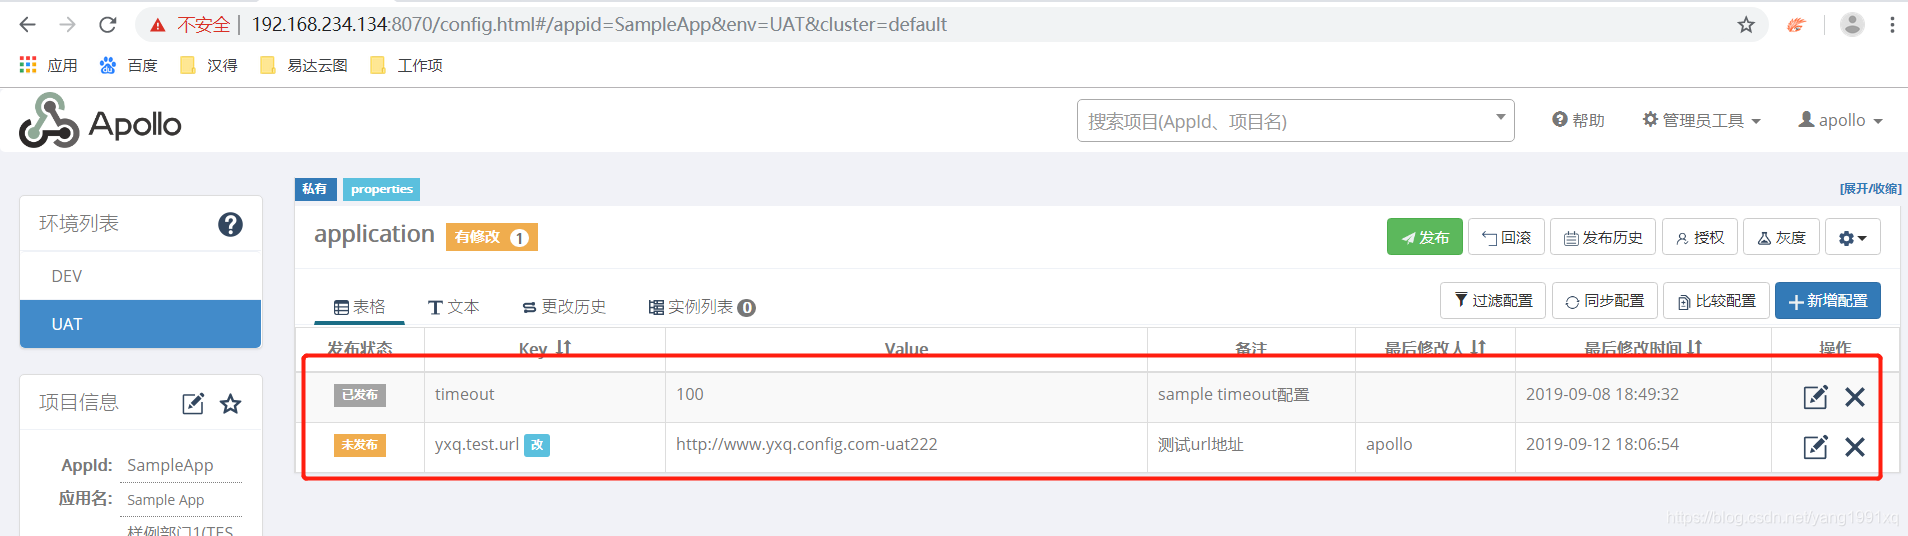
- 多环境配置步骤
1.打包
在apollo github下载下来的包,有4个比较重要的文件夹:
apollo-adminservice: adminservice的源码
apollo-configservice:configservice的源码
apollo-portal:portal的源码
scripts:初始化数据的脚本,以及自动打包的脚本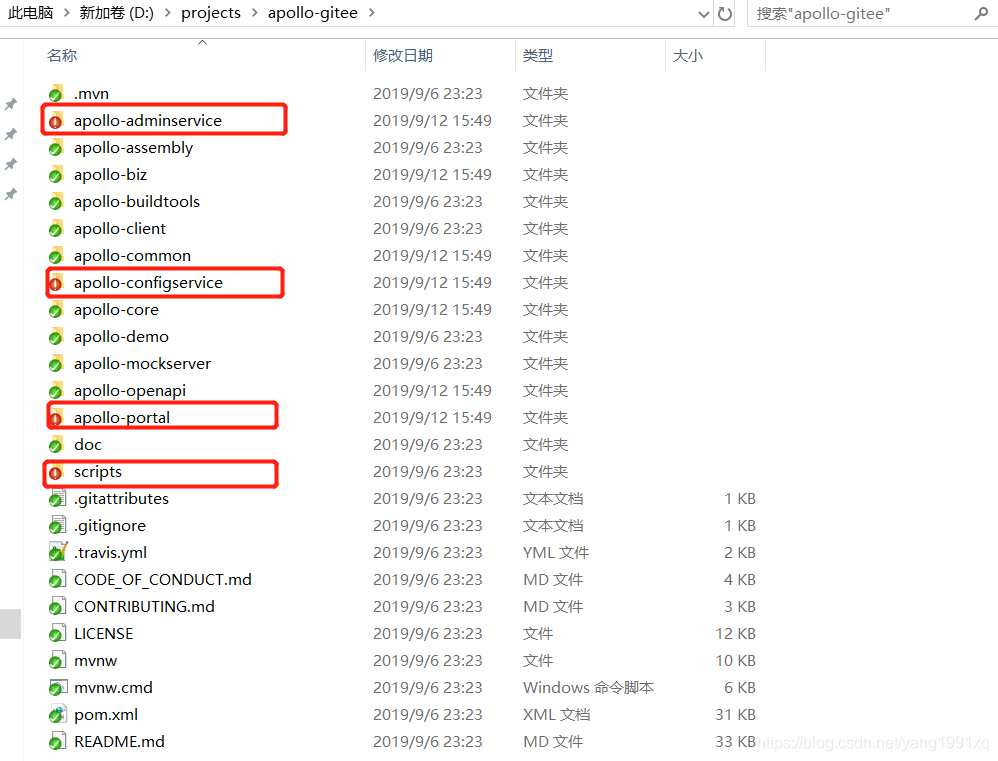
如果有多套环境,则在使用scripts打包生成部署包之前,需要修改源码。
比如DEV使用默认源码时,则UAT环境需要做以下修改,避免与DEV环境冲突:
apollo-configservice项目源码修改如下:
\apollo-configservice\src\main\config\apollo-configservice.conf:设置UAT环境configservice日志目录
\apollo-configservice\src\main\config\application-github.properties:设置uat环境configservice数据库
\apollo-configservice\src\main\resources\application.yml:设置configservice在eureka中注册的appId,以及服务启用的端口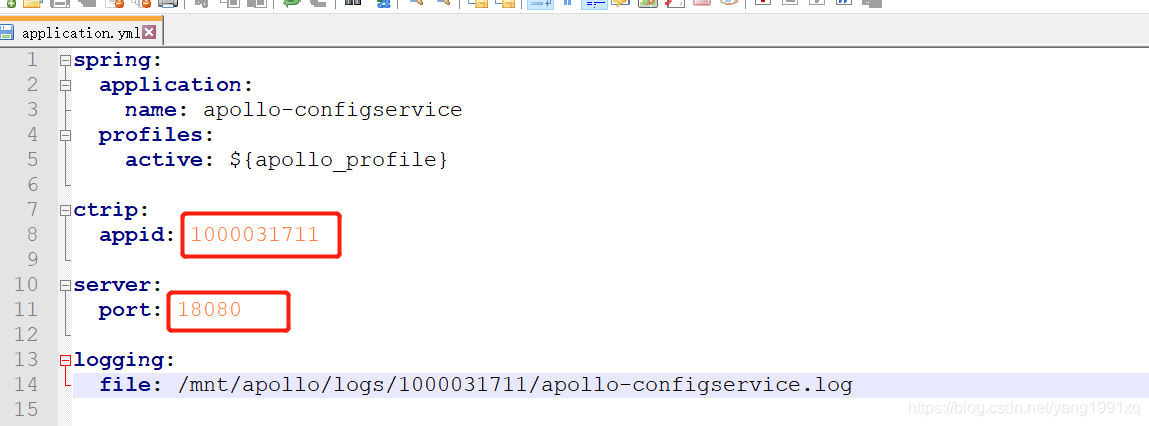
\apollo-configservice\src\main\resources\configservice.properties
apollo-adminservice项目源码修改如下:
\apollo-adminservice\src\main\config\apollo-adminservice.conf:设置uat环境adminservice的日志目录。
\apollo-adminservice\src\main\config\application-github.properties:设置uat环境adminservice使用的config数据库:
\apollo-adminservice\src\main\resources\adminservice.properties:设置configservice在eureka中注册的appId,以及服务启用的端口
\apollo-adminservice\src\main\resources\application.yml: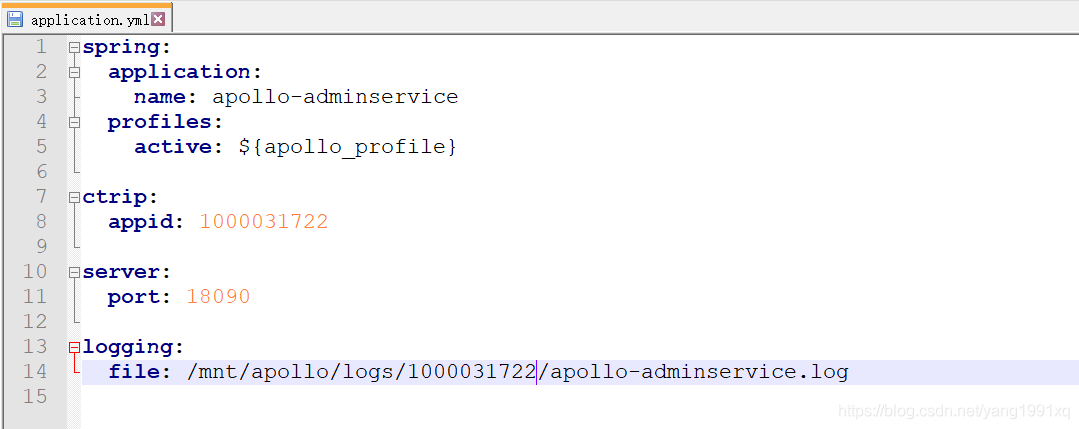
修改\scripts\build.bat: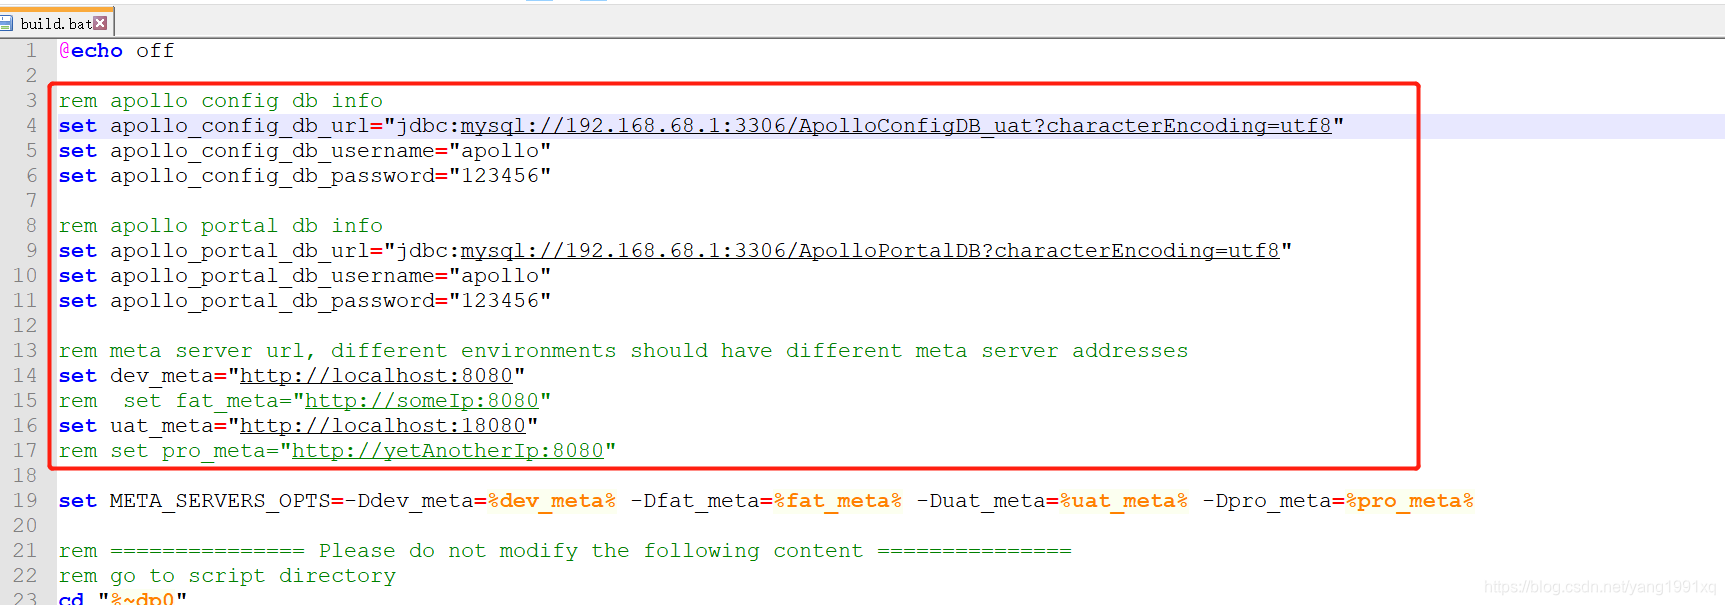
服务部署目录: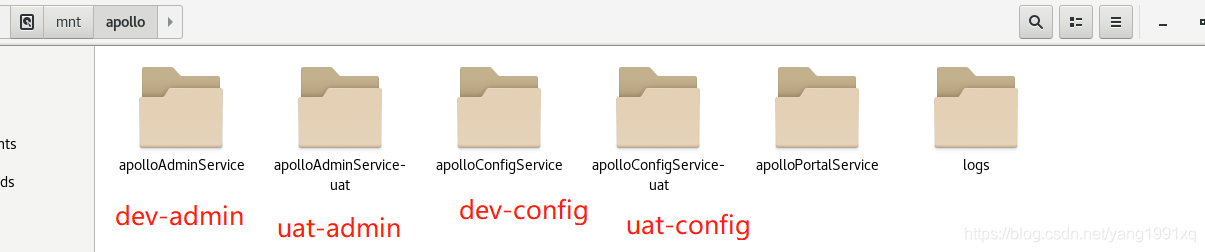
服务日志所在目录: