1.什么是Spring Security
Spring Security是一个能够为基于Spring的企业应用系统提供声明式(注解)的安全访问控制解决方案的安全框架。它提供了一组可以在Spring应用上下文中配置的Bean,充分利用了Spring IoC,DI(控制反转Inversion of Control ,DI:Dependency Injection 依赖注入)和AOP(面向切面编程)功能,为应用系统提供声明式的安全访问控制功能,减少了为企业系统安全控制编写大量重复代码的工作。
2.Spring Security 的基本使用
2.1导入依赖
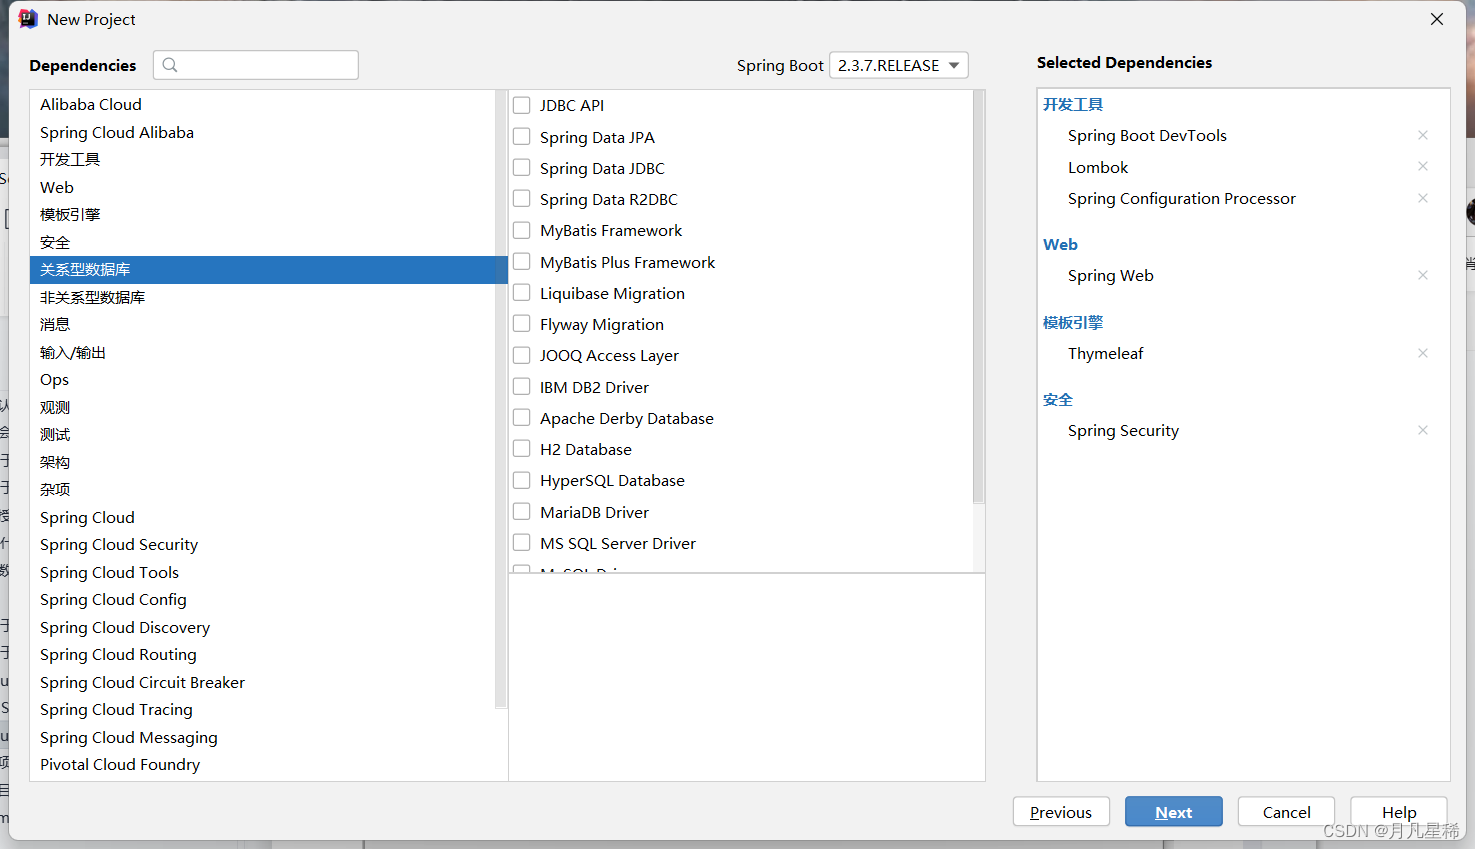
2.启动类添加注解

2.2简单测试


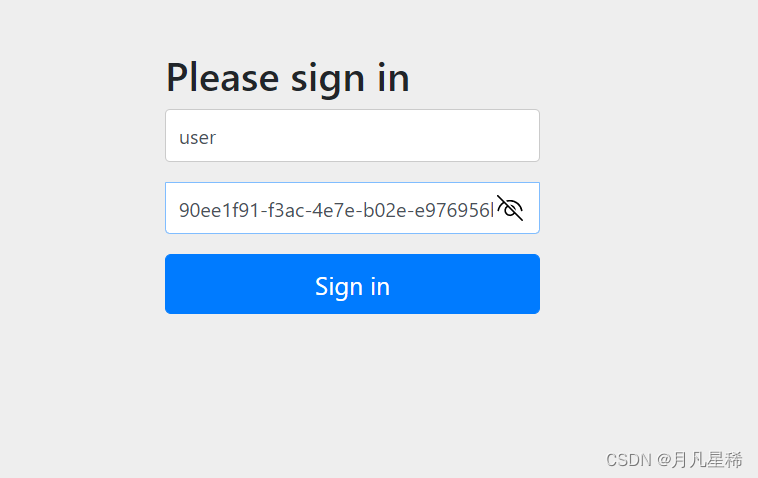
3 好了基础的使用你已经会了,开始配置我们自己的用户名和密码

3.2通过继承WebSecurityConfigurerAdapter设置用户名和密码
3.2.1先设置加密 这个是因为spring Sercurity强制要使用密码加密,当然我们也可以不加密,但是官方要求是不管你是否加密,都必须配置一个类似Shiro的凭证匹配器
@Bean
 public PasswordEncoder passwordEncoder(){
        return new BCryptPasswordEncoder();
} @Override
protected void configure(AuthenticationManagerBuilder auth) throws Exception {
auth.inMemoryAuthentication()
.withUser("yn")//用户名
.password(passwordEncoder().encode("1104"))//密码
.roles("admin")//权限
.and()
.withUser("jay")
.password("1979118")
.roles("boss");
}3.2.3效果图

4.到这你已经会简单的创建自己的用户信息,那么让查看用户信息
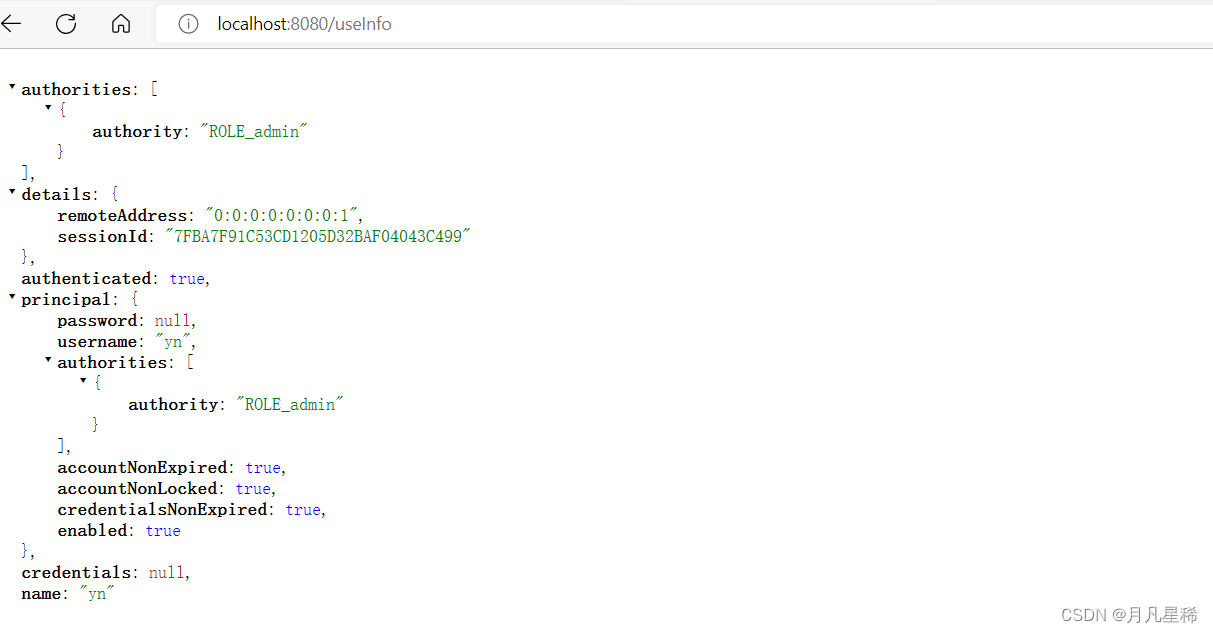
4.1方法一:使用 Principal接口返回值,注意类上的是RestController注解
    @GetMapping("useInfo")
    public Principal getPrincipal(Principal principal){
        return principal;
    }
4.2方法二:得到保存在ThreadLocal 中的安全上下文对象,然后返回json格式的数据
    @GetMapping("userInfo2")
    public Object getUserInfo2() {
        Authentication authentication = SecurityContextHolder.getContext().getAuthentication();
        return authentication;
    }
5,到这简单的使用已经会了,那么我们开始配置管理权限
5.1controller层,依旧使用RestController
    @PostMapping("login")
    public String login(){
        return "登录成功";
    }
    @GetMapping("query")
    public String query(){
        return "这是查看";
    }
    @GetMapping("delete")
    public String delete(){
        return "这是删除";
    }
    @GetMapping("add")
    public String add(){
        return "这是添加";
    }
    @GetMapping("update")
    public String update(){
        return "这是更新";
    }
配置我們的管理信息
    //多用户配置
    @Override
    protected void configure(AuthenticationManagerBuilder auth) throws Exception {
        auth.inMemoryAuthentication()
                .withUser("yn")
                .password(passwordEncoder().encode("1104"))
                .authorities("use:add","use:del")
                .and()
                .withUser("ky")
                .password(passwordEncoder().encode("1234"))
                .authorities("use:add","use:del","use:que","use:upd");
    }

    @Override
    protected void configure(HttpSecurity http) throws Exception {
        //设置登录和无权限界面,给一个表单登陆 就是我们的登录页面,登录成功或者失败后走我们的url
        http.formLogin().successForwardUrl("/login").failureForwardUrl("/403");
        http.authorizeRequests()
                // 匹配哪些url,需要哪些权限才可以访问 当然我们也可以使用链式编程的方式
                .antMatchers("/add").hasAnyAuthority("use:add")
                .antMatchers("/update").hasAnyAuthority("use:upd")
                .antMatchers("/delete").hasAnyAuthority("use:del")
                .antMatchers("/query").hasAnyAuthority("use:que")
                .anyRequest().authenticated();
    }

    //加密
    @Bean
    public PasswordEncoder passwordEncoder(){
        return new BCryptPasswordEncoder();
}6.方法上的權限
6.1controller的方法上贴上注解@PreAuthorrize
  @PostMapping("login")
    public String login(){
        return "登录成功";
    }
    @GetMapping("query")
    @PreAuthorize("hasAnyAuthority('use:que')")
    public String query(){
        return "这是查看";
    }
    @GetMapping("delete")
    @PreAuthorize("hasAnyAuthority('use:del')")
    public String delete(){
        return "这是删除";
    }
    @GetMapping("add")
    @PreAuthorize("hasAnyAuthority('use:add')")
    public String add(){
        return "这是添加";
    }
    @GetMapping("update")
    @PreAuthorize("hasAnyAuthority('use:upd')")
    public String update(){
        return "这是更新";
    }
当然你也可以组合条件使用 ‘or’或者‘and’:
@PreAuthorize("hasRole('ADMIN') or hasAuthority('user:admin1')")
6.2配置信息
 //多用户配置
    @Override
    protected void configure(AuthenticationManagerBuilder auth) throws Exception {
        auth.inMemoryAuthentication()
                .withUser("yn")
                .password(passwordEncoder().encode("1104"))
                .authorities("use:add","use:del")
                .and()
                .withUser("ky")
                .password(passwordEncoder().encode("1234"))
                .authorities("use:add","use:del","use:que","use:upd");
    }

    @Override
    protected void configure(HttpSecurity http) throws Exception {
        //设置登录和无权限界面,给一个表单登陆 就是我们的登录页面,登录成功或者失败后走我们的url
        http.formLogin().successForwardUrl("/login").failureForwardUrl("/403");
        http.authorizeRequests()
//                // 匹配哪些url,需要哪些权限才可以访问 当然我们也可以使用链式编程的方式
//                .antMatchers("/add").hasAnyAuthority("use:add")
//                .antMatchers("/update").hasAnyAuthority("use:upd")
//                .antMatchers("/delete").hasAnyAuthority("use:del")
//                .antMatchers("/query").hasAnyAuthority("use:que")
                .anyRequest().authenticated();//所有访问都得获得权限
    }

    //加密
    @Bean
    public PasswordEncoder passwordEncoder(){
        return new BCryptPasswordEncoder();
}最后在配置类上加@EnableGlobalMethodSecurity(prePostEnabled = true)注解
@Configuration
@EnableGlobalMethodSecurity(prePostEnabled = true)//开启全局方法级别的验证
public class SecurityConfiguration extends WebSecurityConfigurerAdapter {
值得注意的是:

