系列文章目录
Vue基础篇一:编写第一个Vue程序
Vue基础篇二:Vue组件的核心概念
Vue基础篇三:Vue的计算属性与侦听器
Vue基础篇四:Vue的生命周期(秒杀案例实战)
Vue基础篇五:Vue的指令
Vue基础篇六:Vue使用JSX进行动态渲染
Vue提高篇一:使用Vuex进行状态管理
Vue提高篇二:使用vue-router实现静态路由
Vue提高篇三:使用vue-router实现动态路由
Vue提高篇四:使用Element UI组件库
Vue提高篇五:使用Jest进行单元测试
Vue提高篇六: 使用Vetur+ESLint+Prettier插件提升开发效率
Vue实战篇一: 使用Vue搭建注册登录界面
Vue实战篇二: 实现邮件验证码发送
Vue实战篇三:实现用户注册
Vue实战篇四:创建多步骤表单
Vue实战篇五:实现文件上传
Vue实战篇六:表格渲染动态数据
Vue实战篇七:表单校验
Vue实战篇八:实现弹出对话框进行交互
Vue实战篇九:使用省市区级联选择插件
Vue实战篇十:响应式布局
Vue实战篇十一:父组件获取子组件数据的常规方法
Vue实战篇十二:多项选择器的实际运用
Vue实战篇十三:实战分页组件
Vue实战篇十四:前端excel组件实现数据导入
Vue实战篇十五:表格数据多选在实际项目中的技巧
Vue实战篇十六:导航菜单
Vue实战篇十七:用树型组件实现一个知识目录
Vue实战篇十八:搭建一个知识库框架
Vue实战篇十九:使用printjs打印表单
Vue实战篇二十:自定义表格合计
Vue实战篇二十一:实战Prop的双向绑定
Vue实战篇二十二:生成二维码
Vue实战篇二十三:卡片风格与列表风格的切换
Vue实战篇二十四:分页显示
Vue实战篇二十五:使用ECharts绘制疫情折线图
Vue实战篇二十六:创建动态仪表盘
Vue实战篇二十七:实现走马灯效果的商品轮播图
Vue实战篇二十八:实现一个手机版的购物车
Vue实战篇二十九:模拟一个简易留言板
Vue项目实战篇一:实现一个完整的留言板(带前后端源码下载)
Vue实战篇三十:实现一个简易版的头条新闻
Vue实战篇三十一:实现一个改进版的头条新闻
Vue实战篇三十二:实现新闻的无限加载
Vue实战篇三十三:实现新闻的浏览历史
一、背景
二、实现登录功能
- 我们把原来的我的页面进行改造,加入一个是否登录状态,如果状态为已登录,则显示浏览历史、收藏等信息,如果状态为未登录,则显示登录页面。
- 注意,本文仅模拟登录的功能,没有进行后台验证(后续将提供完整的前后端功能)

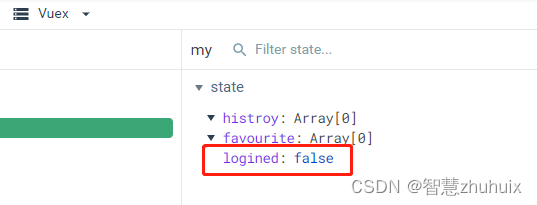
2.1 添加登录状态的状态管理器
const my = {
  state: {
	...
    // 是否已登录
    logined: false
  },

  mutations: {

    ...
    SET_LOGIN: (state, login) => {
      state.logined = login
    }

  },

  actions: {
    ...
    setLogin({ commit }, login) {
      return new Promise(resolve => {
        commit('SET_LOGIN', login)
      })
    }
  }
}

export default my
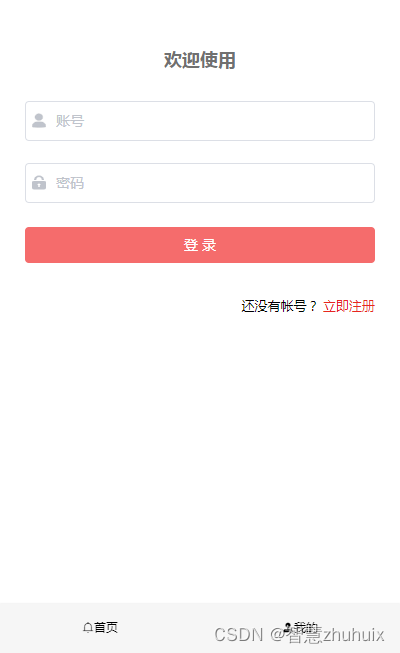
2.2 编写登录表单
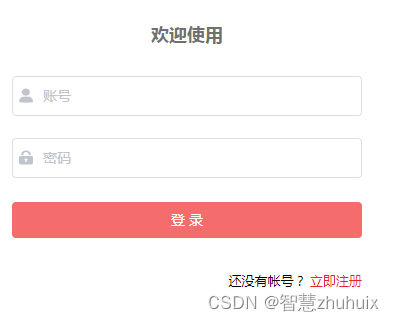
- 以下是改造后完整源码
<template>
   <!-- 已登录状态显示我的信息 -->
  <div v-if="logined == true" class="content">
    <div class="header">
      <div class="user">
        <img class="avatar" src="@/assets/images/avatar.png">
        <p class="user-name">{{ loginForm.username }}</p>
        <img class="right" src="@/assets/images/right.png">
      </div>
      <div class="info">
        <div class="histroy" @click="toHistroy()">
          <span class="histroy-count">{{ histroryCount }}</span>
          <span class="histroy-text">{{ '浏览历史' }}</span>
        </div>
        <div class="fav">
          <span class="fav-count">{{ favCount }}</span>
          <span class="fav-text">{{ '我的收藏' }}</span>
        </div>
      </div>
    </div>
    <div class="logout">
      <el-button
        size="medium"
        type="danger"
        style="width: 90%"
        @click.native.prevent="logout"
      >
        <span>退 出 登 录</span>
      </el-button>
    </div>
  </div>
  <!-- 未登录状态显示登录页面 -->
  <div v-else>
    <el-form
      ref="loginForm"
      :model="loginForm"
      :rules="loginRules"
      label-position="left"
      label-width="0px"
      class="login-form"
    >
      <h2 class="title">欢迎使用</h2>
      <el-form-item prop="username">
        <el-input
          v-model="loginForm.username"
          type="text"
          auto-complete="off"
          placeholder="账号"
        >
          <svg-icon
            slot="prefix"
            icon-class="user"
            class="el-input__icon input-icon"
          />
        </el-input>
      </el-form-item>
      <el-form-item prop="password">
        <el-input
          v-model="loginForm.password"
          type="password"
          auto-complete="off"
          placeholder="密码"
          @keyup.enter.native="handleLogin"
        >
          <svg-icon
            slot="prefix"
            icon-class="password"
            class="el-input__icon input-icon"
          />
        </el-input>
      </el-form-item>
      <el-form-item style="width: 100%">
        <el-button
          :loading="loading"
          size="medium"
          type="danger"
          style="width: 100%"
          @click.native.prevent="handleLogin"
        >
          <span v-if="!loading">登 录</span>
          <span v-else>登 录 中...</span>
        </el-button>
      </el-form-item>

      <p class="register">
        <!-- <span class="memo">请使用Chrome,Firefox,IE 10+  </span> -->
        还没有帐号?
        <a href="/register" type="primary">立即注册</a>
      </p>
    </el-form>
  </div>
</template>

<script>

export default {
  data() {
    return {
      loginForm: {
        username: '',
        password: ''
      },
      loginRules: {
        username: [
          { required: true, trigger: 'blur', message: '用户名不能为空' }
        ],
        password: [
          { required: true, trigger: 'blur', message: '密码不能为空' }
        ]
      },
      loading: false
    }
  },
  computed: {
    histroryCount() {
      return this.$store.state.my.histroy.length
    },
    favCount() {
      return this.$store.state.my.favourite.length
    },
    // 从状态管理器中获取登录状态
    logined() {
      return this.$store.state.my.logined
    }
  },
  methods: {
    // 模拟登录成功
    handleLogin() {
      this.$refs.loginForm.validate((valid) => {
        if (valid) {
          this.loading = true
          this.$store.commit('SET_LOGIN', true)
          this.loading = false
        } else {
          console.log('error submit!!')
          return false
        }
      })
    },
    // 模拟注销登录
    logout() {
      this.$store.commit('SET_LOGIN', false)
      this.loginForm.username = ''
      this.loginForm.password = ''
    },
    toHistroy() {
      if (this.histroryCount > 0) {
        this.$router.push('/list')
      }
    }
  }
}

</script>

<style lang="scss"  scoped>
.login-form {
  border-radius: 6px;
  background: #ffffff;
  width: 100%;
  padding: 25px 25px 5px 25px;
  margin-top: 25px;
  .el-input {
    height: 38px;
    input {
      height: 38px;
    }
  }
  .input-icon {
    height: 39px;
    width: 14px;
    margin-left: 2px;
  }
}

.title {
  margin: 0 auto 30px auto;
  text-align: center;
  color: #707070;
}

.register {
  float: right;
  font-size: 13px;
  // color: rgb(24, 144, 255);
}
a {
  color: #e72521;
  text-decoration: none;
  background-color: transparent;
  outline: none;
  cursor: pointer;
  transition: color 0.3s;
}
a:hover {
  color: #e72521;
}

.content {
  width: 100%;
  height: 100%;
  background-color: rgb(252, 248, 248);
}
.header {
  width: 100%;
  height: 5.33rem;
  background-color: #fff;
}

.user {
  margin-top: 0.5rem;
  overflow: hidden;
  padding: 0.5rem;
  height: 2.5rem;
  width: 100%;
}

.avatar {
  float: left;
  width: 1.8rem;
  height: 1.8rem;
  border-radius: 50%;
}

.user-name {
  float: left;
  margin-top: 0.6rem;
  margin-left: 0.5rem;
  color: #404040;
  font-size: 18px;
}

.right {
  float: right;
  width: 0.8rem;
  height: 0.8rem;
  margin-top: 0.6rem;
}

.info {
  float: left;
  padding: 1rem;
  height: 2.5rem;
  width: 100%;
}
.histroy {
  display: flex;
  float: left;
  flex-direction: column;
  align-items: center;
  justify-content: center;
  cursor: pointer;
}

.histroy-count {
  color: #404040;
  font-size: 18px;
}

.histroy-text {
  margin-top: 0.1rem;
  color: #9b9191;
  font-size: 14px;
}

.fav {
  display: flex;
  float: right;
  flex-direction: column;
  align-items: center;
  justify-content: center;
  cursor: pointer;
}

.fav-count {
  color: #404040;
  font-size: 18px;
}

.fav-text {
  margin-top: 0.1rem;
  color: #9b9191;
  font-size: 14px;
}

.logout {
  display: flex;
  align-items: center;
  justify-content: center;
  margin-top: 2rem;

}
</style>
2.3 动图演示

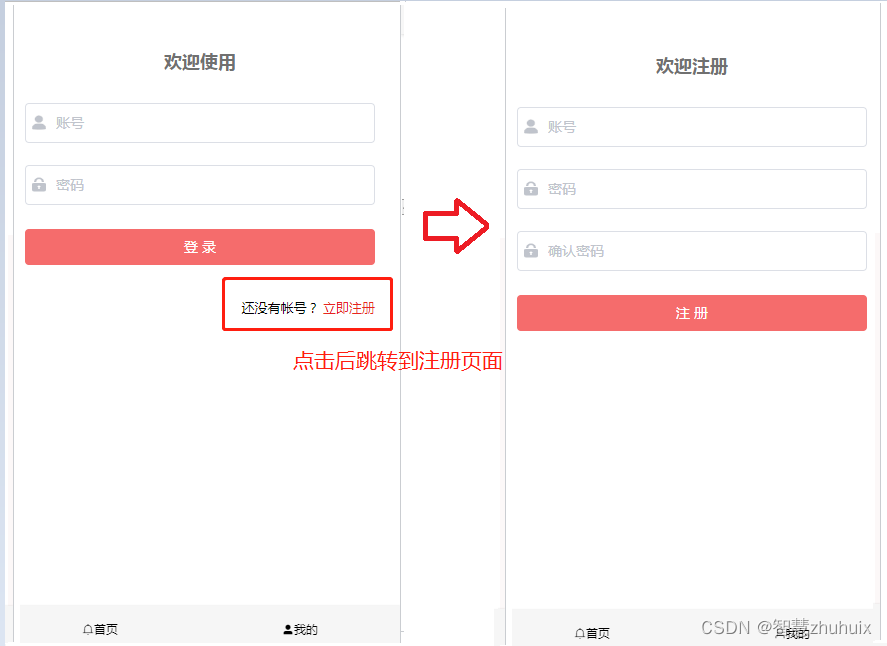
三、添加新的注册页面
1、用户在登录前,需要向系统进行注册。
2、注册时输入用户名,密码(密码需两次输入一致)
3、本文只实现模拟注册(后续将提供完整的前后端功能)
<template>
  <div>
    <el-form
      ref="signupForm"
      :model="signupForm"
      :rules="signupRules"
      label-position="left"
      label-width="0px"
      class="login-form"
    >
      <h2 class="title">欢迎注册</h2>
      <el-form-item prop="username">
        <el-input
          v-model="signupForm.username"
          type="text"
          auto-complete="off"
          placeholder="账号"
        >
          <svg-icon
            slot="prefix"
            icon-class="user"
            class="el-input__icon input-icon"
          />
        </el-input>
      </el-form-item>
      <el-form-item prop="password">
        <el-input
          v-model="signupForm.password"
          type="password"
          auto-complete="off"
          placeholder="密码"
        >
          <svg-icon
            slot="prefix"
            icon-class="password"
            class="el-input__icon input-icon"
          />
        </el-input>
      </el-form-item>
      <el-form-item prop="password2">
        <el-input
          v-model="signupForm.password2"
          type="password"
          auto-complete="off"
          placeholder="确认密码"
          @keyup.enter.native="handleSignup"
        >
          <svg-icon
            slot="prefix"
            icon-class="password"
            class="el-input__icon input-icon"
          />
        </el-input>
      </el-form-item>
      <el-form-item style="width: 100%">
        <el-button
          :loading="loading"
          size="medium"
          type="danger"
          style="width: 100%"
          @click.native.prevent="handleSignup"
        >
          <span v-if="!loading">注 册</span>
          <span v-else>注 册 中...</span>
        </el-button>
      </el-form-item>
    </el-form>
  </div>
</template>

<script>

export default {
  data() {
    // 二次密码输入校验
    var checkpass = (rule, value, callback) => {
      console.log(value)
      if (value === '') {
        callback(new Error('请再次输入密码'))
      } else if (value !== this.signupForm.password) {
        callback(new Error('两次输入密码不一致'))
      } else {
        callback()
      }
    }
    return {
      signupForm: {
        username: '',
        password: '',
        password2: ''
      },
      signupRules: {
        username: [
          { required: true, trigger: 'blur', message: '用户名不能为空' }
        ],
        password: [
          { required: true, trigger: 'blur', message: '密码不能为空' }
        ],
        password2: [
          { trigger: 'blur', validator: checkpass }
        ]

      },
      loading: false
    }
  },
  methods: {
    // 模拟注册成功
    handleSignup() {
      this.$refs.signupForm.validate((valid) => {
        if (valid) {
          this.loading = true
          this.$store.commit('SET_LOGIN', true)
          this.loading = false
          this.$router.push('/my')
        } else {
          console.log('error signup!!')
          return false
        }
      })
    }
  }
}

</script>

<style lang="scss"  scoped>
.login-form {
  border-radius: 6px;
  background: #ffffff;
  width: 100%;
  padding: 25px 25px 5px 25px;
  margin-top: 25px;
  .el-input {
    height: 38px;
    input {
      height: 38px;
    }
  }
  .input-icon {
    height: 39px;
    width: 14px;
    margin-left: 2px;
  }
}

.title {
  margin: 0 auto 30px auto;
  text-align: center;
  color: #707070;
}

</style>
四、效果演示

五、源码地址
- 请关注文末的微信公众号,回复“新闻客户端”。