前言
近期对自己负责的项目进行优化,但 webpack 这块一直有着茫然的不熟悉,本着对 webpack 打包配置及项目优化的进一步理解和学习,所以记录下自己学习的流程,加深印象,有深入的理解后再进行补充。另外,对不同版本的 webpack(比如 webpack4 和 webpack5),在一些配置的参考上会略有不同。
此测试项目已上传至gitee,有错误及不准确之处,欢迎评论指正~
一、初始化及安装
1. 初始化项目
新建文件夹 demo_webpack,在此目录下执行命令 npm init,执行后项目文件夹里会生成包管理器 package.json。
$ npm init
2. 安装打包工具 webpack
# 安装webpack脚手架
$ npm i webpack-cli -D

# 安装webpack
$ npm i webpack -D
二、基础配置
1. 配置出入口
(1)配置入口
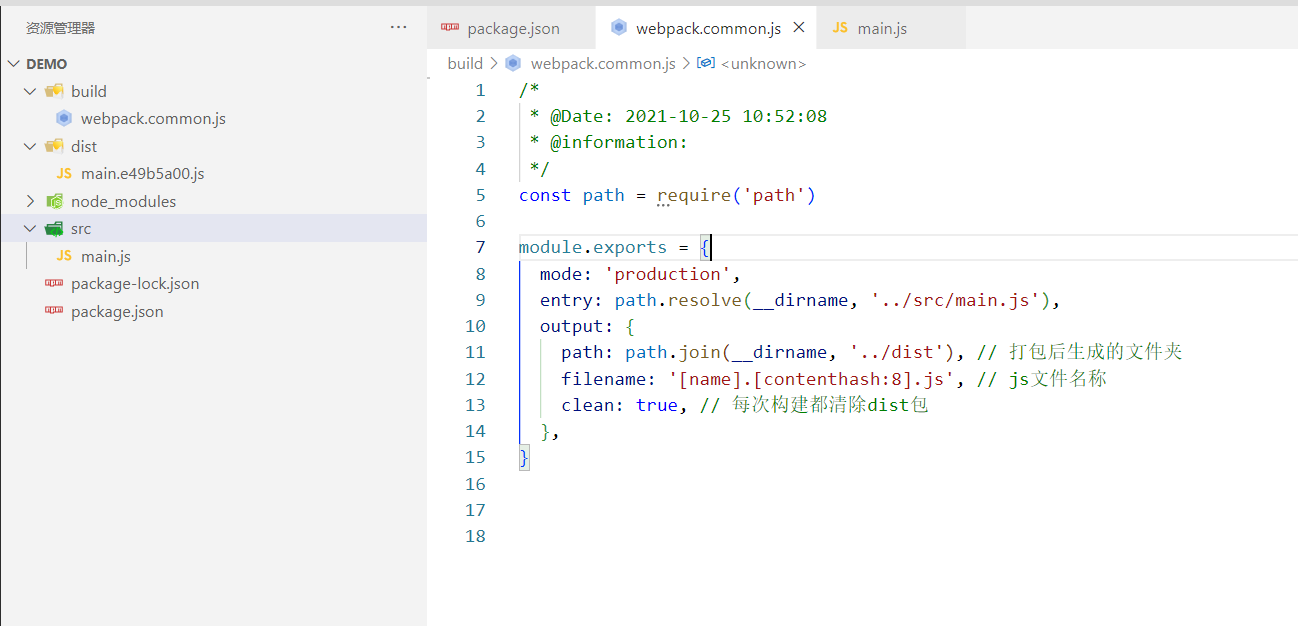
新建 build/webpack.common.js
// webpack.common.js
const path = require('path')

module.exports = {
  entry: path.resolve(__dirname,'../src/main.js'),// 入口文件
}
(2)配置出口
// webpack.common.js
const path = require('path')

module.exports = {
  output: {
    path: path.join(__dirname,'../dist'),// 打包后生成的文件夹
    filename: '[name].[contenthash:8].js',// js文件名称
    clean: true,// 每次构建都清除dist包
  },}
2. 添加 webpack 构建脚本
// package.json

"scripts": {
  "build":"webpack --config build/webpack.common.js",}
最后可以运行打包命令
$ npm run build
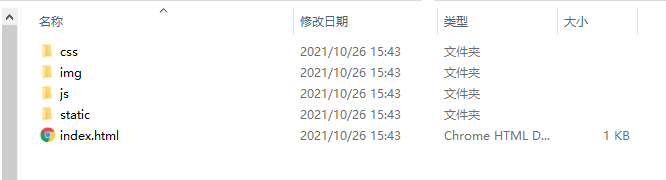
打包后目录结构
三、插件(plugins)
插件(Plugins)是用来拓展 Webpack 功能的,包括:打包优化、资源管理、注入环境变量。插件使用:只需要 require()它,然后把它添加到 plugins 数组中。
1. html-webpack-plugin
该插件将为你生成一个 HTML5 文件, 其中包括使用 script 标签的 body 中的所有 webpack 包。 只需添加插件到你的 webpack 配置如下
(1)安装
$ npm i html-webpack-plugin -D
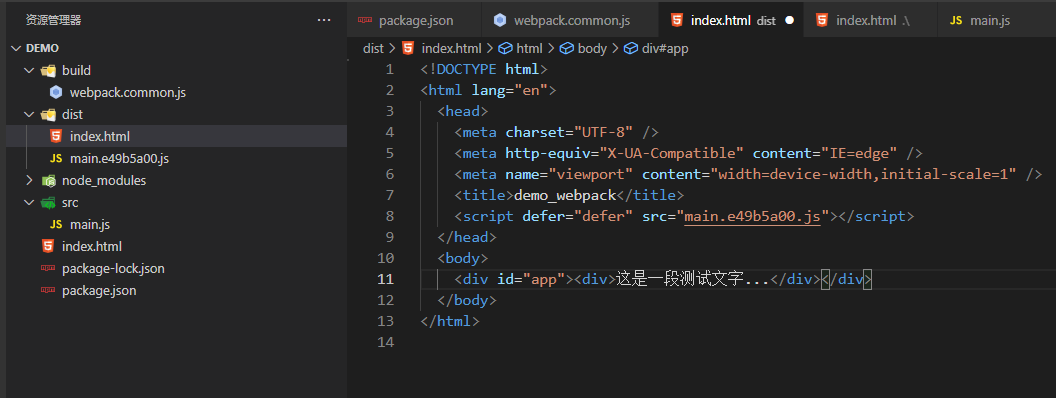
(2)新建 index.html
<!-- index.html -->
<!DOCTYPE html>
<html lang="en">
  <head>
    <meta charset="UTF-8" />
    <meta http-equiv="X-UA-Compatible" content="IE=edge" />
    <meta name="viewport" content="width=device-width,initial-scale=1.0" />
    <title>demo_webpack</title>
  </head>
  <body>
    <div id="app">
      <div>这是一段测试文字...</div>
    </div>
  </body>
</html>
(3)配置
// webpack.common.js
const HtmlWebpackPlugin = require('html-webpack-plugin')

module.exports = {
  plugins: [
    new HtmlWebpackPlugin({
      template: path.resolve(__dirname,'../index.html'),// html模板
      filename: 'index.html',}),],}
(4)运行
$ npm run build
打包完成后可以看到 dist 下多了 index.html 文件,并且打包生成的 js 文件在 index.html 中通过 script 标签被引入。
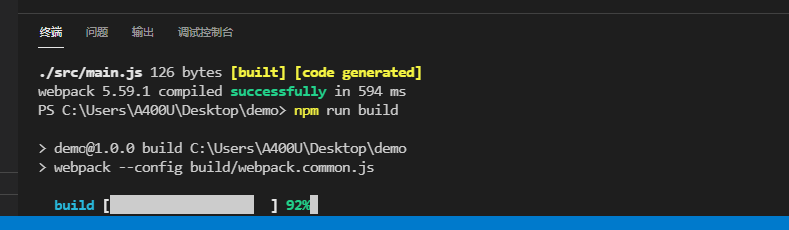
2. progress-bar-webpack-plugin
打包时可以显示打包进度
(1)安装
$ npm i progress-bar-webpack-plugin -D
(2)配置
// webpack.common.js
const ProgressBarPlugin = require('progress-bar-webpack-plugin')

module.exports = {
  plugins: [
    new ProgressBarPlugin({
      complete: '█',}
(3)运行
$ npm run build
可以看到执行打包命令后显示出了打包进度...
四、loader
webpack 使 loader 能够对文件进行预处理,用于对模块的源代码进行转换,loader 都在 module 下的 rules 中配置。
rules 是一个数组,数组每一项是一个 js 对象,该对象有两个关键属性 test 和 use。loader 配置项:
- test: 是一个正则表达式或正则表达式数组,模块文件名与正则匹配的会被 use 里的 loader 处理(必选)
- loader 调用 loader 的名称 / use 链式调用 loader (必选,两种调用方式选其一)
- exclude: 有一些文件不想被正则匹配到的 loader 处理。值是字符串或正则表达式,字符串需要是绝对路径(可选)
- include: 表示的意思正好与 exclude 相反,它表示只对匹配到的文件处理(可选)
- options: 为 loader 提供额外的参数配置(可选)
1.css-loader 和 style-loader
用于加载解析 css
css-loader: 解释(interpret) @import 和 url() ,会 import/require() 后再解析(resolve)它们
style-loader: 将 CSS 注入到 JavaScript 中,通过 DOM 操作控制 css
(1)安装
$ npm i css-loader style-loader -D
(2)配置
// webpack.common.js

module.exports = {
  module: {
    rules: [
      {
        test: /\.css$/,use: ['style-loader','css-loader'],//从右向左解析
      },},}
2.url-loader 和 file-loader
加载 images 图像,字体,视频资源
url-loader: 功能类似于 file-loader,但是在文件大小(单位 byte)低于指定的限制时,可以返回一个 DataURL
file-loader: 默认情况下,生成的文件的文件名就是文件内容的 MD5 哈希值并会保留所引用资源的原始扩展名
(1)安装
$ npm i url-loader file-loader -D
(2)配置
// webpack.common.js

module.exports = {
  module: {
    rules: [
      {
        test: /\.(png|jpe?g|gif|svg|ico)(\?.*)?$/,// 图片、gif、svg、ico资源
        type: 'javascript/auto',// 解决asset重复
        loader: 'url-loader',// 将文件转为base64内联到bundle中,如果超出限制的大小,则使用file-loader将文件移动到输出的目录中
        options: {
          esModule: false,// 关闭es6模块化解析
          limit: 10000,// 图片大于10kb,就会被base64处理
          name: 'img/[name].[hash:7].[ext]',// [hash:10]取图片的hash的前10位,[ext]取文件原来扩展名
        },{
        test: /\.(mp4|webm|ogg|mp3|wav|flac|aac)(\?.*)?$/,// 视频资源
        loader: 'url-loader',options: {
          limit: 10000,name: 'media/[name].[hash:7].[ext]',{
        test: /\.(woff2?|eot|ttf|otf)(\?.*)?$/i,// 字体资源
        loader: 'url-loader',name: 'fonts/[name].[hash:7].[ext]',}
(3)拓展
在 webpack5 中,内置了资源模块(asset module),代替了 file-loader 和 url-loader
例如,处理 png 图片资源,如下配置:
module.exports = {
  module: {
    rules: [
      {
        test: /\.png/,type: 'asset/resource',generator: {
          filename: 'img/[name].[hash:7].[ext]',}
3. babel-loader
解析 es6,jsx
Babel 其实是几个模块化的包,使用@区分其他非官方包:
- @babel/core:babel 核心库
- babel-loader:webpack 的 babel 插件,让我们可以在 webpack 中运行 babel
- @babel/preset-env:将 ES6 转换为向后兼容的 JavaScript
- @babel/plugin-transform-runtime:处理 async,await、import()等语法关键字的帮助函数
(1)安装
$ npm i @babel/core babel-loader @babel/preset-env @babel/plugin-transform-runtime -D
(2)配置
// webpack.common.js

module.exports = {
  module: {
    rules: [
      {
        test: /(\.jsx|\.js)$/,use: ['babel-loader'],exclude: /node_modules/,}
(3)添加 babel 额外配置项
在根目录下新建.babelrc,配置如下
{
  "presets": [
    "@babel/preset-env"
  ],"plugins": [
    "@babel/plugin-transform-runtime"
  ]
}
3. html-loader
将 HTML 导出为字符串,处理 HTML 中引入的静态资源。当编译器需要时,将压缩 HTML 字符串
(1)安装
$ npm i html-loader -D
(2)配置
// webpack.common.js

module.exports = {
  module: {
    rules: [
      {
        test: /\.html$/i,loader: 'html-loader',options: {
          esModule: false,// 在开发环境中启用false
        },}
五、搭建环境
1. 搭建本地环境服务器
(1)安装
$ npm i webpack-dev-server -D
(2)配置
// webpack.common.js

module.exports = {
  devServer: {
    hot: true,open: false,port: 8088,compress: true,// 开启gzip压缩
    static: {
      // 托管静态资源文件,可通过数组的方式托管多个静态资源文件
      directory: path.join(__dirname,'../public'),client: {
      progress: false,// 在浏览器端打印编译速度
    },}
(3)添加启动命令
// package.json

"scripts": {
  "dev":"webpack serve --config build/webpack.common.js",}
2. 区分生产环境与开发环境
build 下新建 webpack.dev.js 和 webpack.prod.js。根目录下新建文件夹config,在config中新建dev.env.js和prod.env.js
// dev.env.js

module.exports = {
  NODE_ENV: 'development',}
// prod.env.js

module.exports = {
  NODE_ENV: 'prodction',}
(1)安装
$ npm i -D webpack-merge
(2)更改公共配置文件 webpack.common.js
// webpack.common.js

const path = require('path')
const HtmlWebpackPlugin = require('html-webpack-plugin')

module.exports = {
  entry: path.resolve(__dirname,output: {
    path: path.join(__dirname,plugins: [
    new HtmlWebpackPlugin({
      template: path.resolve(__dirname,filename: 'index.html',module: {
    rules: [
      {
        test: /\.css$/,{
        test: /(\.jsx|\.js)$/,{
        test: /\.(png|jpe?g|gif|svg|ico)(\?.*)?$/,type: 'javascript/auto',loader: 'url-loader',limit: 10000,name: 'img/[name].[hash:7].[ext]',}
(3)更改开发环境配置文件 webpack.dev.js
// webpack.dev.js

const { merge } = require('webpack-merge')
const common = require('./webpack.common.js')
const path = require('path')
const env = require('../config/dev.env')
const webpack = require('webpack')

module.exports = merge(common,{
  stats: 'errors-only',// 去除控制台webpack打印的无用信息
  devServer: {
    hot: true,plugins: [
    new webpack.DefinePlugin({
      'process.env': {
        NODE_ENV: JSON.stringify(env.NODE_ENV),})
(4)更改生产环境配置文件 webpack.prod.js
// webpack.prod.js

/*
 * @Date: 2021-10-22 15:49:07
 * @information: 生产配置
 */
const webpack = require('webpack')
const { merge } = require('webpack-merge')
const common = require('./webpack.common.js')
const env = require('../config/prod.env.js')
const path = require('path')
// 打包进度显示
const ProgressBarPlugin = require('progress-bar-webpack-plugin')

module.exports = merge(common,{
  output: {
    path: path.resolve(__dirname,filename: 'js/[name].[chunkhash].js',// 此选项决定了每个输出 bundle 的名称
    chunkFilename: 'js/[id].[chunkhash].js',// 此选项决定了非入口(non-entry) chunk 文件的名称
  },module: {
    rules: [
      {
        test: /\.html$/i,// 将HTML导出为字符串,处理HTML中引入的静态资源
        loader: 'html-loader',new ProgressBarPlugin({
      complete: '█',})
(5)修改 package.json 中启动和打包命令
"scripts": {
    "dev": "webpack serve --config build/webpack.dev.js","build": "webpack --config build/webpack.prod.js",
3. 配置别名
// webpack.common.js

module.exports = {
  resolve: {
    extensions: ['.js','.jsx','.json','.vue'],// 省略文件后缀
    alias: {
      // 配置别名
      '@': path.resolve(__dirname,'../src'),}
六、代码分离
1. mini-css-extract-plugin
分离 css 文件
(1)安装
$ npm i mini-css-extract-plugin -D
(2)配置
// webpack.common.js
const MiniCssExtractPlugin = require('mini-css-extract-plugin')

module.exports = {
  plugins: [
    new MiniCssExtractPlugin({
      filename: 'css/[name]_[contenthash:8].css',// 抽离整的css文件名称
    }),use: [MiniCssExtractPlugin.loader,{
        test: /\.(scss|sass)$/,// 解析scss、sass,需安装sass-loader
        use: [MiniCssExtractPlugin.loader,'css-loader','sass-loader'],}
七、打包优化
1. 开启 gzip 压缩
(1)安装
$ npm i compression-webpack-plugin -D
(2)配置
//webpack.prod.js
const CompressionPlugin = require('compression-webpack-plugin')

module.exports = {
  plugins: [
    new CompressionPlugin({
      asset: '[path].gz[query]',// 目标资源名称。[file] 会被替换成原资源。[path] 会被替换成原资源路径,[query] 替换成原查询字符串
      algorithm: 'gzip',// test: new RegExp('\\.(js|css)$'),test: /\.(js|css)$/,threshold: 10240,// 只处理比这个值大的资源。按字节计算,默认为0
      minRatio: 0.8,// 只有压缩率比这个值小的资源才会被处理,默认为0.8
    }),}
2. externals
防止将外部资源包打包到自己的 bundle 中,例如从 cdn 引入的资源防止进行打包处理
(1)cdn 引入资源
<!-- index.html -->

<!DOCTYPE html>
<html lang="zh_CN">
  <head>
    <meta charset="UTF-8" />
    <meta http-equiv="X-UA-Compatible" content="IE=edge" />
    <meta name="viewport" content="width=device-width,initial-scale=1.0" />
    <title>demo_webpack</title>
  </head>
  <body>
    <div id="app">
      <div>这是一段测试文字...</div>

      <div class="green">这是一段绿色的字啊222</div>

      <div class="red">这是一段红色的字啊</div>
    </div>

    <!-- 引入cdn -->
    <script
      src="https://code.jquery.com/jquery-3.1.0.js"
      integrity="sha256-slogkvB1K3VOkzAI8QITxV3VzpOnkeNVsKvtkYLMjfk="
      crossorigin="anonymous"
    ></script>
  </body>
</html>
(2)配置
//webpack.common.js

module.exports = {
  externals: {
    jquery: 'jQuery',}
(3)在业务 js 文件中引入
import $ from 'jquery'
八、 引入 Vue
1. 安装
vue-loader,用于解析.vue 文件
vue-template-compiler,用于模板编译
$ npm i -D vue-template-compiler vue-loader vue-style-loader
2. 配置
// webpack.common.js
const { VueLoaderPlugin } = require('vue-loader')

module.exports = {
  plugins: [new VueLoaderPlugin()],module: {
    rules: [
      // vue-loader 要放在匹配规则的第一个,否则会报错
      {
        test: /\.vue$/,loader: 'vue-loader',include: [path.resolve(__dirname,'../src')],}
3. 配置 externals
(1)在 index.html 文件中引入 vue、vue-router
<!-- index.html -->

<script src="https://cdn.bootcss.com/vue/2.6.12/vue.min.js"></script>
<script src="https://cdn.bootcss.com/vue-router/3.5.1/vue-router.min.js"></script>
(2)在 webpack.common.js 中引入 vue、vue-router
// webpack.common.js

module.exports = {
  externals: {
    vue: 'Vue','vue-router': 'VueRouter',}
4. 使用
此时可以正常使用 vue 和 vue-router 了...
比如新建 src/App.vue、src/Home.vue、src/Mine.vue 等页面,新建 src/routers/router.js 路由文件。并写入内容及配置,此处省略,可参考gitee代码。
(1)配置 main.js
// main.js

import Vue from 'vue'
import App from './App.vue'
import router from './routers/router'
Vue.config.productionTip = false

new Vue({
  el: '#app',router,components: { App },template: '<App/>',})
九、一些资源处理及优化插件
1. copy-webpack-plugin
拷贝插件,将一些静态资源(如图片、视频、文件)拷贝至打包后的文件夹中
$ npm i -D copy-webpack-plugin
// webpack.common.js
const CopyPlugin = require("copy-webpack-plugin")

module.exports = {
  new CopyPlugin({
    patterns: [
      // 说明:在此测试项目中,`public/static`中的内容打包时会被复制到`dist/static`中...
      {
        from: path.resolve(__dirname,// 定义要拷贝的源目录
        to: '',// 定义要拷贝到的目标目录,非必填,不填写则拷贝到打包的output输出地址中
      },}
2. friendly-errors-webpack-plugin
友好的终端错误显示方式,项目启动后可以在终端中提示一些自定义信息
$ npm i -D friendly-errors-webpack-plugin
// webpack.dev.js
const FriendlyErrorsWebpackPlugin = require('friendly-errors-webpack-plugin')

module.exports = {
  plugins: [
    new FriendlyErrorsWebpackPlugin({
      // 运行成功
      compilationSuccessInfo: {
        messages: ['Your Application is: http://localhost:8088'],notes: ['有些附加说明要在成功编辑时显示'],// 运行错误 - //您可以收听插件转换和优先级的错误,严重性可以是'错误'或'警告'
      onErrors: utils.createNotifierCallback(),clearConsole: true,// 是否每次编译之间清除控制台,默认为true
    }),}
// build/utils.js

exports.createNotifierCallback = () => {
  const notifier = require('node-notifier')

  return (severity,errors) => {
    if (severity !== 'error') return

    const error = errors[0]
    const filename = error.file && error.file.split('!').pop()

    notifier.notify({
      title: packageConfig.name,message: severity + ': ' + error.name,subtitle: filename || '',// icon: path.join(__dirname,'logo.png')
    })
  }
}
3. terser-webpack-plugin
压缩 js,去除注释等..(PS: webpack5+已内置压缩 js 的插件功能,但若想自定义,需额外引包写配置。)
$ npm i -D terser-webpack-plugin
// webpack.prod.js
const TerserPlugin= require('terser-webpack-plugin')

module.exports = {
  plugins: [
    new TerserPlugin({
      parallel: true,// 多进程
      terserOptions: {
        ecma: undefined,warnings: false,parse: {},compress: {
          drop_console: true,drop_debugger: true,pure_funcs: ['console.log'],// 移除console
        },}
附 packag.json 部分配置
使用 cross-env 进行启动和打包项目的命令,设置环境变量等。
$ npm i -D cross-env
// packag.json

"scripts": {
  "test": "echo \"Error: no test specified\" && exit 1","start": "npm run dev","dev": "cross-env NODE_ENV=development webpack server --progress --config build/webpack.dev.js","build": "cross-env NODE_ENV=production webpack --config build/webpack.prod.js"
},
文件结构

打包后的文件结构
 一目录结构├──build//构建相关├──config//配置相关├─...
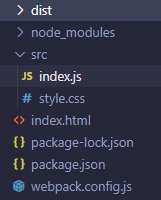 接着第一节的demo现在我们尝试整合一些其他资源,比如图像,...