Vue脚手架:
vue-cli:
全局安装:
npm install -g vue-cli
查看版本:
vue -V 初始化脚手架:
vue init webpack + 项目的名字运行项目:
npm run dev
打包项目:
npm run build文件及文件夹的信息:
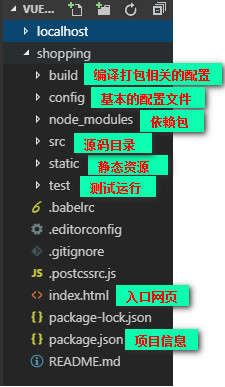

开发依赖:  开发编译打包需要的依赖,打包之后就不要了
生产依赖:  打包前后都需要的依赖
Vue-router:
下载安装:
npm install vue-router
在router文件夹下新建js文件:
import VueRouter from 'vue-router'//引入路由模块
       import Vue from 'vue'
       Vue.use(VueRouter)//依赖模块
       let router=new VueRouter({
       	routes:[
			{path:'路径(加斜杠访问)',name:"名字(直接访问)",component:'注册组件(跳转的位置)',chidern:[]子路由}
			{path:'/',redirect:"/home"},//路由的重定向 如果hash 为'/' 指向到 /home
       	]
       })
       export default router
通过<router-link to='/path'>标签来切换组件
通过<router-view>标签显示
keep-alive:在component组件、router-view外面包裹上keep-alive的话,就会对组件进行缓存,当切换回来的时候,组件会立即渲染,理论来说,切换组件的时候其实会把上一个组件销毁,使用了keep-alive则不会(就是组件一直存在于缓存中)
include匹配到的组件会被缓存,exclude匹配到的不会被缓存
值可以为逗号隔开的字符串include = ‘a,b’;正则:include = ‘/a|b/’;数组:include=[‘a’,’b’]
多级路由:
const routes = [
  {path:'/main',component:AppMain},{path:'/news',component:AppNews,children:[//children是子目录
    {path:'inside',component:AppNewsInside},{path:'outside',component:AppNewsOutside}
  ]},]
默认路由:
{path:'',component:Main}//将默认路径设置成Main动态路由:
{path:'/user/:id',component:User}//id为传的值命名路由:
直接用name : main在hash中写name就可以路由
路由跳转:
router.push = router-link:to router.replace = router-link:to.replace router.go() = window.history.go路由钩子:
全局路由钩子:
router.beforeEach((to,from,next) => {
    //会在任意路由跳转前执行,next一定要记着执行,不然路由不能跳转了
  console.log('beforeEach')
  console.log(to,from)
  //
  next()
})
//
router.afterEach((to,from) => {
    //会在任意路由跳转后执行
  console.log('afterEach')
})
局部路由:
 routes: [
    {
      path: '/foo',component: Foo,beforeEnter: (to,next) => {
        // ...
      }
    }
  ]
组件内的路由钩子:
beforeRouteEnter (to,next) //confirm 前调用
beforeRouteUpdate (to,next) //在当前路由改变调用
beforeRouteLeave (to,next)//导航离开该组件的对应路由时调用
生命周期:
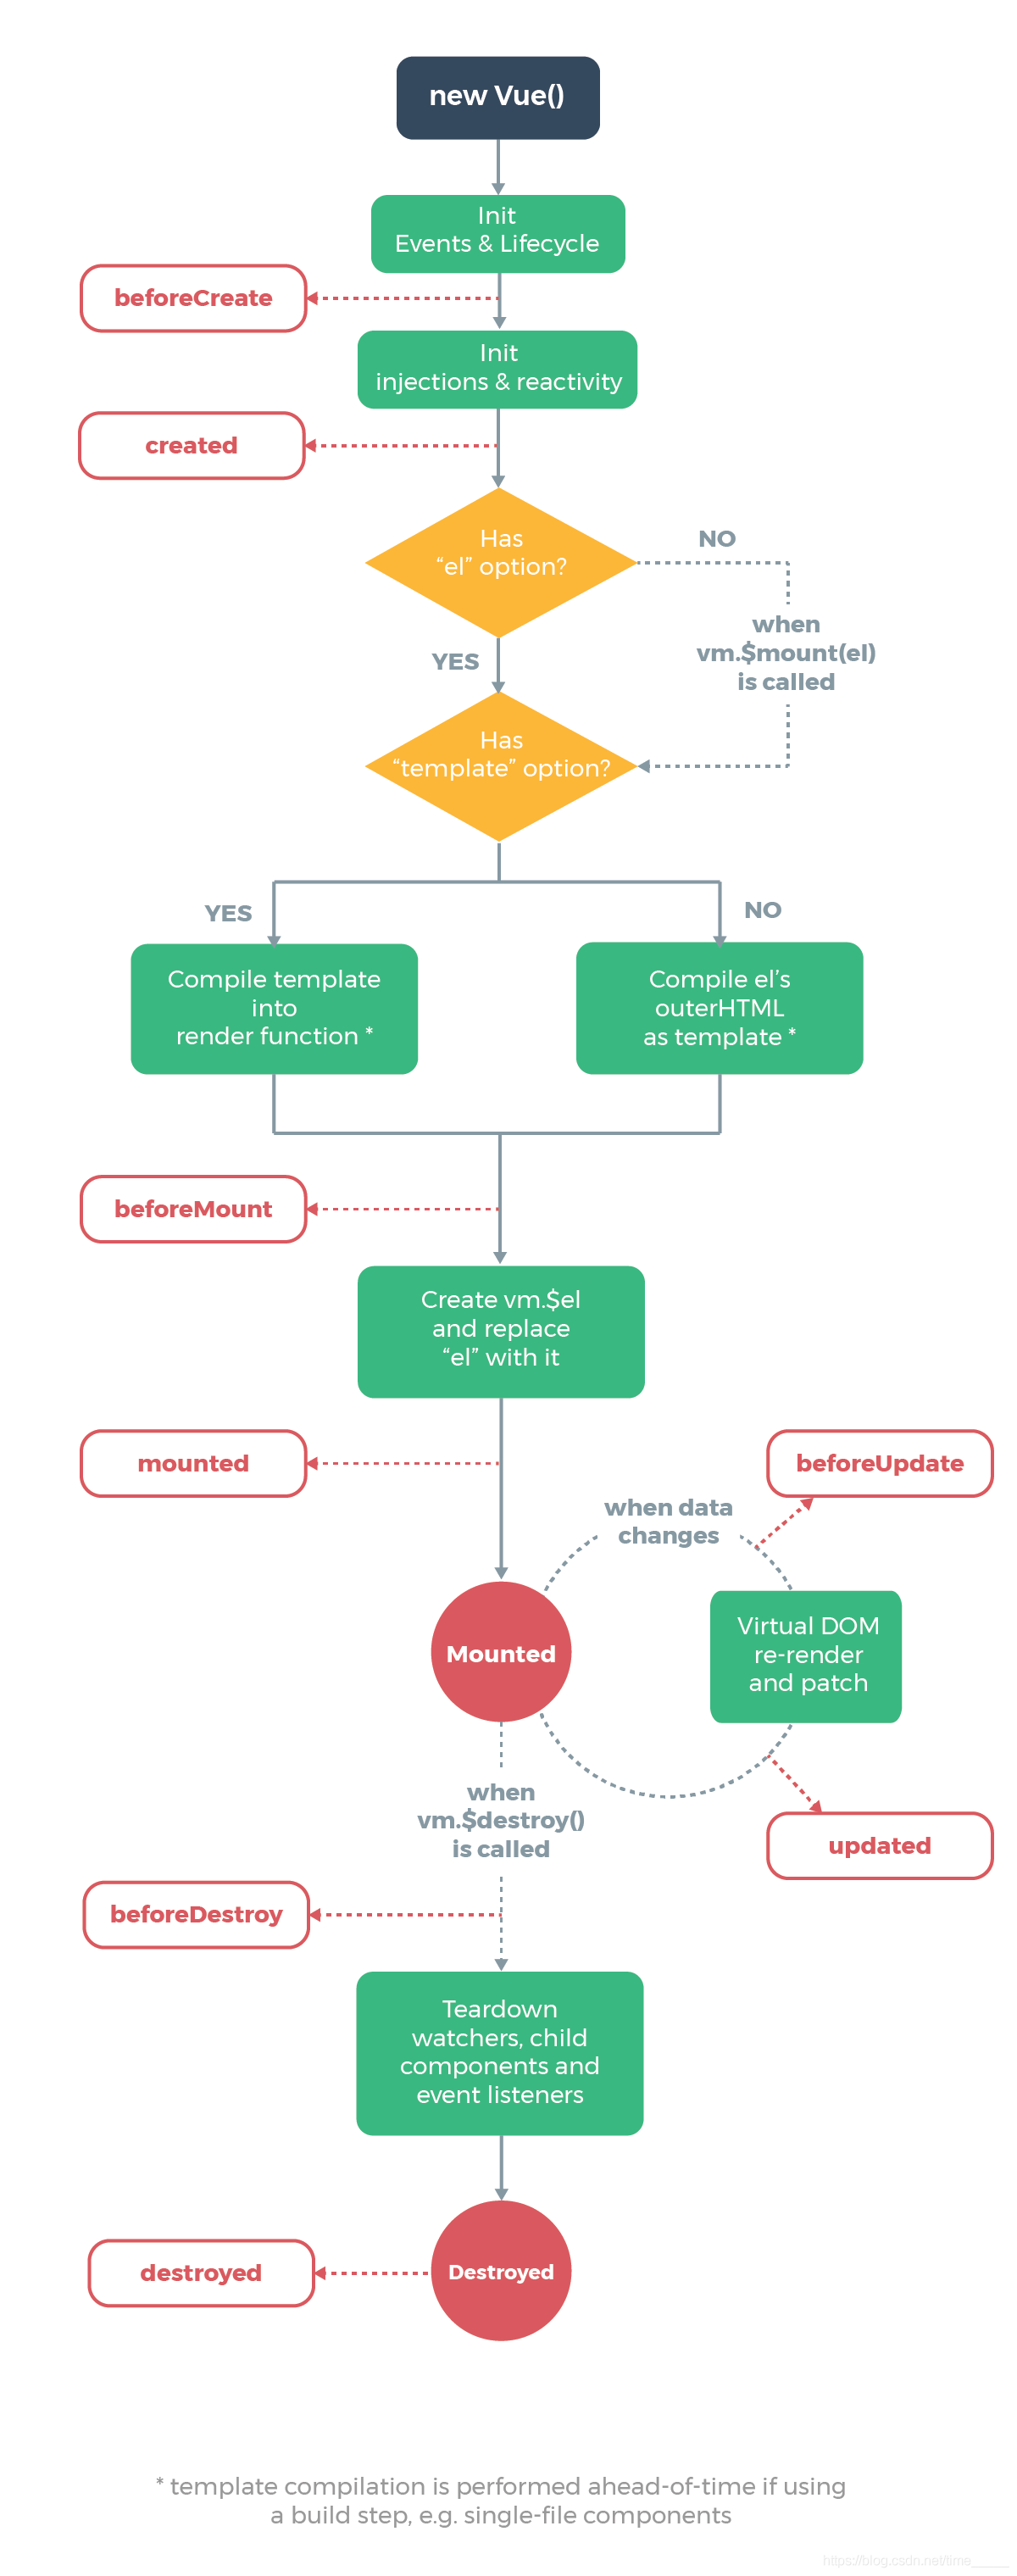
beforeCreate:
创建组件之前,没有组件,没有元素,没有事件,没有生命周期
created:
创建组件结束,有数据,没有元素
beforeMount:
挂载之前,有数据,没有元素
mounted:
挂载完成,有元素,有数据
beforeUpdate:(在mounted后执行)
用于监听数据变化
updated:
用于监听数据变化
beforeDestroy:
销毁实例,元素数据还在
destroyed:
销毁实例
Vue中的ajax:
axios:
载入:npm install axios
在main.js中
import Axios from 'axios';//引入
Vue.prototype.$axios = Axios;//将Axios附着在Vue,以供全局调用
Axios.defaults.baseURL = 'http://localhost:1024';//设置默认接口地址
然后在需要请求的组件中:
this.$axios
        .post("hash",data)//hash是接口地址,不需要加主机地址(http://localhost/index直接写/index)data是传输的对象
        .then(res => {//返回值
          if (res.data.err == 0) {
           console.log(res)
          }
        })
        .catch(err => {
          console.log(err);
        });
axios拦截器:
请求拦截:
axios.interceptors.request.use(function (config) {//发送之前进行过滤
    return config;
  },function (error) {
    return Promise.reject(error);
  });
响应拦截:
axios.interceptors.response.use(function (response) {//请求到数据后进行过滤
    return response;
  },function (error) {
    return Promise.reject(error);
  });
Vuex:
作用:多个组件共享状态及数据
安装:npm install vuex
配置:在src中新建store文件夹:在里面新建js文件
import Vue from 'vue'
import Vuex from 'vuex'//引入Vuex
Vue.use(Vuex);
import login from './login/index'
const store = new Vuex.Store({
  modules: {
    login: login,}
})
export default store;//抛出vuex实例
在src中新建的store文件夹中新建另一个文件夹:里面有5个js文件

大致示范一下里面的内容(部分购物车内容,大概看一下就好):
index.js
import state from './state';
import mutations from './mutations';
import getters from './getters';
import actions from './actions';
let store = {
  state,mutations,getters,actions
};

export default store;
state.js
export default {
  carObj: [],}
getters.js
export default {
  // 派生属性
  all(state) {
    var price = 0;
    var sum = 0;
    var seleceAll = true;
    for (let i = 0; i < state.carObj.length; i++) {
      if (state.carObj[i].sel) {
        price += state.carObj[i].price * state.carObj[i].num;
        sum += state.carObj[i].num;
      }
      seleceAll *= state.carObj[i].sel;
    }
    return {
      price: price,sum: sum,seleceAll: seleceAll
    }
  }
}
mutations.js:
export default {
  //只做状态值得修改 不做任何逻辑操作
  addTo(state,carObj) {
    state.carObj = carObj
  }
}
actions.js:
export default {
  // // 异步处理逻辑操作
  initCar({
    commit
  }) {
    let carlist = localStorage.carlist ? JSON.parse(localStorage.carlist) : [];
    commit('addTo',carlist)
  }
}
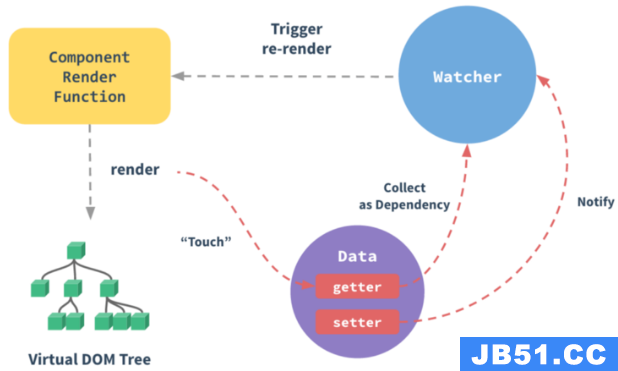
主要流程:(官网的)
初步理解就是:通过actions的函数改变states(数据),渲染到所有绑定的页面,页面再次调用actions(函数),再次修改

深层理解:组件触发actions传递数据(抛发),触发mutations修改状态值,修改state的值,渲染到页面

辅助工具:
import { mapState,mapGetters,mapMutations,mapActions } from 'vuex'
引入辅助工具使组件可以设置或获取到函数及数据
this.$store//获取到storemapStates:
computed: {
  // 使用对象展开运算符将此对象混入到外部对象中
  ...mapState({
        //state中的变量名
  })
}
mapGetters:
 computed: {
  // 使用对象展开运算符将 getter 混入 computed 对象中
    ...mapGetters([
      'doneTodosCount','anotherGetter'
    ])
  }
mapMutations:
methods: {
    ...mapMutations([
      'increment',// 将 `this.increment()` 映射为 `this.$store.commit('increment')`
      // `mapMutations` 也支持载荷:
      'incrementBy' // 将 `this.incrementBy(amount)` 映射为 `this.$store.commit('incrementBy',amount)`
    ])
  }
mapActions:
 methods: {
    ...mapActions([
      'increment',// 将 `this.increment()` 映射为 `this.$store.dispatch('increment')`
      // `mapActions` 也支持载荷:
      'incrementBy' // 将 `this.incrementBy(amount)` 映射为 `this.$store.dispatch('incrementBy',amount)`
    ])
  }
 from https://mp.weixin.qq.com/s/-rc1lYYlsfx-wR4mQmIIQQ V...
 D:\Temp>npm init vite@latest vue3study --temp...
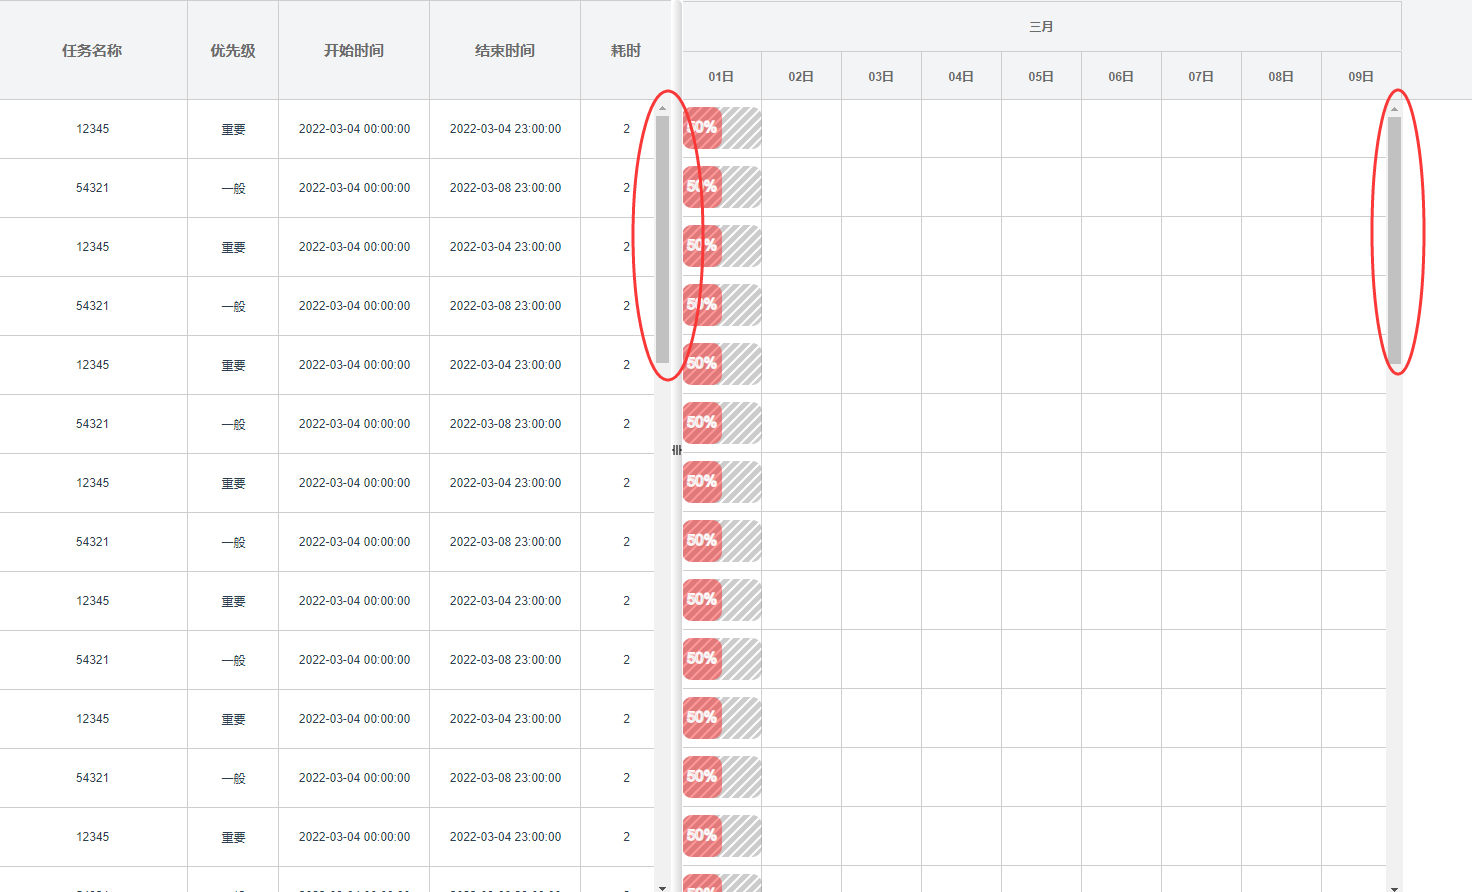 文章浏览阅读1.2k次。最近自己从零撸起的甘特图组件需要子组...
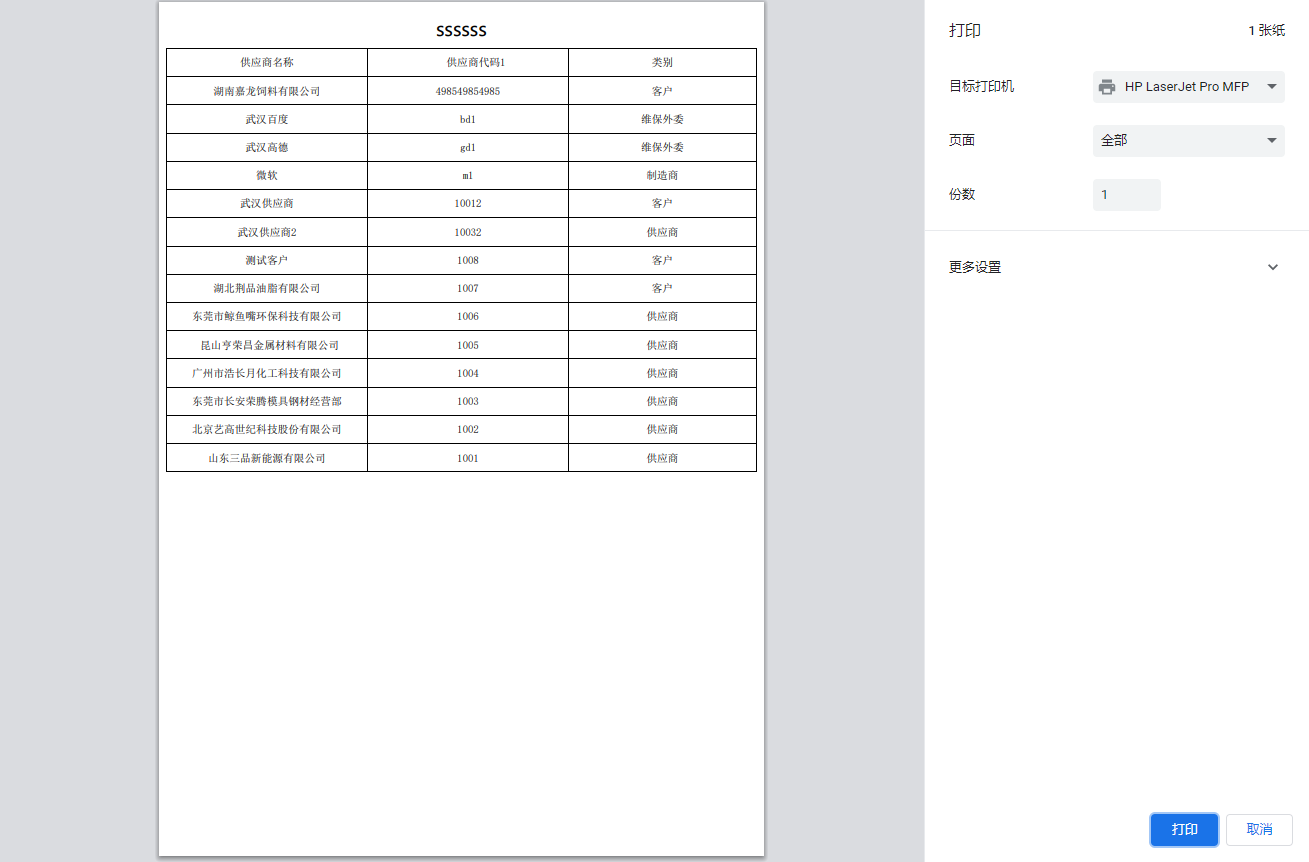 文章浏览阅读3.3k次,点赞3次,收藏16次。静默打印是什么?简...