Redux 是 JavaScript 状态容器,提供可预测化的状态管理。
初学这个,觉得网上有些文章并不那么容易看懂,这里用浅白的话简单介绍一下Redux在react-native的使用。
说白了就三个主要东西,Action,Store以及Reducer。
Reducer:在触发上面的Action后,对Action进行处理,并返回一个新的state。
Store:每个程序有且只有一个Store,作为一个根节点管理state,很多个state等于子节点。Action和Reduce就是通过Store才能联系到一起。
直接来个事例,顺便对比一下用传统的setState方法和使用Redux来控制state的区别
先来搭配一下Redux环境
npm install --save redux 【redux的包】
npm install --save react-redux 【react-redux是redux需要依赖的包】
npm install --save redux-thunk 【redux-thunk是用来让redux有异步的action事务】
先看工程的目录结构,有三个文件夹,就是上述三个东西。。。。。
Store留在最后才说,因为这是其他两个连接的对象。
这三个东西的流程是这样的,
1.Store不用多说,都是拷贝一份代码完事。然后把store的绑在根页面的属性内。
2.Reducer,先建一个索引的文件作为绑定Reducer的(也是拷贝的功夫),然后就可以写多个Reducer了。Reducer是通过Action分发过来的action,找到合适类型的Reducer,Reducer的逻辑代码就会生成新的一个state,最后return给Store。
3.Action,给页面触发用的,当页面绑定好connect,就可以通过props获取【dispatch分发器】和【Store管理的state】,dispatch分发器在页面使用:(1)事件会传到Action。(2)Action里再用dispatch分发到Reducer。(3)Reducer已经绑定了Store,只要return一个state给Store,Store就会把新的state替换旧的。
4.从以上三步可以看出,这三个东西的运作流程,但会有点模糊,我看很多贴的时候都会有这个疑问,我现在很熟悉redux的原理了,我到底怎么统一管理state呢?回顾一下这里第1点,Store是要绑在根页面的,因此我们可以获得Store管理的state。再回顾一下第2点,Reducer需要一个索引绑定多个Reducer的,因此每个Reducer返回的新的state是都得经过绑定这个索引的。最后回顾第3点,页面获得Store管理的state。综合以上分析,根据Reducer的索引可以找到对应的state,然后让页面获得对应的state。
Redux其实说白了,比直接用传统的state是要麻烦很多,因为写多了很多代码才能达到使用传统的state的效果。但是维护这个很关键,统一管理state,在维护上,绝对比传统的state要快,因为有业务逻辑代码改动的话,不要再打开那臃肿的界面慢慢找,在Redux框架可以快速找到相应代码,而且看到的代码是简洁的。这大概是前期费那么大劲也要使用Redux的原因吧。
先来Action,
LoginAction.js是一个处理登录的action,这里写得很简单,看看帐号密码对不对。
import * as types from './ActionType';

export function performLoginAction(username,password) {
	return (dispatch) => {
		console.log("run......performLoginAction.....performLogin");
		dispatch(performLogin());
		if (username === 'ljy' && password === '123') {
			dispatch(receiveLoginResult("succeed"));
		} else {
			// dispatch(receiveLoginResult("fail"));
			dispatch(receiveLoginResult("fail"));
		}
	}
}

function performLogin() {
	return {
		type: types.PERFORM_LOGIN_ACTION,}
}
function receiveLoginResult(result) {
	return {
		type: types.RECEIVE_LOGIN_ACTION,data: result
	}
}
上面导入的ActionType.js是下面这段你没看错,这个文件主要是用来写一些Action类型,为什么需要这个呢?因为我们平时管理RN的数据,都是用state管理的,这个redux作为一个中间件统一管理所有state,所以有个Action类型,让Action能正确地分发给下一级Reducer。
export const PERFORM_LOGIN_ACTION = 'PERFORM_LOGIN_ACTION';
export const RECEIVE_LOGIN_ACTION = 'RECEIVE_LOGIN_ACTION';
先不说函数调用的问题,先要理解每个函数的作用,后面用到的时候会提到。
performLoginAction(username,password)这个方法是用来处理登录的,里面return一个方法,可以看到方法里面有多个dispatch方法。dispatch是用来传递给下一级的。action的下一级是Reducer,可见performLoginAction(username,password)方法下面有两个方法,都是返回一个对象的,那就是把对象传过去给Reducer。那最大的疑问是(dispatch)=>{}括号里的dispatch从哪里传过来的,上面流程第3点,页面绑定数据connect就能获取dispatch,那这里Action的dispatch当然是从页面传过来的啦。
再来Reducer,
需要一个索引,建一个index.js,代码就是拷贝,要改的是combineReducers里面的对象,比如login是索引(key),对象就是引入的LoginReducers。
import {combineReducers} from 'redux';
import LoginReducers from './LoginReducers';
import LoginReducers2 from './LoginReducers2';

const rootReducer = combineReducers({
	login: LoginReducers,login2: LoginReducers2
});

export default rootReducer;
从索引可以看到有两个Reducer,这里给出其中一个LoginReducers.js,另一个大同小异。
import * as types from '../action/ActionType';

const initialState = {
	loading: false,data: '',}

export default function login(state = initialState,action) {
	switch (action.type) {
		case types.PERFORM_LOGIN_ACTION:
			return {
				...state,loading: true,};
		case types.RECEIVE_LOGIN_ACTION:
			return {
				...state,loading: false,data: action.data
			};
		default:
			return state;
	}
}
Action里的dispatch传到Reducer来了,在上面Action的dispatch只有一个参数,这个参数传到这个Reducer的提供了的login方法的action参数,因为第一个参数是内置的state参数,这里login方法有个switch,根据Action类型返回对应的state,否则返回原来的state。
这段是靠js功底,应该能看懂吧?...state是一个语法,意思是把state里所有的键值对列出来,比如说:loading:false,data:"",
再来Store,
configure-store.js,大部分是拷贝的,这个可能跟传统的redux写法有些不一样,因为用了redux-thunk,这个的作用上面有说到啦。
import {createStore,applyMiddleware} from 'redux';
import thunkMiddleware from 'redux-thunk';
import rootReducer from '../reducers/index';

const createStoreWithMiddleware = applyMiddleware(thunkMiddleware)(createStore);

export default function configureStore(initialState) {
	const store = createStoreWithMiddleware(rootReducer,initialState);
	return store;
}
上面讲到Reducer的索引文件,在这里用上了,关联到Store了。导入的rootReducer就是我们上面写得索引。
成功了一大半了,理解了Redux方面的原理,结合上述代码,Redux这块就简单入门了。还有什么没做呢?写好Redux部分,就差在页面上调用了。
最后到Page,
页面根目录Root.js,用react-redux的Provider绑定Store。依旧是拷贝,作用是导入Store绑定到界面。
import React,{Component} from 'react';
import{} from 'react-native';

import {Provider} from 'react-redux'
import configureStore from './store/configure-store'

import App from './App'

const store = configureStore();

export default class RootApp extends Component {

	render() {
		return (
			<Provider store={store}>
				<App />
			</Provider >
		)
	}
}
根目录绑定好Store后就可以在子页面使用了。这里子页面的Component导出的话,需要用react-redux提供的connect导出。下面详细解释绑定数据到子页面。
为了更好对比setState和dispatch两种方式改变state,以下TextInput控件的代码用到了setState,TouchableOpacity控件的代码用到了dispatch。
Provider包含的根页面,App.js
import React,{Component} from 'react';
import {
	AppRegistry,StyleSheet,Text,View,TouchableOpacity,TextInput
} from 'react-native'
import {connect} from 'react-redux';
import {performLoginAction} from './action/LoginAction';

class App extends Component {
	constructor(props) {
		super(props);
		this.state = {
			username: '',psw: ''
		};
	}

	render() {
		const {dispatch,login} = this.props;
		return (
			<View style={{flex: 1,justifyContent: 'center'}}>
				<View style={{height: 100,margin: 10}}>
					<View style={{flex: 1}}>
						<TextInput
							style={{fontSize: 20}}
							underlineColorAndroid={'transparent'}
							placeholder={"帐号"}
							onChangeText={(username) => this.setState({username})}
							value={this.state.username}
						/>
					</View>
					<View style={{height: 1,backgroundColor: '#eee'}}/>
					<View style={{flex: 1}}>
						<TextInput
							style={{fontSize: 20}}
							underlineColorAndroid={'transparent'}
							placeholder={"密码"}
							onChangeText={(psw) => this.setState({psw})}
							value={this.state.psw}
						/>
					</View>
					<View style={{height: 1,backgroundColor: '#eee'}}/>
				</View>
				<View style={{margin: 10,alignItems: 'center'}}>
					<TouchableOpacity onPress={()=> {
						dispatch(performLoginAction(this.state.username,this.state.psw));
					}}>
						<Text style={{fontSize: 30}}>登录</Text>
					</TouchableOpacity>
				</View>
				<View style={{height: 100,margin: 10,justifyContent: 'center',alignItems: 'center'}}>
					<Text style={{height: 30,fontSize: 20,margin: 10}}>{login.data}</Text>
				</View>
			</View>
		)
			;
	}
}
function mapStateToProps(state) {
	const {login} = state;
	return {
		login
	}
}
export default connect(mapStateToProps)(App);
最后一行的connect是在子页面或者说控件吧,进行绑定数据到Store。connect需要mapStateToProps方法返回的一个Reducer,mapStateToProps方法有个参数state,这个是Store统一管理的state,也就是根节点。上面有一个Reducer的索引是login,学了js的这句应该看得懂的,const {login} = state;等于const login = state.login;
有点感觉吧。。。。。。Reducer的索引就是这样用的,把每个state区分开来,但是Store又是一个根节点,把所有用索引区分开来的state统一在一个根节点上。
function mapStateToProps(state) {
	const {login} = state;
	return {
		login
	}
}
export default connect(mapStateToProps)(App);
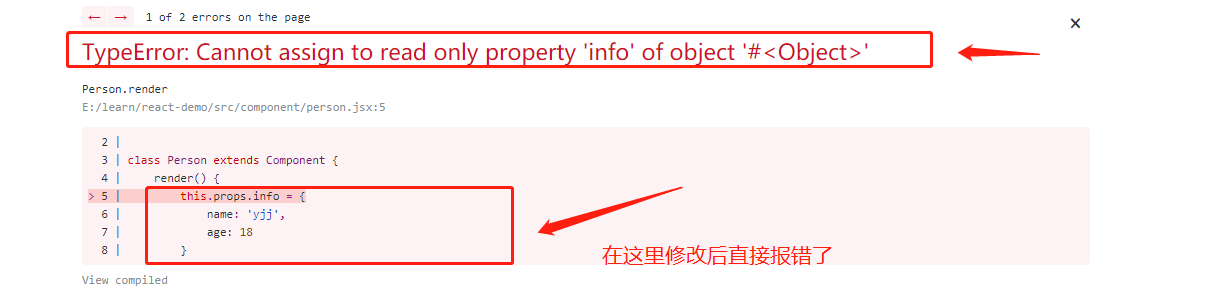
这个页面或者说控件,props属性里就有东西拿了。可以获取dispatch,这个分发器太熟悉了,上面讲到烂了。。。。。还有一个login,这个login哪里来的?就是mapStateToProps方法返回的索引为login的Reducer,Reducer是返回state的,所以有这个参数login,本质上是一个state。这里页面的state就是login,login是只读的不能写的,不能用setState去改变它,要用dispatch分发事件(并非state)给Action,Action分发(并非state)给Reducer,Reducer返回state给Store,Store再用新的state替换对应索引的state。
const {dispatch,login} = this.props;
拿到state,是只读,直接用就好了,把平时setState的习惯改为dispatch写。redux就入门了。
简单介绍了一下React-Native使用了一下Redux。相关源码百度搜,很多。。。。。。