| IP |
数据库版本 |
|
| 192.168.3.3 |
14.4 |
主 |
| 192.168.3.5 |
14.4 |
从 |
1.安装postgresql
一.源码编译安装postgresql-14
创建用户
[root@localhost postgresql-14.4]# useradd postgres
##创建安装目录
[root@localhost postgresql-14.4]# mkdir -p /home/pgsql/{data,log}
[root@localhost postgresql-14.4]# touch /home/pgsql/log/postgresql.log
[root@localhost pgsql]# chown -R postgres:postgres /home/pgsql/data
[root@localhost pgsql]# chown -R postgres:postgres /home/pgsql/log
##安装依赖包
[root@localhost ~]# rpm -ivh ncurses-devel-5.9-14.20130511.el7_4.x86_64.rpm
准备中... ################################# [100%]
正在升级/安装...
1:ncurses-devel-5.9-14.20130511.el7################################# [100%]
[root@localhost ~]# rpm -ivh readline-devel-6.2-11.el7.x86_64.rpm
准备中... ################################# [100%]
正在升级/安装...
1:readline-devel-6.2-11.el7 ################################# [100%]
[root@localhost ~]# rpm -ivh zlib-1.2.7-18.el7.x86_64.rpm --nodeps --force
准备中... ################################# [100%]
正在升级/安装...
1:zlib-1.2.7-18.el7 ################################# [100%]
[root@localhost ~]# rpm -ivh zlib-devel-1.2.7-18.el7.x86_64.rpm
准备中... ################################# [100%]
正在升级/安装...
1:zlib-devel-1.2.7-18.el7 ################################# [100%]
[root@localhost ~]# tar -xzvf postgresql-14.4.tar.gz
[root@localhost ~]# cd postgresql-14.4/
[root@localhost postgresql-14.4]# ./configure --prefix=/home/pgsql
[root@localhost postgresql-14.4]# make && make install
##配置环境变量
[root@pg1 ~]# vim /etc/profile
export PGHOME=/home/pgsql/
export PGUSER=postgres
export PGPORT=5432
export PGDATA=/home/pgsql/data
export PGLOG=/home/pgsql/log/postgresql.log
export PATH=$PGHOME/bin:$PATH:$HOME/bin
export LD_LIBRARY_PATH=$PGHOME/lib:$LD_LIBRARY_PATH
[root@pg1 log]# source /etc/profile
##初始化数据库
[root@localhost pgsql]# su - postgres
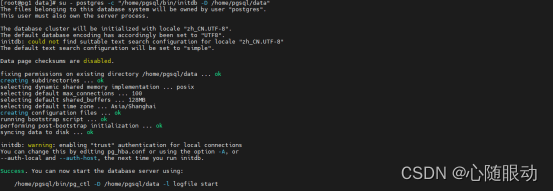
[postgres@localhost ~]$ /home/pgsql/bin/initdb -D /home/pgsql/data
##启动数据库,并创建复制用户
[root@pg1 data]# su - postgres
##启动数据库
[postgres@pg1 ~]$ /home/pgsql/bin/pg_ctl -D /home/pgsql/data -l /home/pgsql/log/postgresql.log start
##创建复制用户
postgres=# create role replica login replication encrypted password '123456';
CREATE ROLE
##修改主的配置文件(192.168.3.3)
[root@pg1 ~]# vim /home/pgsql/data/pg_hba.conf
![]()
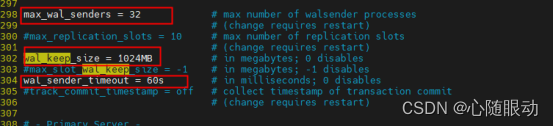
vim /home/pgsql/postgresql.conf
![]()
![]()

##重启数据库
[root@pg1 pgsql]# su - postgres -c "/home/pgsql/bin/pg_ctl -D /home/pgsql/data -l /home/pgsql/log/postgresql.log restart"
##从库操作(192.168.3.5)
[root@pg3 data]# /home/pgsql/bin/pg_basebackup -h 192.168.3.3 -p 5432 -U replica -F p -P -D /home/pgsql/data/
![]()
##修改配置文件
vim /data/appData/postgreSql/postgresql.conf
## 移除或注释 wal_level,从库不需要这个配置
# wal_level = hot_standby
## 修改或添加以下
max_standby_streaming_delay=30s #可选,流复制最大延迟
wal_receiver_status_interval=10s #可选,向主库报告状态的最大间隔时间
hot_standby_feedback=on #可选,查询冲突时向主库反馈
max_connections=1000 #最大连接数一般大于主库就行
primary_conninfo = 'host=192.168.3.3 port=5432 user=replica password=123456' # 表示主库连接信息
recovery_target_timeline = 'latest' # 表示恢复最新的数据
##创建声明文件(创建 standby.signal 文件,声明从库)
vim /home/pgsql/data/standby.signal
![]()
##同步过来数据给个权限
[root@pg3 home]# chown -R postgres:postgres pgsql/
##启动数据库
[root@pg3 home]# su - postgres -c "/home/pgsql/bin/pg_ctl -D /home/pgsql/data -l /home/pgsql/log/postgresql.log start"
##主从验证
##在主上(192.168.3.3)
select pid,application_name,state,client_addr,sync_priority,sync_state from pg_stat_replication;

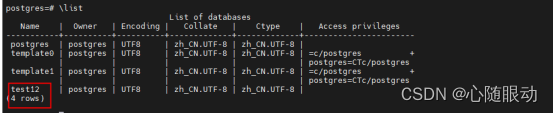
##创建一个数据库

###在从库查看(192.168.3.5)