分离服务端和客户端、发送表情消息
前言
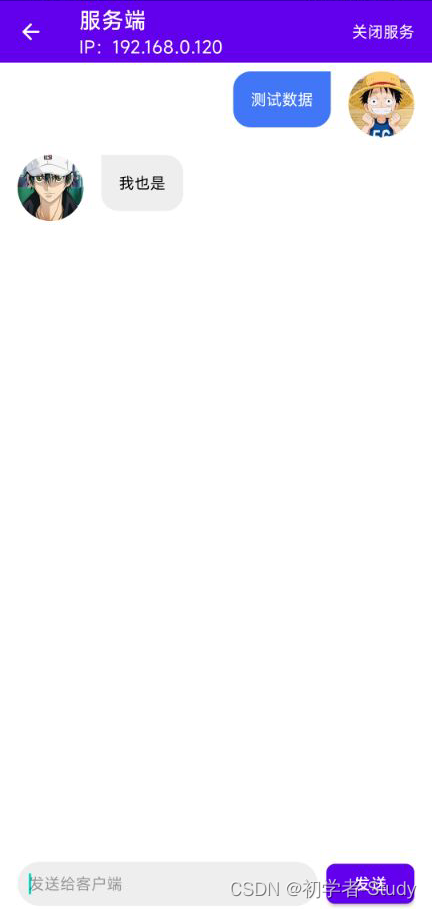
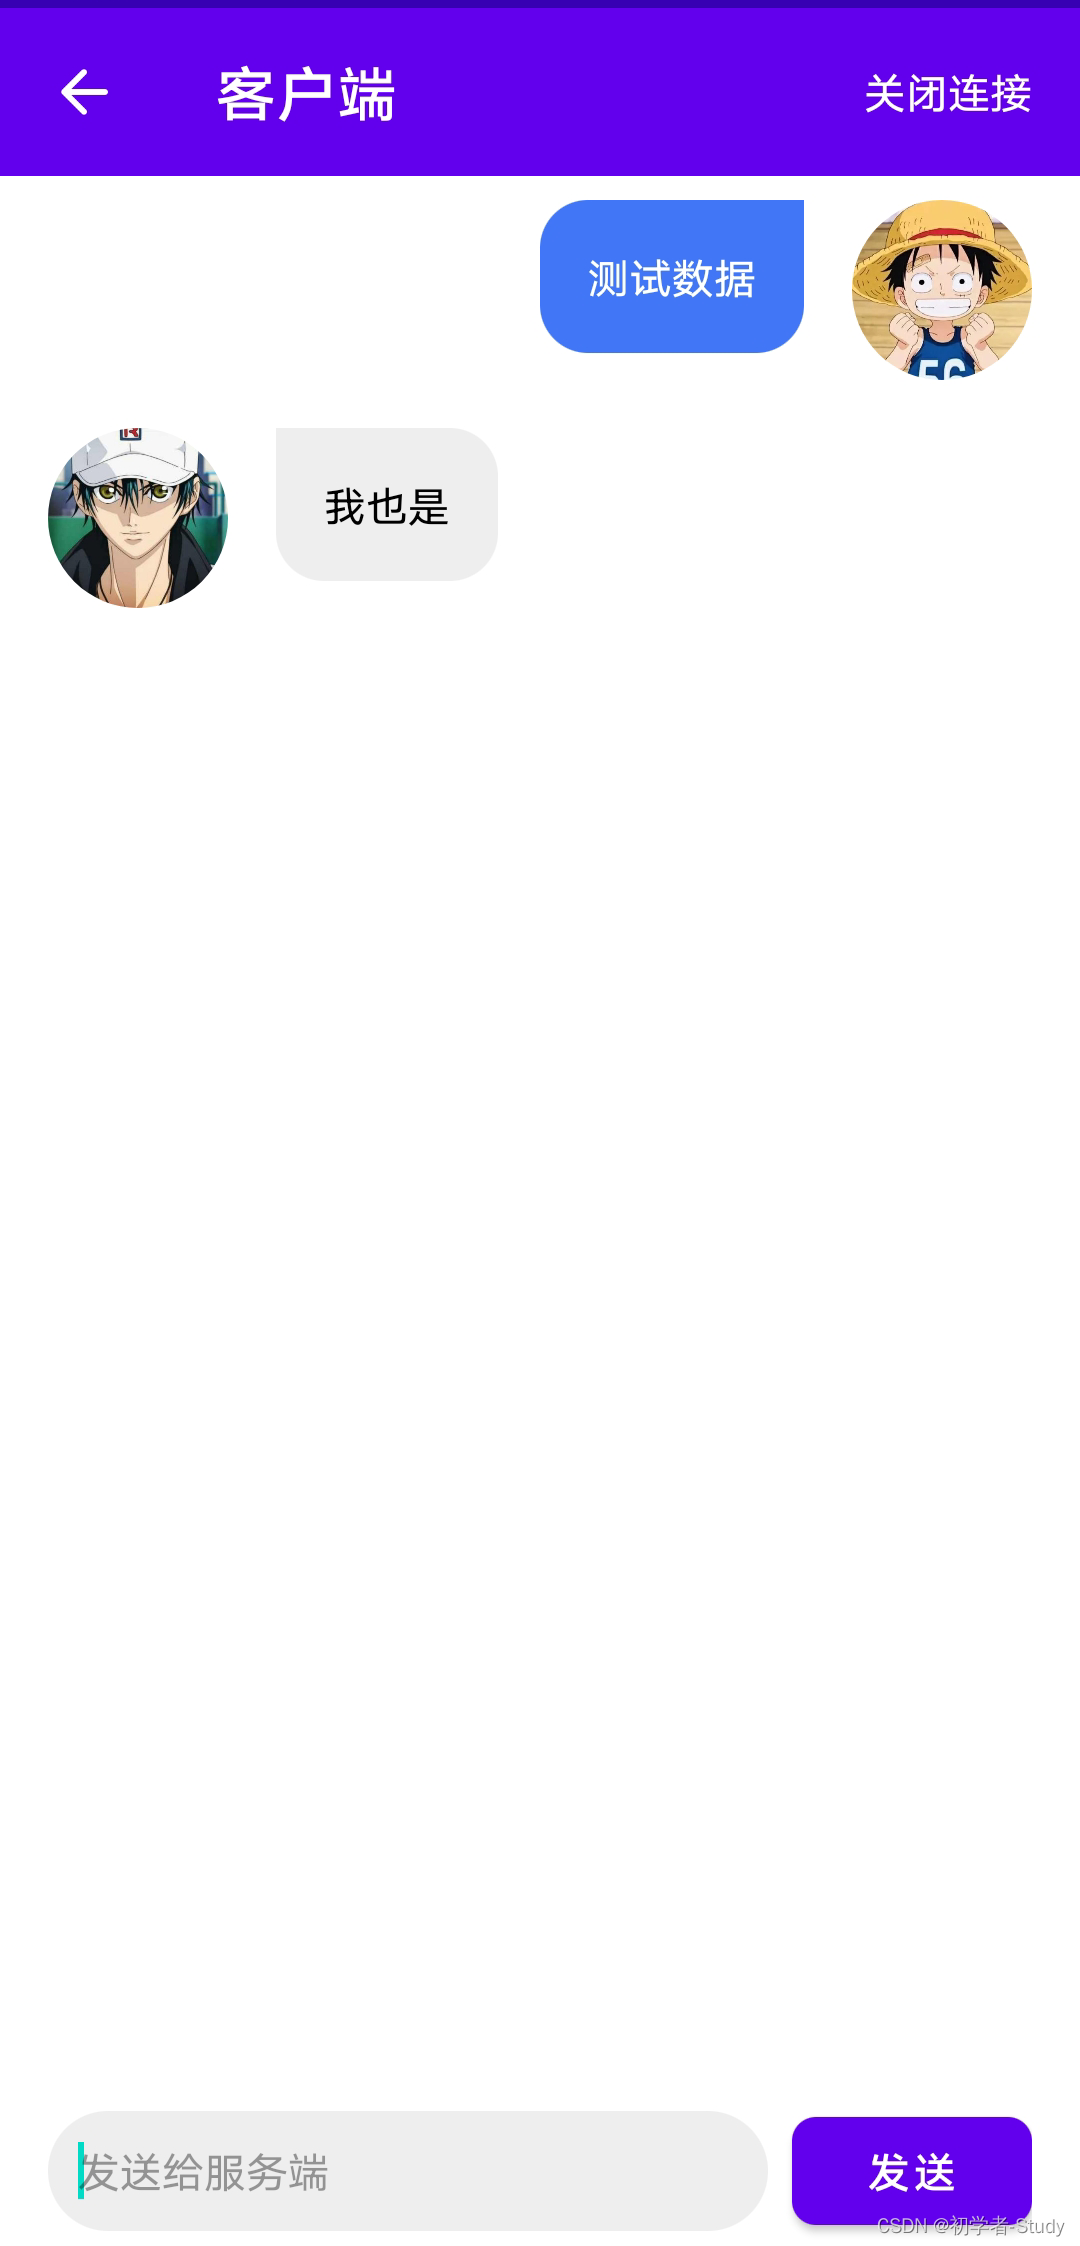
在之前写的Socket通讯中,完成了基本的客户端和服务端的通讯,功能比较简单,本文将对功能进行一次升级。完成后效果图如下:


正文
功能升级分为两个环节,页面优化,消息类型增加。首先来说就是页面的优化,之前全部写在一个页面里面,虽然可行,但是会显得很臃肿,不利于解读和维护。
一、页面优化
页面优化内容还是比较多的,首先要做的就是分离页面。在com.llw.socket包下新建一个ui包。
① 分包
这个包下新建一个BaseActivity,代码如下:
open class BaseActivity: AppCompatActivity() {

    protected fun getIp() =
        intToIp((applicationContext.getSystemService(WIFI_SERVICE) as WifiManager).connectionInfo.ipAddress)

    private fun intToIp(ip: Int) =
        "${(ip and 0xFF)}.${(ip shr 8 and 0xFF)}.${(ip shr 16 and 0xFF)}.${(ip shr 24 and 0xFF)}"

    protected fun showMsg(msg: String) = Toast.makeText(this, msg, Toast.LENGTH_SHORT).show()

    protected open fun jumpActivity(clazz: Class<*>?) = startActivity(Intent(this, clazz))

}
这里是作为一个基类,后续我们写关于Activity的都放在这个下面。
在com.llw.socket包下新建一个adapter包,将MsgAdapter移到adapter包下。
在com.llw.socket包下新建一个bean包,将Message移到bean包下。
② 创建ServerActivity
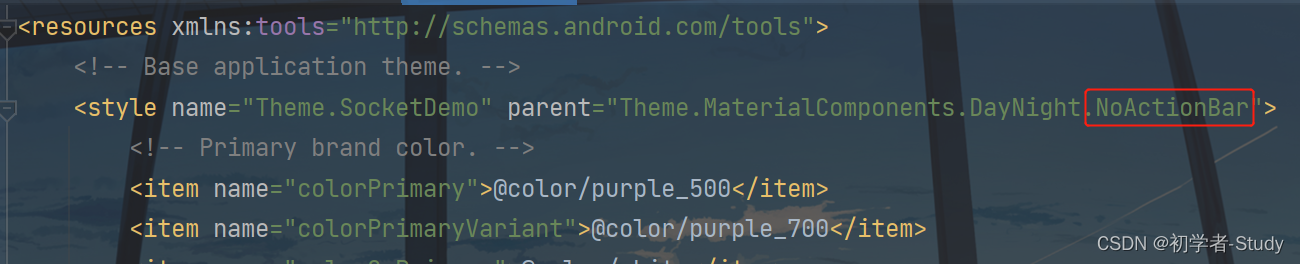
在创建之前我们需要改动一下样式,因为之前是使用自带的ActionBar,现在我们需要去掉,改成NoActionBar,如下图所示:
然后在drawable文件夹下新建一个ic_back_black.xml,作为页面的返回图标,代码如下:
<?xml version="1.0" encoding="UTF-8" standalone="no"?>
<vector xmlns:android="http://schemas.android.com/apk/res/android"
    android:width="24dp"
    android:height="24dp"
    android:autoMirrored="true"
    android:tint="#000000"
    android:viewportWidth="24.0"
    android:viewportHeight="24.0">

    <path
        android:fillColor="@android:color/white"
        android:pathData="M19,11H7.83l4.88,-4.88c0.39,-0.39 0.39,-1.03 0,-1.42l0,0c-0.39,-0.39 -1.02,-0.39 -1.41,0l-6.59,6.59c-0.39,0.39 -0.39,1.02 0,1.41l6.59,6.59c0.39,0.39 1.02,0.39 1.41,0l0,0c0.39,-0.39 0.39,-1.02 0,-1.41L7.83,13H19c0.55,0 1,-0.45 1,-1l0,0C20,11.45 19.55,11 19,11z" />

</vector>
在ui包下新建一个ServerActivity,对应布局是activity_server.xml,布局代码如下:
<?xml version="1.0" encoding="utf-8"?>
<LinearLayout xmlns:android="http://schemas.android.com/apk/res/android"
    xmlns:app="http://schemas.android.com/apk/res-auto"
    xmlns:tools="http://schemas.android.com/tools"
    android:layout_width="match_parent"
    android:layout_height="match_parent"
    android:orientation="vertical"
    tools:context=".ui.ServerActivity">

    <com.google.android.material.appbar.MaterialToolbar
        android:id="@+id/toolbar"
        android:layout_width="match_parent"
        android:layout_height="?attr/actionBarSize"
        android:background="@color/purple_500"
        app:navigationIcon="@drawable/ic_back_black"
        app:navigationIconTint="@color/white"
        app:subtitleTextColor="@color/white"
        app:title="服务端"
        app:titleTextColor="@color/white">

        <TextView
            android:id="@+id/tv_start_service"
            android:layout_width="wrap_content"
            android:layout_height="wrap_content"
            android:layout_gravity="end"
            android:layout_marginEnd="16dp"
            android:text="开启服务"
            android:textColor="@color/white"
            android:textSize="14sp" />
    </com.google.android.material.appbar.MaterialToolbar>

    <LinearLayout
        android:id="@+id/lay_client"
        android:layout_width="match_parent"
        android:layout_height="110dp"
        android:orientation="vertical"
        android:visibility="gone">

        <com.google.android.material.textfield.TextInputLayout
            android:id="@+id/op_code_layout"
            style="@style/Widget.MaterialComponents.TextInputLayout.OutlinedBox"
            android:layout_width="match_parent"
            android:layout_height="wrap_content"
            android:layout_marginStart="16dp"
            android:layout_marginEnd="16dp">

            <com.google.android.material.textfield.TextInputEditText
                android:id="@+id/et_ip_address"
                android:layout_width="match_parent"
                android:layout_height="wrap_content"
                android:digits="0123456789."
                android:hint="连接Ip地址"
                android:inputType="number"
                android:lines="1"
                android:singleLine="true"
                android:text="192.168.0.120" />
        </com.google.android.material.textfield.TextInputLayout>

        <Button
            android:id="@+id/btn_connect_service"
            android:layout_width="match_parent"
            android:layout_height="wrap_content"
            android:layout_marginStart="16dp"
            android:layout_marginEnd="16dp"
            android:text="连接服务"
            app:layout_constraintEnd_toEndOf="parent"
            app:layout_constraintStart_toStartOf="parent"
            app:layout_constraintTop_toBottomOf="@+id/btn_start_service" />
    </LinearLayout>

    <androidx.recyclerview.widget.RecyclerView
        android:id="@+id/rv_msg"
        android:layout_width="match_parent"
        android:layout_height="0dp"
        android:layout_weight="1" />

    <LinearLayout
        android:layout_width="match_parent"
        android:layout_height="50dp"
        android:gravity="center_vertical"
        android:paddingStart="16dp"
        android:paddingEnd="16dp">

        <androidx.appcompat.widget.AppCompatEditText
            android:id="@+id/et_msg"
            android:layout_width="0dp"
            android:layout_height="40dp"
            android:layout_weight="1"
            android:background="@drawable/shape_et_bg"
            android:gravity="center_vertical"
            android:hint="发送给客户端"
            android:padding="10dp"
            android:textSize="14sp" />

        <com.google.android.material.button.MaterialButton
            android:id="@+id/btn_send_msg"
            android:layout_width="80dp"
            android:layout_height="wrap_content"
            android:layout_marginStart="8dp"
            android:text="发送"
            app:cornerRadius="8dp" />
    </LinearLayout>
</LinearLayout>
然后我们再修改一下ServerActivity中的代码,如下所示:
class ServerActivity : BaseActivity(), ServerCallback {

    private val TAG = ServerActivity::class.java.simpleName
    private lateinit var binding: ActivityServerBinding

    //Socket服务是否打开
    private var openSocket = false

    //消息列表
    private val messages = ArrayList<Message>()

    //消息适配器
    private lateinit var msgAdapter: MsgAdapter

    override fun onCreate(savedInstanceState: Bundle?) {
        super.onCreate(savedInstanceState)
        binding = ActivityServerBinding.inflate(layoutInflater)
        setContentView(binding.root)

        initView()
    }

    private fun initView() {
        binding.toolbar.apply {
            subtitle = "IP:${getIp()}"
            setNavigationOnClickListener { onBackPressed() }
        }
        //开启服务/关闭服务 服务端处理
        binding.tvStartService.setOnClickListener {
            openSocket = if (openSocket) {
                SocketServer.stopServer();false
            } else SocketServer.startServer(this)
            //显示日志
            showMsg(if (openSocket) "开启服务" else "关闭服务")
            //改变按钮文字
            binding.tvStartService.text = if (openSocket) "关闭服务" else "开启服务"
        }

        //发送消息给客户端
        binding.btnSendMsg.setOnClickListener {
            val msg = binding.etMsg.text.toString().trim()
            if (msg.isEmpty()) {
                showMsg("请输入要发送的信息");return@setOnClickListener
            }
            //检查是否能发送消息
            val isSend = if (openSocket) openSocket else false
            if (!isSend) {
                showMsg("当前未开启服务或连接服务");return@setOnClickListener
            }
            SocketServer.sendToClient(msg)
            binding.etMsg.setText("")
            updateList(1, msg)
        }
        //初始化列表
        msgAdapter = MsgAdapter(messages)
        binding.rvMsg.apply {
            layoutManager = LinearLayoutManager(this@ServerActivity)
            adapter = msgAdapter
        }
    }

    override fun onOptionsItemSelected(item: MenuItem): Boolean {
        when(item.itemId) {
            android.R.id.home -> onBackPressed()
        }
        return super.onOptionsItemSelected(item)
    }

    /**
     * 接收到客户端发的消息
     */
    override fun receiveClientMsg(success: Boolean, msg: String) = updateList(2, msg)

    override fun otherMsg(msg: String) {
        Log.d(TAG, msg)
    }

    /**
     * 更新列表
     */
    private fun updateList(type: Int, msg: String) {
        messages.add(Message(type, msg))
        runOnUiThread {
            (if (messages.size == 0) 0 else messages.size - 1).apply {
                msgAdapter.notifyItemChanged(this)
                binding.rvMsg.smoothScrollToPosition(this)
            }
        }
    }
}
在这里我首先继承自BaseActivity,这样可以使用父类的方法,然后实现ServerCallback,就可以收到客户端发送过来的消息。同时我们不用再去判断当前是客户端还是服务端,因为当我们进入这个页面那就是服务端了。
③ 创建ClientActivity
在ui包下新建一个ClientActivity,对应布局是activity_client.xml,布局代码如下:
<?xml version="1.0" encoding="utf-8"?>
<LinearLayout xmlns:android="http://schemas.android.com/apk/res/android"
    xmlns:app="http://schemas.android.com/apk/res-auto"
    xmlns:tools="http://schemas.android.com/tools"
    android:layout_width="match_parent"
    android:layout_height="match_parent"
    android:orientation="vertical"
    tools:context=".ui.ClientActivity">

    <com.google.android.material.appbar.MaterialToolbar
        android:id="@+id/toolbar"
        android:layout_width="match_parent"
        android:layout_height="?attr/actionBarSize"
        android:background="@color/purple_500"
        app:navigationIcon="@drawable/ic_back_black"
        app:navigationIconTint="@color/white"
        app:title="客户端"
        app:titleTextColor="@color/white">

        <TextView
            android:id="@+id/tv_connect_service"
            android:layout_width="wrap_content"
            android:layout_height="wrap_content"
            android:layout_gravity="end"
            android:layout_marginEnd="16dp"
            android:text="连接服务"
            android:textColor="@color/white"
            android:textSize="14sp" />
    </com.google.android.material.appbar.MaterialToolbar>

    <androidx.recyclerview.widget.RecyclerView
        android:id="@+id/rv_msg"
        android:layout_width="match_parent"
        android:layout_height="0dp"
        android:layout_weight="1" />

    <LinearLayout
        android:layout_width="match_parent"
        android:layout_height="50dp"
        android:gravity="center_vertical"
        android:paddingStart="16dp"
        android:paddingEnd="16dp">

        <androidx.appcompat.widget.AppCompatEditText
            android:id="@+id/et_msg"
            android:layout_width="0dp"
            android:layout_height="40dp"
            android:layout_weight="1"
            android:background="@drawable/shape_et_bg"
            android:gravity="center_vertical"
            android:hint="发送给服务端"
            android:padding="10dp"
            android:textSize="14sp" />

        <com.google.android.material.button.MaterialButton
            android:id="@+id/btn_send_msg"
            android:layout_width="80dp"
            android:layout_height="wrap_content"
            android:layout_marginStart="8dp"
            android:text="发送"
            app:cornerRadius="8dp" />
    </LinearLayout>

</LinearLayout>
然后我们再来看ClientActivity的代码,如下所示:
class ClientActivity : BaseActivity(), ClientCallback {

    private val TAG = BaseActivity::class.java.simpleName
    private lateinit var binding: ActivityClientBinding

    //Socket服务是否连接
    private var connectSocket = false

    //消息列表
    private val messages = ArrayList<Message>()
    //消息适配器
    private lateinit var msgAdapter: MsgAdapter

    override fun onCreate(savedInstanceState: Bundle?) {
        super.onCreate(savedInstanceState)
        binding = ActivityClientBinding.inflate(layoutInflater)
        setContentView(binding.root)

        initView()
    }

    private fun initView() {
        binding.toolbar.setNavigationOnClickListener { onBackPressed() }

        //连接服务/断开连接 客户端处理
        binding.tvConnectService.setOnClickListener {
            if (connectSocket) {
                SocketClient.closeConnect()
                connectSocket = false
                showMsg("关闭连接")
            } else {
                showEditDialog()
            }
            binding.tvConnectService.text = if (connectSocket) "关闭连接" else "连接服务"
        }
        //发送消息给服务端
        binding.btnSendMsg.setOnClickListener {
            val msg = binding.etMsg.text.toString().trim()
            if (msg.isEmpty()) {
                showMsg("请输入要发送的信息");return@setOnClickListener
            }
            //检查是否能发送消息
            val isSend = if (connectSocket) connectSocket  else false
            if (!isSend) {
                showMsg("当前未开启服务或连接服务");return@setOnClickListener
            }
            SocketClient.sendToServer(msg)
            binding.etMsg.setText("")
            updateList(2, msg)
        }
        //初始化列表
        msgAdapter = MsgAdapter(messages)
        binding.rvMsg.apply {
            layoutManager = LinearLayoutManager(this@ClientActivity)
            adapter = msgAdapter
        }
    }

    private fun showEditDialog() {
        val dialogBinding =
            DialogEditIpBinding.inflate(LayoutInflater.from(this@ClientActivity), null, false)
        AlertDialog.Builder(this@ClientActivity).apply {
            setIcon(R.drawable.ic_connect)
            setTitle("连接Ip地址")
            setView(dialogBinding.root)
            setPositiveButton("确定") { dialog, _ ->
                val ip = dialogBinding.etIpAddress.text.toString()
                if (ip.isEmpty()) {
                    showMsg("请输入Ip地址");return@setPositiveButton
                }
                connectSocket = true
                SocketClient.connectServer(ip, this@ClientActivity)
                showMsg("连接服务")
                binding.tvConnectService.text = "关闭连接"
                dialog.dismiss()
            }
            setNegativeButton("取消") { dialog, _ -> dialog.dismiss() }
        }.show()
    }

    /**
     * 接收到服务端发的消息
     */
    override fun receiveServerMsg(msg: String) = updateList(1, msg)

    override fun otherMsg(msg: String) {
        Log.d(TAG, msg)
    }

    /**
     * 更新列表
     */
    private fun updateList(type: Int, msg: String) {
        messages.add(Message(type, msg))
        runOnUiThread {
            (if (messages.size == 0) 0 else messages.size - 1).apply {
                msgAdapter.notifyItemChanged(this)
                binding.rvMsg.smoothScrollToPosition(this)
            }
        }
    }
}
在这里,我们同样继承自BaseActivity,不同的是这里实现了ClientCallback,用于接收服务端发送的消息。进入这个页面我们可以专心的处理客户端的业务逻辑代码。
这里的客户端因为要输入服务端的ip地址,而我又不希望ip地址的输入框占据页面的空间,因此我这里用了一个弹窗来做ip地址的输入。弹窗中有一个自定义布局,在layout下新建一个dialog_edit_ip.xml,代码如下:
<?xml version="1.0" encoding="utf-8"?>
<androidx.constraintlayout.widget.ConstraintLayout xmlns:android="http://schemas.android.com/apk/res/android"
    xmlns:app="http://schemas.android.com/apk/res-auto"
    android:layout_width="match_parent"
    android:layout_height="wrap_content">

    <com.google.android.material.textfield.TextInputLayout
        android:id="@+id/textInputLayout"
        style="@style/Widget.MaterialComponents.TextInputLayout.OutlinedBox"
        android:layout_width="match_parent"
        android:layout_height="wrap_content"
        android:layout_marginStart="16dp"
        android:layout_marginTop="16dp"
        android:layout_marginEnd="16dp"
        app:layout_constraintEnd_toEndOf="parent"
        app:layout_constraintStart_toStartOf="parent"
        app:layout_constraintTop_toTopOf="parent">

        <com.google.android.material.textfield.TextInputEditText
            android:id="@+id/et_ip_address"
            android:layout_width="match_parent"
            android:layout_height="wrap_content"
            android:digits="0123456789."
            android:hint="Ip地址"
            android:inputType="number"
            android:lines="1"
            android:singleLine="true"/>
    </com.google.android.material.textfield.TextInputLayout>
</androidx.constraintlayout.widget.ConstraintLayout>
弹窗中用到一个图标,在drawable文件夹下新建ic_connect.xml文件,代码如下:
<?xml version="1.0" encoding="UTF-8" standalone="no"?>
<vector xmlns:android="http://schemas.android.com/apk/res/android"
    android:width="24dp"
    android:height="24dp"
    android:tint="#000000"
    android:viewportWidth="24.0"
    android:viewportHeight="24.0">

    <path
        android:fillColor="@android:color/white"
        android:pathData="M7,4c0,-1.11 -0.89,-2 -2,-2S3,2.89 3,4s0.89,2 2,2S7,5.11 7,4zM10.19,4.5L10.19,4.5c-0.41,0 -0.76,0.25 -0.92,0.63C8.83,6.23 7.76,7 6.5,7h-3C2.67,7 2,7.67 2,8.5V11h6V8.74c1.43,-0.45 2.58,-1.53 3.12,-2.91C11.38,5.19 10.88,4.5 10.19,4.5zM19,17c1.11,0 2,-0.89 2,-2s-0.89,-2 -2,-2s-2,0.89 -2,2S17.89,17 19,17zM20.5,18h-3c-1.26,0 -2.33,-0.77 -2.77,-1.87c-0.15,-0.38 -0.51,-0.63 -0.92,-0.63h0c-0.69,0 -1.19,0.69 -0.94,1.33c0.55,1.38 1.69,2.46 3.12,2.91V22h6v-2.5C22,18.67 21.33,18 20.5,18zM17.25,11.09c0,0 0,-0.01 0.01,0c-1.06,0.27 -1.9,1.11 -2.17,2.17c0,0 0,-0.01 0,-0.01C14.98,13.68 14.58,14 14.11,14c-0.55,0 -1,-0.45 -1,-1c0,-0.05 0.02,-0.14 0.02,-0.14c0.43,-1.85 1.89,-3.31 3.75,-3.73c0.04,0 0.08,-0.01 0.12,-0.01c0.55,0 1,0.45 1,1C18,10.58 17.68,10.98 17.25,11.09zM18,6.06c0,0.51 -0.37,0.92 -0.86,0.99c0,0 0,0 0,0c-3.19,0.39 -5.7,2.91 -6.09,6.1c0,0 0,0 0,0C10.98,13.63 10.56,14 10.06,14c-0.55,0 -1,-0.45 -1,-1c0,-0.02 0,-0.04 0,-0.06c0,-0.01 0,-0.02 0,-0.03c0.5,-4.12 3.79,-7.38 7.92,-7.85c0,0 0.01,0 0.01,0C17.55,5.06 18,5.51 18,6.06z" />

</vector>
因为服务端和客户端页面的底部都是输入框,因此同样要避免输入框弹出使页面整体向上移动的情况,所以我们需要改动一下AndroidManifest.xml中的activity标签。
<activity
	android:name=".ui.ClientActivity"
    android:exported="false"
    android:windowSoftInputMode="adjustResize"/>
<activity
	android:name=".ui.ServerActivity"
	android:exported="false"
	android:windowSoftInputMode="adjustResize"/>
实际上主要就是添加这行代码:
android:windowSoftInputMode="adjustResize"
④ 选择类型
现在服务端和客户端都有了,那么我们还需要一个入口,用来选择是服务端还是客户端。在ui包下新建一个SelectTypeActivity类,对应的布局是activity_select_type.xml,代码如下:
<?xml version="1.0" encoding="utf-8"?>
<LinearLayout xmlns:android="http://schemas.android.com/apk/res/android"
    xmlns:app="http://schemas.android.com/apk/res-auto"
    xmlns:tools="http://schemas.android.com/tools"
    android:layout_width="match_parent"
    android:layout_height="match_parent"
    android:orientation="vertical"
    tools:context=".ui.SelectTypeActivity">

    <com.google.android.material.appbar.MaterialToolbar
        android:layout_width="match_parent"
        android:layout_height="?attr/actionBarSize"
        android:background="@color/purple_500"
        app:title="选择类型"
        app:titleTextColor="@color/white" />

    <LinearLayout
        android:layout_width="match_parent"
        android:layout_height="match_parent"
        android:gravity="center"
        android:orientation="vertical">

        <Button
            android:id="@+id/btn_server"
            android:layout_width="240dp"
            android:layout_height="120dp"
            android:layout_marginBottom="20dp"
            android:text="服务端"
            android:textSize="18sp" />

        <Button
            android:id="@+id/btn_client"
            android:layout_width="240dp"
            android:layout_height="120dp"
            android:layout_marginTop="20dp"
            android:text="客户端"
            android:textSize="18sp" />
    </LinearLayout>
</LinearLayout>
然后我们看一下SelectTypeActivity的代码:
class SelectTypeActivity : BaseActivity() {

    override fun onCreate(savedInstanceState: Bundle?) {
        super.onCreate(savedInstanceState)
        setContentView(R.layout.activity_select_type)

        findViewById<Button>(R.id.btn_server).setOnClickListener {
            jumpActivity(ServerActivity::class.java)
        }

        findViewById<Button>(R.id.btn_client).setOnClickListener {
            jumpActivity(ClientActivity::class.java)
        }
    }
}
这里的代码就很简单,将他作为入口,跳转到ServerActivity和ClientActivity,然后我们打开AndroidManifest.xml,同时修改一下MainActivity和SelectTypeActivity所对应的activity标签,修改后的代码如下:
		<activity
            android:name=".ui.SelectTypeActivity"
            android:exported="true" >
            <intent-filter>
                <action android:name="android.intent.action.MAIN" />

                <category android:name="android.intent.category.LAUNCHER" />
            </intent-filter>
        </activity>
        <activity
            android:name=".ui.MainActivity"
            android:exported="false"/>
这里就是将SelectTypeActivity作为启动页面,同时MainActivity已经不再使用了,你可以删除也可以留着它,现在运行看看效果。
二、表情消息
说到表情消息,实际上就是emoji。基本上每个社交App都会有emoji,国内的基本上用的是自定义的库,国外的就是采用emojipedia中的居多,而在Jetpack组件中就有一个关于emoji的库。
① 依赖Emoji2库
一开始实际上是emoji库,后来emoji2的出现替换了emoji,因为emoji2的兼容性更强,那么怎么去使用它呢?打开app下的build.gradle,在dependencies{}闭包下添加如下代码:
	def emoji2_version = "1.2.0"
    implementation "androidx.emoji2:emoji2:$emoji2_version"
    implementation "androidx.emoji2:emoji2-views:$emoji2_version"
    implementation "androidx.emoji2:emoji2-views-helper:$emoji2_version"
    implementation 'androidx.emoji2:emoji2-bundled:1.0.0-alpha03'
这里要注意一点,使用最新版的emoji2需要你的appcompat库在1.4.0及以上版本。
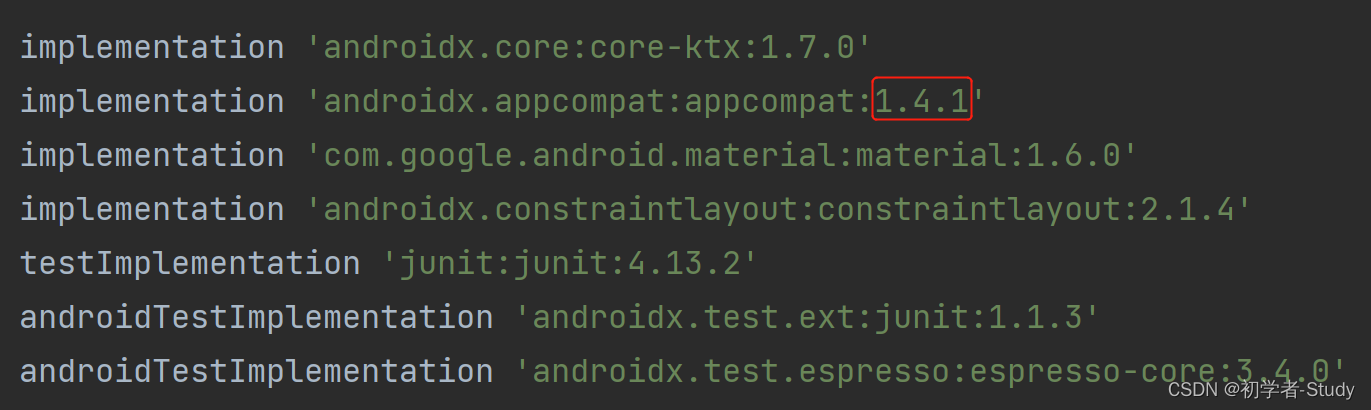
也就是这个库,添加好依赖之后点击Sync Now进行下载依赖同步。
② 初始化Emoji2库
使用Emoji2库,有两种方式,一种是使用可下载的,一种是本地绑定的,可下载需要支持Google的GMS服务,本地的不需要,但是会造成apk的大小增加很多。当然我这个应用首先就用不了GMS,因为是在国内,同时我还不在意应用大小,所以采用第二种本地绑定的方式。
下面我们来进行初始化操作,首先我们在com.llw.socket创建一个SocketApp,代码如下:
class SocketApp : Application() {

    private val TAG = SocketApp::class.java.simpleName

    companion object {
        private var instance: SocketApp by Delegates.notNull()
        fun instance() = instance
    }

    @SuppressLint("RestrictedApi")
    override fun onCreate() {
        super.onCreate()
        instance = this

        initEmoji2()
    }

    /**
     * 初始化Emoji2
     */
    private fun initEmoji2() = EmojiCompat.init(BundledEmojiCompatConfig(this).apply {
        setReplaceAll(true)
        registerInitCallback(object : InitCallback() {
            override fun onInitialized() {
            	//初始化成功回调
                Log.d(TAG, "onInitialized")
            }

            override fun onFailed(@Nullable throwable: Throwable?) {
                //初始化失败回调
                Log.e(TAG, throwable.toString())
            }
        })
    })
}
这里我们使用单例,然后初始化Emoji2,BundledEmojiCompatConfig就是绑定本地的方式,你可以选择生成apk看看里面占内存最大的是什么内容。通过SocketApp中初始化,在页面使用的时候可以就可以无所顾忌了。为了让App在启动的时候调用SocketApp,我们需要在AndroidManifest.xml中注册。
③ 加载Emoji列表
因为用的是本地的,所以我自己找了几个表情,在main文件夹下新建一个assets文件夹,文件夹下新建一个emoji.txt,里面的内容如下: