今天是年前最后一篇文章了,不想写太多的东西,就写一些有关Redis相关问题的解决方案。当我们启动了Redis服务器之后,会看到3个警告,如果没看到,那是很好的,但是我看到了。看到了就不能不管,所以就好好的解决一下。我把这三个警告的信息截图了,大家可以有更直接的感觉。效果截图如下:
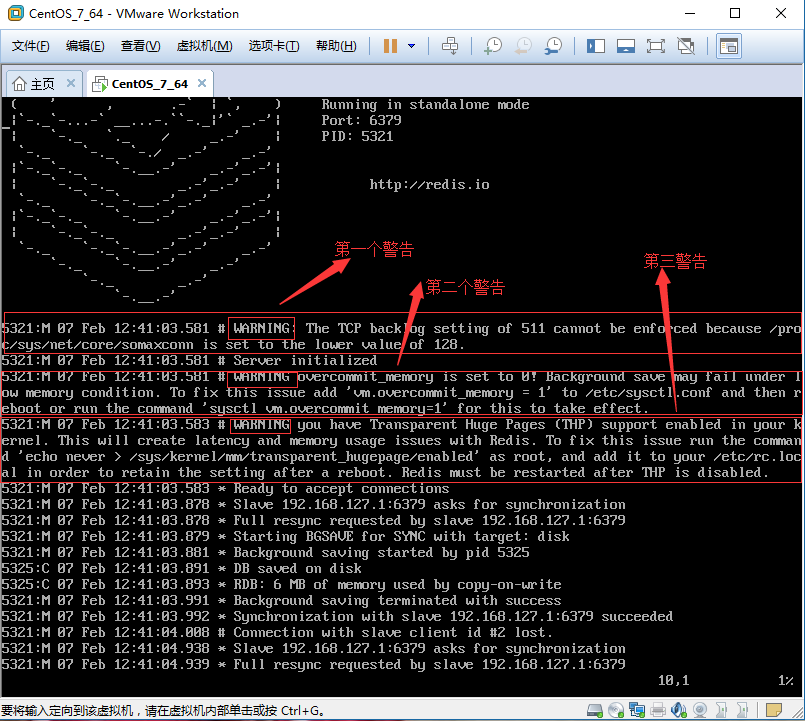
1)、第一个警告信息提示:The TCP backlog setting of 511 cannot be enforced because /proc/sys/net/core/somaxconn is set to the lower value of 128
2)、第二个警告信息提示:WARNING overcommit_memory is set to 0! Background save may fail under low memory condition. To fix this issue add ‘vm.overcommit_memory = 1‘ to /etc/sysctl.conf and then reboot or run the command ‘sysctl vm.overcommit_memory=1‘ for this to take effect.
这两个问题的解决方法很简单,晚上也有类似的解决方案。
解决:
         //针对这两个问题,都要修改/etc/sysctl.conf文件,在文件末尾加入以下两句:

         net.core.somaxconn= 1024
         vm.overcommit_memory = 1
3)、第三个警告信息提示:WARNING you have Transparent Huge Pages (THP) support enabled in your kernel. This will create latency and memory usage issues with Redis. To fix this issue run the command ‘echo never > /sys/kernel/mm/transparent_hugepage/enabled‘ as root,and add it to your /etc/rc.local in order to retain the setting after a reboot. Redis must be restarted after THP is disabled.
这个问题不容易解决,我搞了好久才搞定的,所以必须记录下来,否则以后想看看都不容易。
大家想了解跟多情况,可以查看该博客 http://docs.fedoraproject.org/en-US/Fedora/21/html/System_Administrators_Guide/sec-GRUB_2_over_Serial_Console.html#sec-Configuring_GRUB_2 。
第一种方式:
我们开始第三个问题的解决吧,如果你也是grub2的linux系统,请通过以下步骤关闭大内存页面。
步骤一、 编辑 /etc/default/grub,在GRUB_CMDLINE_LINUX加入选项 transparent_hugepage=never
    GRUB_TIMEOUT=5
    GRUB_DISTRIBUTOR="$(sed 's,release .*$,g' /etc/system-release)"
    GRUB_DEFAULT=saved
    GRUB_DISABLE_SUBMENU=true
    GRUB_TERMINAL_OUTPUT=console
    GRUB_CMDLINE_LINUX=rd.lvm.lv=fedora/swap rd.lvm.lv=fedora/root rhgb quiet transparent_hugepage=never
    GRUB_DISABLE_RECOVERY=true"
步骤二、 重新生成grub配置文件
[root@linux ~]# grub2-mkconfig -o /boot/grub2/grub.cfg
步骤三、 重启你的系统
至此大功告成,如果你使用的是grub,请把选项写入grub.conf文件就好了。
步骤四、查询hugepage状态
       [root@linux ~]# cat /sys/kernel/mm/transparent_hugepage/enabled
        always madvise [never]
第二种方式:
   [root@linux ~]$ grep Huge /proc/meminfo
    AnonHugePages:         0 kB
    HugePages_Total:
    HugePages_Free:
    HugePages_Rsvd:
    HugePages_Surp:
    Hugepagesize:       2048 kB
解决了,还是很高兴的。其实这三个警告信息已经提供了解决办法,有的是临时方法,有的是永久方法,只是第三个警告不是那么直接好解决。好了,今天就到这里,我在这里祝福大家新年快乐,我自己也新年快乐。
 文章浏览阅读752次。关系型数据库关系型数据库是一个结构化的...