命令列表
先把所有的命令给出来了。
yum -y install gcc-c++
yum -y install wget
yum install -y pcre pcre-devel
yum install -y zlib zlib-devel
yum install -y openssl openssl-devel
wget -c https://nginx.org/download/nginx-1.14.1.tar.gz
tar -zxvf nginx-1.14.1.tar.gz
cd nginx-1.14.1
./configure && make && make install
whereis nginx
/usr/local/nginx/sbin/nginx
一步安装
所有的命令一起执行,爽歪歪
复制下面的命令,然后粘贴到命令行,等着就好了
yum -y install gcc-c++ && yum -y install wget && yum install -y pcre pcre-devel && yum install -y zlib zlib-devel && yum install -y openssl openssl-devel && wget -c https://nginx.org/download/nginx-1.14.1.tar.gz && tar -zxvf nginx-1.14.1.tar.gz && cd nginx-1.14.1 && ./configure && make && make install
分步安装+介绍
一. gcc 安装
安装 nginx 需要先将官网下载的源码进行编译,编译依赖 gcc 环境,如果没有 gcc 环境,则需要安装:
yum -y install gcc-c++
二. wget安装
下面下载nginx需要使用wget命令下载,有些系统没有wget,需要下载。
yum -y install wget
三. PCRE 安装
PCRE(Perl Compatible Regular Expressions) 是一个Perl库,包括 perl 兼容的正则表达式库。nginx 的 http 模块使用 pcre 来解析正则表达式,所以需要在 linux 上安装 pcre 库,pcre-devel 是使用 pcre 开发的一个二次开发库。nginx也需要此库。命令:
yum install -y pcre pcre-devel
四. zlib 安装
zlib 库提供了很多种压缩和解压缩的方式, nginx 使用 zlib 对 http 包的内容进行 gzip ,所以需要在 Centos 上安装 zlib 库。
yum install -y zlib zlib-devel
五. OpenSSL 安装
OpenSSL 是一个强大的安全套接字层密码库,囊括主要的密码算法、常用的密钥和证书封装管理功能及 SSL 协议,并提供丰富的应用程序供测试或其它目的使用。
nginx 不仅支持 http 协议,还支持 https(即在ssl协议上传输http),所以需要在 Centos 安装 OpenSSL 库。
yum install -y openssl openssl-devel
六. Nginx安装
nginx下载
使用wget命令下载(推荐)。
wget -c https://nginx.org/download/nginx-1.14.1.tar.gz
nginx解压
依然是直接命令:
tar -zxvf nginx-1.10.1.tar.gz
nginx配置
其实在 nginx-1.10.1 版本中你就不需要去配置相关东西,默认就可以了。当然,如果你要自己配置目录也是可以的。
- 进入目录
cd nginx-1.14.1 - 配置
- 使用默认配置
./configure - 自定义配置(不推荐)
./configure \
--prefix=/usr/local/nginx \
--conf-path=/usr/local/nginx/conf/nginx.conf \
--pid-path=/usr/local/nginx/conf/nginx.pid \
--lock-path=/var/lock/nginx.lock \
--error-log-path=/var/log/nginx/error.log \
--http-log-path=/var/log/nginx/access.log \
--with-http_gzip_static_module \
--http-client-body-temp-path=/var/temp/nginx/client \
--http-proxy-temp-path=/var/temp/nginx/proxy \
--http-fastcgi-temp-path=/var/temp/nginx/fastcgi \
--http-uwsgi-temp-path=/var/temp/nginx/uwsgi \
--http-scgi-temp-path=/var/temp/nginx/scgi
注:将临时文件目录指定为/var/temp/nginx,需要在/var下创建temp及nginx目录 - 使用默认配置
- nginx编译安装
make
make install
也可以不分开和上面的配置一起
./configure && make && make install 查看nginx安装位置
whereis nginx

Nginx命令控制
- 启动:
/usr/local/nginx/sbin/nginx - 强行停止:
/usr/local/nginx/sbin/nginx -s stop - 平滑停止:
/usr/local/nginx/sbin/nginx -s quit - 重新加载配置文件:
/usr/local/nginx/sbin/nginx -s reload
配置文件修改后,执行这个命令可以不停止nginx,使配置文件生效
上面的命令也可以先进入安装目录cd /usr/local/nginx/sbin执行./nginx
- 查看nginx运行状况:
ps -ef | grep nginx

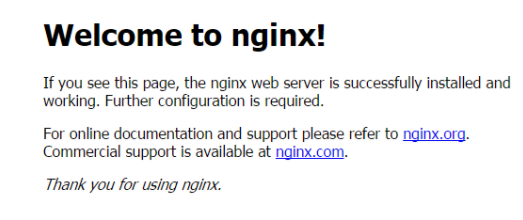
启动后就可以在浏览器看到这个页面了
 文章浏览阅读3.7k次,点赞2次,收藏5次。Nginx学习笔记一、N...
 文章浏览阅读1.7w次,点赞14次,收藏61次。我们在使用容器的...
 文章浏览阅读2.7k次。docker 和 docker-compose 部署 nginx+...
 文章浏览阅读1.3k次。5:再次启动nginx,可以正常启动,可以...
 文章浏览阅读3.1w次,点赞105次,收藏182次。高性能:Nginx ...