安装前准备
- 修改默认主机名称
[root@iZuf60c5bxd15kr9gycvv6Z ~]# hostnamectl set-hostname centos7
[root@iZuf60c5bxd15kr9gycvv6Z ~]# reboot
[root@iZuf60c5bxd15kr9gycvv6Z ~]# yum update
- 安装依赖库
[root@centos7 ~]# yum -y install libaio libaio-devel bison bison-devel zlib-devel openssl openssl-devel ncurses ncurses-devel libcurl-devel libarchive-devel boost boost-devel lsof wget gcc gcc-c++ make cmake perl kernel-headers kernel-devel pcre-devel
删除系统默认数据库配置文件
- 查询
[root@centos7 ~]# find -H /etc/ | grep my.c
/etc/my.cnf
/etc/my.cnf.d
/etc/my.cnf.d/mysql-clients.cnf
/etc/pki/tls/certs/renew-dummy-cert
/etc/pki/tls/certs/make-dummy-cert
- 删除
[root@centos7 ~]# rm -rf /etc/my.cnf /etc/my.cnf.d /etc/my.cnf.d/mysql-clients.cnf
- 确认
[root@centos7 ~]# find -H /etc/ | grep my.c
/etc/pki/tls/certs/renew-dummy-cert
/etc/pki/tls/certs/make-dummy-cert
卸载系统自带mariadb-libs
- 查询
[root@centos7 ~]# rpm -qa|grep mariadb-libs
mariadb-libs-5.5.52-1.el7.x86_64
- 删除
[root@centos7 ~]# rpm -e mariadb-libs-5.5.52-1.el7.x86_64 --nodeps
安装MariaDB数据库
- 下载安装包
[root@centos7 ~]# cd /usr/local/src
[root@centos7 src]# wget https://downloads.mariadb.org/interstitial/mariadb-10.2.8/source/mariadb-10.2.8.tar.gz
- 解压
[root@centos7 src]# tar -zxvf mariadb-10.2.8.tar.gz
- 创建数据库安装目录,数据存放目录,以及用户组、用户
# 创建mysql用户组
[root@centos7 mariadb-10.2.8]# groupadd -r mysql
# 创建mysql用户
[root@centos7 mariadb-10.2.8]# useradd -r -g mysql -s /sbin/nologin -d /usr/local/mysql -M mysql
# 创建安装目录
[root@centos7 mariadb-10.2.8]# mkdir -p /usr/local/mysql
# 创建数据存放目录
[root@centos7 mariadb-10.2.8]# mkdir -p /data/mysql
# 赋以mysql用户读写权限
[root@centos7 mariadb-10.2.8]# chown -R mysql:mysql /data/mysql
- 编译安装
[root@centos7 mariadb-10.2.8]# cd /usr/local/src/mariadb-10.2.8
# 输入以下编译参数
cmake . -DCMAKE_INSTALL_PREFIX=/usr/local/mysql \
-DMYSQL_DATADIR=/data/mysql \
-DSYSCONFDIR=/etc \
-DWITHOUT_TOKUDB=1 \
-DWITH_INNOBASE_STORAGE_ENGINE=1 \
-DWITH_ARCHIVE_STPRAGE_ENGINE=1 \
-DWITH_BLACKHOLE_STORAGE_ENGINE=1 \
-DWIYH_READLINE=1 \
-DWIYH_SSL=system \
-DVITH_ZLIB=system \
-DWITH_LOBWRAP=0 \
-DMYSQL_UNIX_ADDR=/tmp/mysql.sock \
-DDEFAULT_CHARSET=utf8 \
-DDEFAULT_COLLATION=utf8_general_ci

# 如果编译失败请删除CMakeCache.txt
[root@centos7 mariadb-10.2.8]# rm -f CMakeCache.txt
# 让指令重新执行,否则每次读取这个文件,命令修改正确也是报错
# cmake没问题,可以编译并且安装了

# 开始安装,这个过程比较久,跟据电脑配制不同可能会有10-30分钟
[root@centos7 mariadb-10.2.8]# make && make install
- 导入mysql系统表
[root@centos7 mariadb-10.2.8]# cd /usr/local/mysql/
[root@localhost mysql]# scripts/mysql_install_db --user=mysql --datadir=/data/mysql
- 复制配制文件
[root@localhost ~]# cd /usr/local/mysql/
[root@localhost mysql]# cp support-files/my-large.cnf /etc/my.cnf
- 编写快捷启动脚本
[root@centos7 mysql]# vi /lib/systemd/system/mysql.service
# --------------------------------------------------------------------------
# 输入以下代码
# --------------------------------------------------------------------------
[Unit]
Description=MySQL Community Server
After=network.target

[Service]
User=mysql
Group=mysql
Type=forking
PermissionsStartOnly=true
PIDFile=/data/mysql/centos7.pid
ExecStart=/usr/local/mysql/support-files/mysql.server start
ExecReload=/usr/local/mysql/support-files/mysql.server restart
ExecStop=/usr/local/mysql/support-files/mysql.server stop
PrivateTmp=true

[Install]
WantedBy=multi-user.target
- 设置开机启动
[root@centos7 mysql]# systemctl enable mysql.service
- 其它命令说明
# 启动mysql
[root@centos7 mysql]# systemctl start mysql.service
# 停止mysql
[root@centos7 mysql]# systemctl stop mysql.service
# 重启mysql
[root@centos7 mysql]# systemctl restart mysql.service
# 如果提示:Job for mysql.service failed because the control process exited with error code. See "systemctl status mysql.service" and "journalctl -xe" for details.
# 请选结束mysql进程后再尝试执行上面的快捷操作
[root@centos7 mysql]# pkill -9 mysql
- 配置环境变量(以便在任何目录下输入mysql命令)
# 创建独立环境变量文件
[root@localhost mysql]# touch /etc/profile.d/mysql.sh
# 写入变量值
[root@localhost mysql]# echo 'export PATH=$PATH:/usr/local/mysql/bin/' > /etc/profile.d/mysql.sh
# 赋以执行权限
[root@localhost mysql]# chmod 0777 /etc/profile.d/mysql.sh
# 刷新生效
[root@localhost mysql]# source /etc/profile.d/mysql.sh
- 初始化MariaDB
# 运行MariaDB初始化脚本
[root@localhost mysql]# ./bin/mysql_secure_installation

# --------------------------------------------------------------------------
# 根据相关提示进行操作
# 以下提示:
# --------------------------------------------------------------------------
Enter current password for root (enter for none):    输入当前root密码(没有输入)
Set root password? [Y/n]                             设置root密码?(是/否)
New password:                                        输入新root密码
Re-enter new password:                               确认输入root密码
Password updated successfully!                       密码更新成功
Remove anonymous users? [Y/n]                        删除匿名用户?(是/否)
Disallow root login remotely? [Y/n]                  不允许root登录远程?(是/否)
Reload privilege tables now? [Y/n]                   现在重新加载权限表(是/否)

#全部完成!如果你已经完成了以上步骤,MariaDB安装现在应该安装完成。
- 创建外部管理员帐号(根据需要,请尽量保证密码的复杂性避免数据库外泄)
[root@localhost mysql] mysql -uroot -p
# 根据提示输入密码
MariaDB [(none)]> GRANT ALL PRIVILEGES ON *.* TO 'admin'@'%' IDENTIFIED BY 'password' WITH GRANT OPTION;
安装NGINX
-下载安装包并解压
[root@localhost mysql]# cd /usr/local/src
[root@localhost src]# wget http://nginx.org/download/nginx-1.12.1.tar.gz
[root@localhost src]# tar -zxvf nginx-1.12.1.tar.gz
- 创建NGINX安装目录,WEB存放目录,以及用户组、用户
# 创建nginx用户组
[root@centos7 src]# groupadd -r www
# 创建nginx用户
[root@centos7 src]# useradd -r -g www -s /sbin/nologin -d /usr/local/nginx -M www
# 创建安装目录
[root@centos7 src]# mkdir -p /usr/local/nginx
# 创建数据存放目录
[root@centos7 src]# mkdir -p /data/web
# 赋以mysql用户读写权限
[root@centos7 src]# chown -R www:www /data/web
-编译安装
[root@localhost src]# cd nginx-1.12.1
# 输入以下参数
./configure \
--prefix=/usr/local/nginx \
--without-http_memcached_module \
--user=www  \
--group=www \
--with-http_stub_status_module \
--with-http_ssl_module \
--with-http_gzip_static_module

# 如果看到以下说明则编译成功
Configuration summary
  + using system PCRE library
  + using system OpenSSL library
  + using system zlib library

  nginx path prefix: "/usr/local/nginx"
  nginx binary file: "/usr/local/nginx/sbin/nginx"
  nginx modules path: "/usr/local/nginx/modules"
  nginx configuration prefix: "/usr/local/nginx/conf"
  nginx configuration file: "/usr/local/nginx/conf/nginx.conf"
  nginx pid file: "/usr/local/nginx/logs/nginx.pid"
  nginx error log file: "/usr/local/nginx/logs/error.log"
  nginx http access log file: "/usr/local/nginx/logs/access.log"
  nginx http client request body temporary files: "client_body_temp"
  nginx http proxy temporary files: "proxy_temp"
  nginx http fastcgi temporary files: "fastcgi_temp"
  nginx http uwsgi temporary files: "uwsgi_temp"
  nginx http scgi temporary files: "scgi_temp"

# 开始安装
[root@localhost nginx-1.12.1]# make && make install
- 尝试启动
[root@centos7 nginx-1.12.1]# /usr/local/nginx/sbin/nginx
# 如果未提示错误即代表安装成功
- 编写快捷启动脚本
[root@centos7 nginx-1.12.1]# vi /lib/systemd/system/nginx.service
# --------------------------------------------------------------------------
# 输入以下代码
# --------------------------------------------------------------------------
[Unit]
Description=nginx
After=network.target

[Service]
Type=forking
PIDFile=/usr/local/nginx/logs/nginx.pid
ExecStart=/usr/local/nginx/sbin/nginx
ExecReload=/usr/local/nginx/sbin/nginx -s reload
ExecStop=/usr/local/nginx/sbin/nginx -s quit
PrivateTmp=true

[Install]
WantedBy=multi-user.target
- 设置开机启动
[root@centos7 nginx-1.12.1]# systemctl enable nginx.service
- 其它命令说明
# 启动nginx
[root@centos7 nginx-1.12.1]# systemctl start nginx.service
# 停止nginx
[root@centos7 nginx-1.12.1]# systemctl stop nginx.service
# 重启nginx
[root@centos7 nginx-1.12.1]# systemctl restart nginx.service
# 如果提示:Job for nginx.service failed because the control process exited with error code. See "systemctl status nginx.service" and "journalctl -xe" for details.
# 请选结束nginx进程后再尝试执行上面的快捷操作
[root@centos7 nginx-1.12.1]# pkill -9 nginx
- 修改配NGINX配制文件
[root@centos7 php-7.1.9]# cd /usr/local/nginx/conf
[root@centos7 conf]# vi nginx.conf
# 修改如下代码
# --------------------------------------------------------------------------
#user  nobody;去除前面#号,并将用户改为www www
user www www;
# --------------------------------------------------------------------------
#pid        logs/nginx.pid; 去除前面的#号
pid        logs/nginx.pid;
# --------------------------------------------------------------------------
去除前面的#号 如下
log_format  main  '$remote_addr - $remote_user [$time_local] "$request" '
                  '$status $body_bytes_sent "$http_referer" '
                  '"$http_user_agent" "$http_x_forwarded_for"';
# --------------------------------------------------------------------------
# gzip  on;去除前面的#号并加上隐藏版号代码
server_tokens off;
# --------------------------------------------------------------------------
index  index.html index.htm;后面加上index.php 默认页
index  index.html index.htm index.php;
# --------------------------------------------------------------------------
去下以下前面的#号并做如下修改
location ~ \.php$ {
    root           html;
    fastcgi_pass   127.0.0.1:9000;
    fastcgi_index  index.php;
    #fastcgi_param  SCRIPT_FILENAME  /scripts$fastcgi_script_name;
    fastcgi_param  SCRIPT_FILENAME $document_root$fastcgi_script_name;
    include        fastcgi_params;
}
- 最后张节介绍虚拟主机配制,以及memcache配制
安装PHP7
- 下载安装包并解压
[root@centos7 nginx-1.12.1]# cd /usr/local/src
[root@centos7 src]# wget http://cn.php.net/distributions/php-7.1.9.tar.gz
[root@centos7 src]# tar -zxvf php-7.1.9.tar.gz
- 安装必要的相关扩展
[root@centos7 src]# yum install libxml2 libxml2-devel openssl openssl-devel bzip2 bzip2-devel libcurl libcurl-devel libjpeg libjpeg-devel libpng libpng-devel freetype freetype-devel gmp gmp-devel libmcrypt libmcrypt-devel readline readline-devel libxslt libxslt-devel
-编译安装
[root@localhost src]# cd php-7.1.9
# 输入以下参数
./configure \
--prefix=/usr/local/php \
--with-config-file-path=/usr/local/php/etc \
--enable-fpm \
--with-fpm-user=www  \
--with-fpm-group=www \
--enable-inline-optimization \
--disable-debug \
--disable-rpath \
--enable-shared  \
--enable-soap \
--with-libxml-dir \
--with-xmlrpc \
--with-openssl \
--with-mcrypt \
--with-mhash \
--with-pcre-regex \
--with-zlib \
--enable-bcmath \
--with-iconv \
--with-bz2 \
--enable-calendar \
--with-curl \
--with-cdb \
--enable-dom \
--enable-exif \
--enable-fileinfo \
--enable-filter \
--with-pcre-dir \
--enable-ftp \
--with-gd \
--with-openssl-dir \
--with-jpeg-dir \
--with-png-dir \
--with-zlib-dir  \
--with-freetype-dir \
--enable-gd-native-ttf \
--enable-gd-jis-conv \
--with-gettext \
--with-gmp \
--with-mhash \
--enable-json \
--enable-mbstring \
--enable-mbregex \
--enable-mbregex-backtrack \
--with-libmbfl \
--with-onig \
--enable-pdo \
--with-mysqli=mysqlnd \
--with-pdo-mysql=mysqlnd \
--with-zlib-dir \
--with-pdo-sqlite \
--with-readline \
--enable-session \
--enable-shmop \
--enable-simplexml \
--enable-sockets  \
--enable-sysvmsg \
--enable-sysvsem \
--enable-sysvshm \
--enable-wddx \
--with-libxml-dir \
--with-xsl \
--enable-zip \
--enable-mysqlnd-compression-support \
--with-pear \
--enable-opcache

# 开始安装
[root@localhost php-7.1.9]# make && make install
- 配置环境变量(以便在任何目录下输入php命令)
# 创建独立环境变量文件
[root@localhost php-7.1.9]# touch /etc/profile.d/php.sh
# 写入变量值
[root@localhost php-7.1.9]# echo 'export PATH=$PATH:/usr/local/php/bin/' > /etc/profile.d/php.sh
# 赋以执行权限
[root@localhost php-7.1.9]# chmod 0777 /etc/profile.d/php.sh
# 刷新生效
[root@localhost php-7.1.9]# source /etc/profile.d/php.sh
- 配制php.ini
[root@centos7 php-7.1.9]# cp php.ini-production /usr/local/php/etc/php.ini
[root@centos7 php-7.1.9]# vi /usr/local/php/etc/php.ini
# 做以下修改(时区,不显示版本号,开启opcache缓存加速PHP)
# --------------------------------------------------------------------------
1.找到:;date.timezone =                               修改为:date.timezone = PRC
2.找到:expose_php = On                                   修改为:expose_php = Off
3.找到:opcache.enable=0                              修改为:opcache.enable=1
4.在 Dynamic Extensions 代码块中添加 zend_extension=opcache.so
- 配置php-fpm
[root@centos7 php-7.1.9]# cp /usr/local/php/etc/php-fpm.conf.default /usr/local/php/etc/php-fpm.conf
[root@centos7 php-7.1.9]# cp /usr/local/php/etc/php-fpm.d/www.conf.default /usr/local/php/etc/php-fpm.d/www.conf
[root@centos7 php-7.1.9]# cp sapi/fpm/init.d.php-fpm /usr/local/php/bin/php-fpm
[root@centos7 php-7.1.9]# chmod 0777 /usr/local/php/bin/php-fpm
- 尝试启动
[root@centos7 php-7.1.9]# /usr/local/php/bin/php-fpm start
Starting php-fpm  done
# 如提示以上即表示安装成功
- 编写快捷启动脚本
[root@centos7 php-7.1.9]# vi /lib/systemd/system/php-fpm.service
# --------------------------------------------------------------------------
# 输入以下代码
# --------------------------------------------------------------------------
[Unit]
Description=php-fpm
After=network.target

[Service]
Type=forking
PIDFile=/usr/local/php/var/run/php-fpm.pid
ExecStart=/usr/local/php/bin/php-fpm start
ExecReload=/usr/local/php/bin/php-fpm restart
ExecStop=/usr/local/php/bin/php-fpm stop
PrivateTmp=true

[Install]
WantedBy=multi-user.target
- 设置开机启动
[root@centos7 php-7.1.9]# systemctl enable php-fpm.service
- 其它命令说明
# 启动php-fpm
[root@centos7 php-7.1.9]# systemctl start php-fpm.service
# 停止php-fpm
[root@centos7 php-7.1.9]# systemctl stop php-fpm.service
# 重启php-fpm
[root@centos7 php-7.1.9]# systemctl restart php-fpm.service
# 如果提示:Job for php-fpm.service failed because the control process exited with error code. See "systemctl status php-fpm.service" and "journalctl -xe" for details.
# 请选结束php-fpm进程后再尝试执行上面的快捷操作
[root@centos7 php-7.1.9]# pkill -9 php-fpm
NGINX虚拟主机配制
- 打开配制文件
[root@centos7 php-7.1.9]# vi /usr/local/nginx/conf/nginx.conf
- 在http{}节点尾加入以下代码
##############################################
    #LIANGZHI
    ##############################################
    server {
        listen          80;
        server_name     *.demo.com;
        root            /data/web/demo/www;
        access_log      /data/web/demo/log/access.log  main;
        error_log       /data/web/demo/log/error.log error;
        index           index.php;

        #THINKPHP伪静态
        location / {
            if (!-e $request_filename) {
                rewrite ^(.*)$ /index.php?s=$1 last;
                break;
            }
        }

        #解析PHP代码
        location ~ \.php$ {
            fastcgi_pass   127.0.0.1:9000;
            fastcgi_index  index.php;
            fastcgi_param  SCRIPT_FILENAME $document_root$fastcgi_script_name;
            include        fastcgi_params;
        }

        #静态资源缓存1天
        location ~ .*\.(gif|jpg|jpeg|png|bmp|ico|swf|js|css)$ {
            expires     1d;
            access_log  off;
        }

        #字体文件跨域问题
        location ~ .*\.(eof|ttf|ttc|otf|eof|woff|woff2|svg)(.*){
            add_header Access-Control-Allow-Origin *;
        }
    }
安装PHP支持插件Memcache
[root@centos7 www]# cd /usr/local/src
[root@centos7 src]# wget http://memcached.org/files/memcached-1.5.1.tar.gz
[root@centos7 src]# tar -zxvf memcached-1.5.1.tar.gz
[root@centos7 src]# cd memcached-1.5.1
[root@centos7 memcached-1.5.1]# yum install libevent*
[root@centos7 memcached-1.5.1]# ./configure --prefix=/usr/local/memcached
[root@centos7 memcached-1.5.1]# make && make install
- 编写快捷启动脚本
[root@centos7 memcached-1.5.1]# vi /usr/local/memcached/memcached
# 输入以下代码(启动参数请在下面的脚本中修改,如端口,最大内存)
#! /bin/sh
#
# chkconfig: - 55 45
# description:  The memcached daemon is a network memory cache service.
# processname: memcached
# config: /etc/sysconfig/memcached

# Source function library.
. /etc/rc.d/init.d/functions

PORT=11211
USER=root
MAXCONN=1024
CACHESIZE=64
OPTIONS=""

if [ -f /etc/sysconfig/memcached ];then
    . /etc/sysconfig/memcached
fi

# Check that networking is up.
if [ "$NETWORKING" = "no" ]
then
    exit 0
fi

RETVAL=0

start () {
    echo "Starting memcached ..."
    # insure that /var/run/memcached has proper permissions
    chown $USER /usr/local/memcached/bin/memcached
    /usr/local/memcached/bin/memcached -d -p $PORT -u $USER -m $CACHESIZE -c $MAXCONN -P /var/run/memcached.pid $OPTIONS
    RETVAL=$?
    echo
    [ $RETVAL -eq 0 ] && touch /var/lock/subsys/memcached
}
stop () {
    echo "Stopping memcached ..."
    killproc memcached
    RETVAL=$?
    echo
    if [ $RETVAL -eq 0 ] ; then
        rm -f /var/lock/subsys/memcached
        rm -f /var/run/memcached.pid
    fi
}

restart () {
    stop
    start
}

# See how we were called.
case "$1" in
    start)
        start
        ;;
    stop)
    stop
    ;;
    status)
    status memcached
    ;;
    restart|reload)
    restart
    ;;
    condrestart)
    [ -f /var/lock/subsys/memcached ] && restart || :
    ;;
    *)
    echo $"Usage: $0 {start|stop|status|restart|reload|condrestart}"
    exit 1
esac
- 脚本执行权限
[root@localhost memcached-1.5.1]# chmod 0777 /usr/local/memcached/memcached
- 编写服务启动脚本
[root@centos7 memcached-1.5.1]# vi /lib/systemd/system/memcached.service
# --------------------------------------------------------------------------
# 输入以下代码
# --------------------------------------------------------------------------
[Unit]
Description=memcached
After=network.target

[Service]
Type=forking
PIDFile=/var/run/memcached.pid
ExecStart=/usr/local/memcached/memcached start
ExecReload=/usr/local/memcached/memcached restart
ExecStop=/usr/local/memcached/memcached stop
PrivateTmp=true

[Install]
WantedBy=multi-user.target
- 设置开机启动
[root@centos7 memcached-1.5.1]# systemctl enable memcached.service
- 其它命令说明
# 启动memcached
[root@centos7 memcached-1.5.1]# systemctl start memcached.service
# 停止memcached
[root@centos7 memcached-1.5.1]# systemctl stop memcached.service
# 重启memcached
[root@centos7 memcached-1.5.1]# systemctl restart memcached.service
# 如果提示:Job for memcached.service failed because the control process exited with error code. See "systemctl status memcached.service" and "journalctl -xe" for details.
# 请选结束memcached进程后再尝试执行上面的快捷操作
[root@centos7 memcached-1.5.1]# pkill -9 memcached
- 为PHP增加memcache支持(官司网memcache-3.0.8暂时不支持PHP的编译)
官网memcache-3.0.8在编译的时候出现“php-smart_str.h”没有找到的错误!
但是我们可以在github里面找到pecl-memcache支持PHP7的分支,请按以下操作即可完成memcache中扩展安装
[root@centos7 memcached]# cd /usr/local/src/php-7.1.9/ext
# 如果已经安装git忽略yun install git
[root@centos7 memcached]# yum install git
[root@centos7 ext]# git clone https://github.com/websupport-sk/pecl-memcache memcache
[root@centos7 ext]# cd memcache
[root@centos7 ext]# yum install autoconf
[root@centos7 ext]# /usr/local/php/bin/phpize
[root@centos7 ext]# ./configure --with-php-config=/usr/local/php/bin/php-config
[root@centos7 ext]# make && make install
- 修改php.ini
[root@centos7 ext]# vi /usr/local/php/etc/php.ini
# 在 Dynamic Extensions 代码块中添加如下扩展
extension=/usr/local/php/lib/php/extensions/no-debug-non-zts-20160303/memcache.so
-重启linux完成安装(或重启nginx php-fpm)
[root@centos7 ext]# reboot
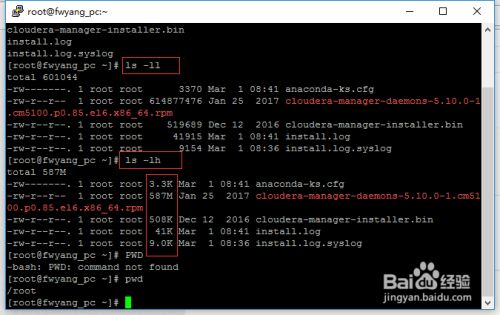 最简单的查看方法可以使用ls -ll、ls-lh命令进行查看,当使用...