使用AngularJS创建单页应用的编程指引

概述

单页应用现在越来越受欢迎。模拟单页应用程序行为的网站都能提供手机/平板电脑应用程序的感觉。Angular可以帮助我们轻松创建此类应用

简单应用

我们打算创建一个简单的应用,涉及主页,关于和联系我们页面。虽然Angular是为创建比这更复杂的应用而生的,但是本教程展示了许多我们在大型项目中需要的概念。

目标

  • 单页应用
  • 无刷新式页面变化
  • 每个页面包含不同数据

虽然使用Javascript和Ajax可以实现上述功能,但是在我们的应用中,Angular可以使我们处理更容易。
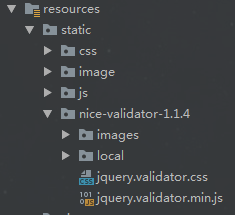
文档结构

  • - script.js
  • - index.html
  • - pages
  • ----- home.html
  • ----- about.html
  • ----- contact.html

HTML页面

这一部分比较简单。我们使用Bootstrap和Font Awesome。打开你的index.html文件,然后我们利用导航栏,添加一个简单布局。

rush:js;">

<script src="https://ajax.googleapis.com/ajax/libs/angularjs/1.0.8/angular.min.js"&gt;
<script src="script.js">

  <ul class="nav navbar-nav navbar-right"&gt;
    <li><a href="#"&gt;<i class="fa fa-home"&gt;</i> Home</a></li>
    <li><a href="#about"&gt;<i class="fa fa-shield"&gt;</i> About</a></li>
    <li><a href="#contact"&gt;<i class="fa fa-comment"&gt;</i> Contact</a></li>
  </ul>
</div>
</nav>

<div id="main">

<!-- angular templating -->
<!-- this is where content will be injected -->

<footer class="text-center">
View the tutorial on <a href="http://scotch.io/tutorials/angular-routing-and-templating-tutorial"&gt;Scotch.io

在页面超链接中,我们使用"#"。我们不希望浏览器认为我们实际上是链接到about.html和contact.html。

Angular应用 模型和控制器

此时我们准备设置我们的应用。让我们先来创建angular模型和控制器。关于模型和控制器,请查阅文档已获得更多内容。

首先,我们需要用javascript来创建我们的模型和控制器,我们将此操作放到script.js中:

// create the module and name it scotchApp
var scotchApp = angular.module('scotchApp',[]);

// create the controller and inject Angular's $scope
scotchApp.controller('mainController',function($scope) {

// create a message to display in our view
$scope.message = 'Everyone come and see how good I look!';
});

接下来让我们把模型和控制器添加到我们的HTML页面中,这样Angular可以知道如何引导我们的应用。为了测试功能有效,我们也会展示一个我们创建的变量$scope.message的值。

<html ng-app="scotchApp">

<script src="https://ajax.googleapis.com/ajax/libs/angularjs/1.2.10/angular.min.js"&gt;
<script src="//ajax.googleapis.com/ajax/libs/angularjs/1.2.10/angular-route.js">
<script src="script.js">

<body ng-controller="mainController">

...

<div id="main">
{{ message }}

在main这个div层中,我们现在可以看到我们创建的消息。知道了我们的模型和控制器设置完毕并且Angular可以正常运行,那么我们将要开始使用这一层来展示不同的页面。

将页面注入到主布局中

ng-view 是一个用来包含当前路由(/home,/about,or /contact)的模板的angular指令,它会获得基于特定路由的文件并将其诸如到主布局中(index.html).

我们将会想div#main中的站点加入ng-view代码来告诉Angular将我们渲染的页面放在哪里.

...

<div id="main">

...

配置路由和视图

由于我们在创建一个单页应用,并且不希望页面刷新,那么我们会用到Angular路由的能力。

让我们看一下我们的Angular文件,并添加到我们的应用中。我们将会在Angular中使用$routeProvider来处理我们的路由。通过这种方式,Angular将会处理所有神奇的请求,通过取得一个新文件并将其注入到我们的布局中。

AngularJS 1.2 和路由

在1.1.6版本之后,ngRoute模型不在包含在Angular当中。你需要通过在文档开头声明该模型来使用它。该教程已经为AngularJS1.2更新:

// create the module and name it scotchApp
// also include ngRoute for all our routing needs
var scotchApp = angular.module('scotchApp',['ngRoute']);

// configure our routes
scotchApp.config(function($routeProvider) {
$routeProvider

// route for the home page
.when('/',{
  templateUrl : 'pages/home.html',controller : 'mainController'
})

// route for the about page
.when('/about',{
  templateUrl : 'pages/about.html',controller : 'aboutController'
})

// route for the contact page
.when('/contact',{
  templateUrl : 'pages/contact.html',controller : 'contactController'
});

});

// create the controller and inject Angular's $scope
scotchApp.controller('mainController',function($scope) {
// create a message to display in our view
$scope.message = 'Everyone come and see how good I look!';
});

scotchApp.controller('aboutController',function($scope) {
$scope.message = 'Look! I am an about page.';
});

scotchApp.controller('contactController',function($scope) {
$scope.message = 'Contact us! JK. This is just a demo.';
});

现在,我们已经通过$routeProvider定义好了我们的路由。通过配置你会发现,你可以使用指定路由、模板文件甚至是控制器。通过这种方法,我们应用的每一部分都会使用Angular控制器和它自己的视图。

清理URL: angular默认会将一个井号放入URL中。为了避免这种事情,我们需要使用$locationProvider来启用 HTML History API. 它将会移除掉hash并创建出漂亮的URL。我们的主页将会拉取 home.html 文件. About 和 contact 页面将会拉取它们关联的文件. 现在如果我们查看我们的应用,并点击导航,我们的内容将会照我们的意思进行改变.

要完成这个教程,我们只需要定义好将会被注入的页面就行了. 我们也将会让它们每一个都展示来自与他们相关的控制器的消息.

Home Page

{{ message }}

<div class="jumbotron text-center">

About Page

{{ message }}

<div class="jumbotron text-center">

Contact Page

{{ message }}

本地运行: Angular路由只会在你为其设置的环境后才会起效。你要确保是使用的 http://localhost 或者是某种类型的环境. 否则angular会说跨域请求支持HTTP.

Angular应用的动画

一旦你把所有的路由都完成之后,你就能开始把玩你的站点并向其加入动画了. 为此,你需要使用angular提供的 模块. 后面你就可以用CSS动画来用动画的方式切换视图了.

页面App上的SEO

理想情况下,此技术可能会被用在有用户登录后的应用程序中。你当然不会真的想要特定用户私人性质的页面搜索引擎索引. 例如,你不会想要你的读者账户,Facebook登录页面或者博客CMS页面被索引到.

如果你确实像针对你的应用进行SEO,那么如何让SEO在使用js构建页面的应用/站点上起效呢? 搜索引擎难于处理这些应用程序因为内容是由浏览器动态构建的,而且对爬虫是不可见的.

让你的应用对SEO友好

使得js单页面应用对SEO友好的技术需要定期做维护. 根据官方的,你需要创建HTML快照. 其如何运作的概述如下:

更多关于这个过程的信息,可以去看看Google的 和他们有关 的指南.

相关文章

前言 做过web项目开发的人对layer弹层组件肯定不陌生,作为l...
前言 前端表单校验是过滤无效数据、假数据、有毒数据的第一步...
前言 图片上传是web项目常见的需求,我基于之前的博客的代码...
前言 导出Excel文件这个功能,通常都是在后端实现返回前端一...
前言 众所周知,js是单线程的,从上往下,从左往右依次执行,...
前言 项目开发中,我们可能会碰到这样的需求:select标签,禁...