1 var和let区别
let左右范围在块里面,var定义的变量可提升,用let声明的变量不可以声明2次
2 简单解构
let [a,b,c] = [1,2,3];
3 map对象遍历
	const map = new Map();
	map.set('first','hello');
	map.set('second','world');

	for (let [key,value] of map) {
	  console.log(key + " is " + value);
	}
4 可变顺序参数和不可以变顺序参数函数
//参数是{}格式这种调用可以无序,一般参数都是键值对形式进行传递
//参数是[]格式需要有顺序
5 测试代码
/**
 * Sample React Native App
 * https://github.com/facebook/react-native
 *
 * @format
 * @flow
 */

import React,{Component} from 'react';
import {Platform,ScrollView,StyleSheet,Text,View,TextInput,NativeModules,deviceeventemitter,Image,Button,AppRegistry,TouchableHighlight,TouchableOpacity,TouchableNativeFeedback,TouchableWithoutFeedback} from 'react-native';

const instructions = Platform.select({
  ios: 'Press Cmd+R to reload,\n' + 'Cmd+D or shake for dev menu',android:
    'Double tap R on your keyboard to reload,\n' +
    'Shake or press menu button for dev menu',});

export default class App extends Component<Props> {
  render() {
    return (
      <View style={styles.container}>
        <View style={styles.buttonContainer}>
          <Button onPress={() => this.ff()} title="press me"/>
        </View>
        <View style={styles.buttonContainer}>
          <Button onPress={this.ff} title="press me" color="#841584"/>
        </View>

       <View style={styles.buttonContainer}>
          <TouchableHighlight onPress={this.showMsg} underlayColor="white">
              <View style={styles.button}>
                  <Text style={styles.text}>{this.move1({x: 3,y: 4})}</Text>
              </View>
          </TouchableHighlight>
        </View>

        <View style={styles.buttonContainer}>
          <TouchableOpacity onPress={this.showMsg}>
              <View style={styles.button}>
                  <Text style={styles.text}>{this.move3([3,4,5])}</Text>
              </View>
          </TouchableOpacity>
        </View>

        <View style={styles.buttonContainer}>
          <TouchableNativeFeedback onPress={this.showMsg}>
              <View style={styles.button}>
                  <Text style={styles.text}>{this.move2({y: 4,x: 3})}</Text>
              </View>
          </TouchableNativeFeedback>
        </View>

        <View style={styles.buttonContainer}>
          <TouchableWithoutFeedback onPress={this.showMsg}>
              <View style={styles.button}>
                  <Text style={styles.text}>{this.move4([3,5])}</Text>
              </View>
          </TouchableWithoutFeedback>
        </View>

       <View style={styles.buttonContainer}>
          <TouchableWithoutFeedback onLongPress={this.showMsg}>
              <View style={styles.button}>
                  <Text style={styles.text}>onLongPress me</Text>
              </View>
          </TouchableWithoutFeedback>
        </View>

       <View style={styles.layoutButtonContainer}>
          <Button onPress={this.showMsg} title="onLongPress me"/>
	  <Button onPress={this.showMsg} title="onLongPress me" color="#841584"/>
        </View>
      </View>
    );
  }

    //参数是{}格式这种调用可以无序,一般参数都是键值对形式进行传递
    move1({x = 0,y = 0} = {}) {
    	return x + y;
    }
    //参数是{}格式这种调用可以无序,一般参数都是键值对形式进行传递
    move2 = ({x,y} = {x: 0,y: 0}) => {
	return x + y;
    }
    //参数是[]格式需要有顺序,move3([x,y,z]) {
	return x + y + z;
    }
    //参数是[]格式需要有顺序,move4 = ([x,z]) => {
	return x + y + z;
    }


    //记得这里调用的时候不需要加上()
    showMsg() {
        console.log("chenyu");
        for (var i = 0; i < 5; i++) {
	    setTimeout(function() {
            	console.log(i);
            },0);
        }
        for (let j = 0; j < 6; j++) {
 	     setTimeout(function() {
            	console.log(j);
            },0);
        }
        var a = [];
        for (var k = 0; k < 10; ++k) {
            a[k] = function() {console.log(k);};
        }
        a[0]();
        a[1]();
        a[6]();
        var b = [];
        for (let j = 0; j < 10; j++) {
            b[j] = function() {console.log(j);};
        }
        b[0]();
        b[1]();
        b[6]();
	//遍历map
	const map = new Map();
	map.set('first',value] of map) {
	  console.log(key + " is " + value);
	}
        var [c,d] = [[1,2],[3,4]].map(([a,b]) => a + b);
        console.log("1 + 2:" + c);
        console.log("3 + 4:" + d);
        let jsonData = {id: 100,name:"chenyu",data:[100,200]};
        let {id,name,data:number} = jsonData;
        console.log(id,number);

    }

}

const styles = StyleSheet.create({
  container: {
    flex: 1,justifyContent: 'center'
  },buttonContainer: {
    margin:10
  },layoutButtonContainer: {
    margin:10,flexDirection: 'row',justifyContent: 'space-between'
  },button: {
    alignItems: 'center',backgroundColor: '#842534'
  },text: {
    padding: 10,color: 'white'
  }
});
6 运行结果
手机界面效果如下
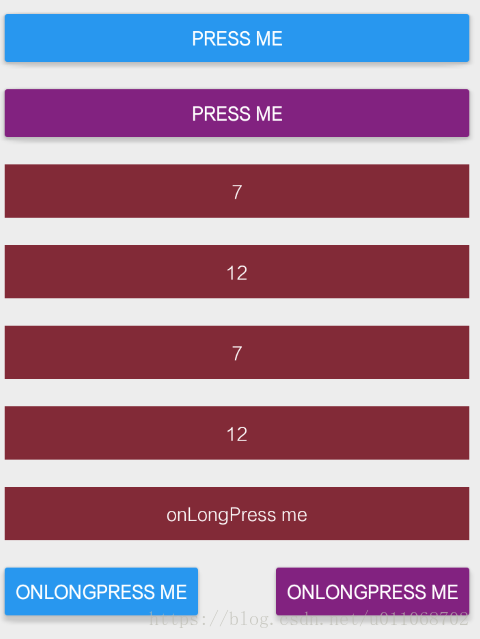
点击上面的 7 按钮 日志如下
          ReactNativeJS  I  chenyu
      SettingsInterface  V  invalidate [system]: current 633 != cached 0
          ReactNativeJS  I  10
                         I  10
                         I  10
                         I  0
                         I  1
                         I  6
                         I  first is hello
                         I  second is world
                         I  1 + 2:3
                         I  3 + 4:7
                         I  100,'chenyu',[ 100,200 ]
                         I  5
                         I  5
                         I  5
                         I  5
                         I  5
                         I  0
                         I  1
                         I  2
                         I  3
                         I  4
                         I  5