问题描述
我正在尝试在图像上绘制蒙版,该蒙版是body-pix(在NodeJS中)完成的处理结果。由于性能原因,我想使用OpenCV绘制蒙版,而不是htmlcanva。
    const segmentation = await net.segmentPersonParts(img,{
        flipHorizontal: false,internalResolution: 'medium',segmentationThreshold: 0.7
    });

    //Mask into opencv Mat
    const segmentationMask = new cv.Mat(segmentation.data,segmentation.height,segmentation.width,cv.CV_8UC4);
    const mask = segmentationMask.cvtColor(cv.COLOR_BGRA2BGR);
    //Application of mask
    const result = mat.bitwiseAnd(mask);
    cv.imwrite('mask.jpg',mask);
    cv.imwrite('result.jpg',result);
这非常有效,并且可以在检测到的人身上绘制黑色蒙版(语义分割),从而达到预期的效果。但是SegmentPersonParts比方法SegmentPerson慢得多,我希望使用最后一种方法。问题是,面罩不起作用。做的时候:
const segmentation = await net.segmentPerson(img,result);
由于蒙版未正确构建,结果只是黑色图像。我该如何解决?
解决方法
我有一个脚本可以使用OpenCV-Python在图像中做到这一点:
import cv2

def pixelate(image):
    # Get input size
    height,width,_ = image.shape

    # Desired "pixelated" size
    h,w = (16,16)

    # Resize image to "pixelated" size
    temp = cv2.resize(image,(w,h),interpolation=cv2.INTER_LINEAR)

    # Initialize output image
    return cv2.resize(temp,(width,height),interpolation=cv2.INTER_NEAREST)

# Load image
image = cv2.imread('1.png')

# ROI bounding box coordinates
x,y,w,h = 122,98,283,240

# Extract ROI
ROI = image[y:y+h,x:x+w]

# Pixelate ROI
pixelated_ROI = pixelate(ROI)

# Paste pixelated ROI back into original image
image[y:y+h,x:x+w] = pixelated_ROI

cv2.imshow('pixelated_ROI',pixelated_ROI)
cv2.imshow('image',image)
cv2.waitKey()
您需要获取boundingboxes坐标并在ROI上使用它。
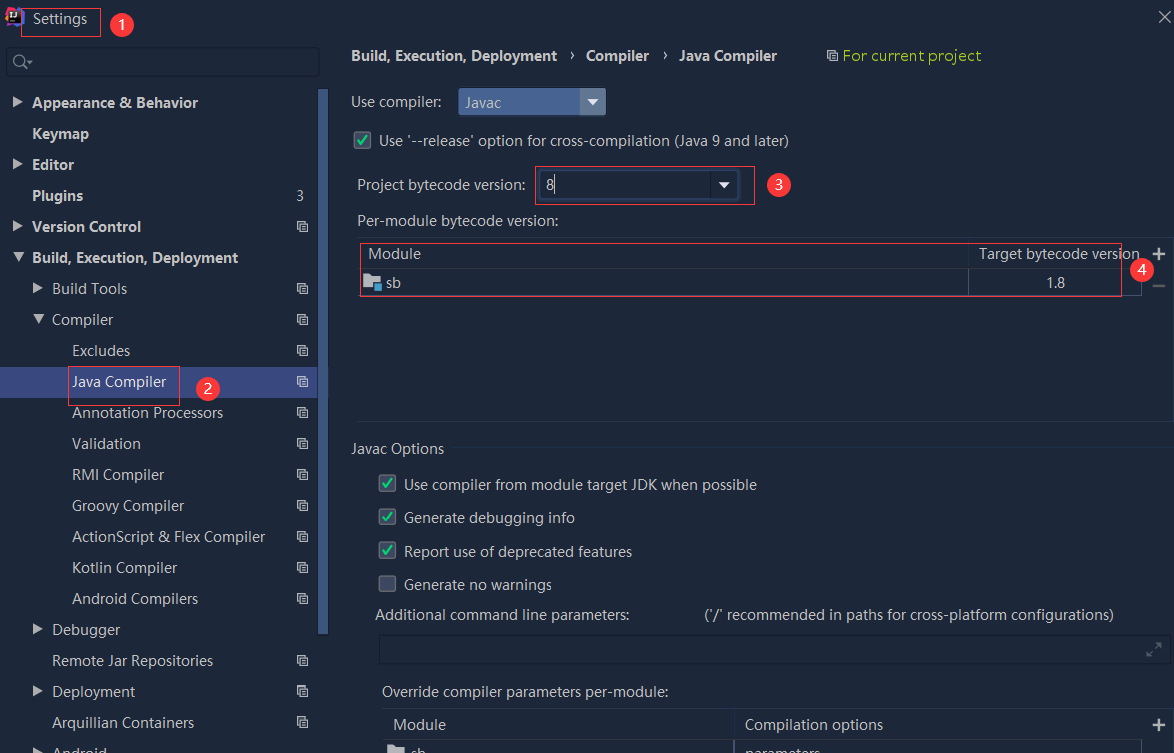 依赖报错 idea导入项目后依赖报错,解决方案:https://blog....
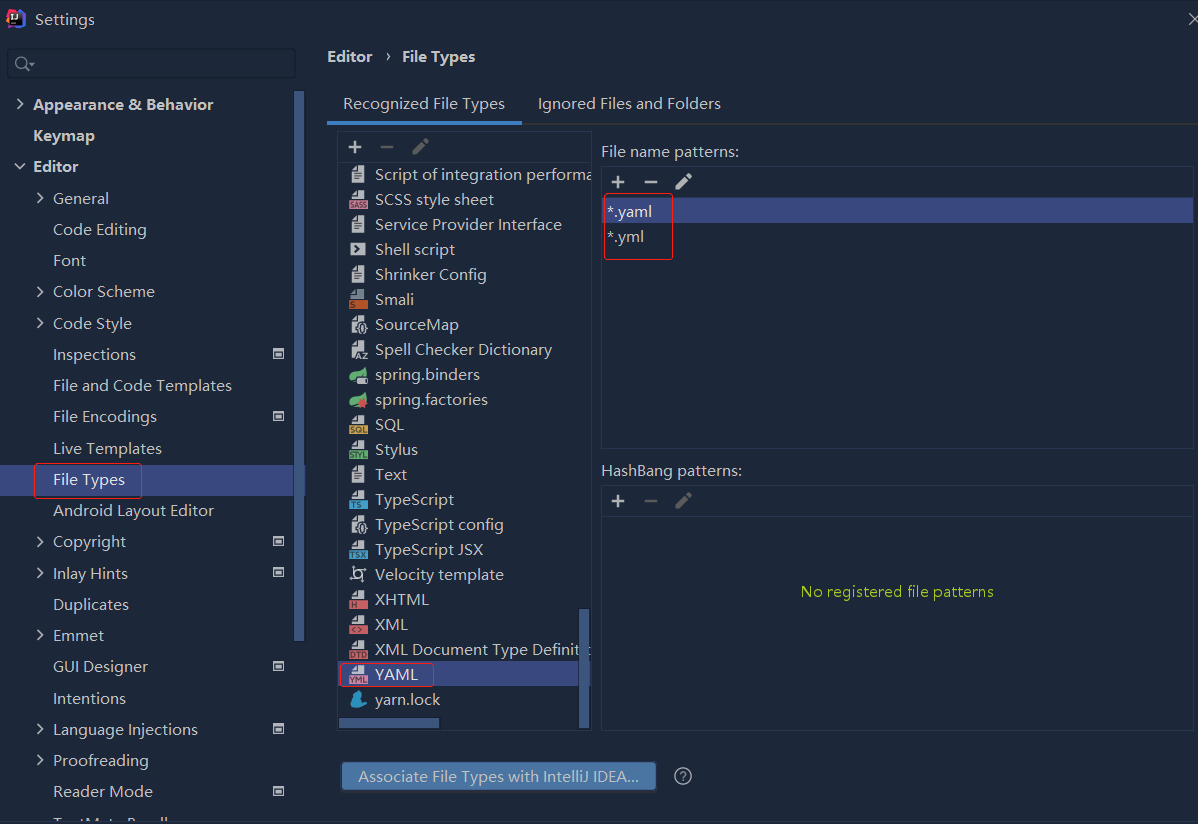
 错误1:gradle项目控制台输出为乱码 # 解决方案:https://bl...