五、认证过程源码剖析1.先从请求说起,我们都知道在django(CBV)中,客户端的发来的请求会执行视图类的as_view方法,而as_view方法中会执行dispacth方法,然后在根据请求的类型执行相应的方法(get、post等)。
2.在上面的示例中,使用django rest framework中的视图类需要继承APIView,请求到达视图类会执行视图类的as_view方法,而OrderView中没有as_view()方法,所以执行APIView的as_view()方法,下面请看APIView类中的as_view()源码:
as_view(cls,** This allows us to discover information about the view when we do URL
reverse lookups. Used for breadcrumb generation.
</span><span style="color: #800000;">"""</span>
<span style="color: #0000ff;">if</span> isinstance(getattr(cls,<span style="color: #800000;">'</span><span style="color: #800000;">queryset</span><span style="color: #800000;">'</span><span style="color: #000000;">,None),models.query.QuerySet):
</span><span style="color: #0000ff;">def</span><span style="color: #000000;"> force_evaluation():
</span><span style="color: #0000ff;">raise</span><span style="color: #000000;"> RuntimeError(
</span><span style="color: #800000;">'</span><span style="color: #800000;">Do not evaluate the `.queryset` attribute directly,</span><span style="color: #800000;">'</span>
<span style="color: #800000;">'</span><span style="color: #800000;">as the result will be cached and reused between requests. </span><span style="color: #800000;">'</span>
<span style="color: #800000;">'</span><span style="color: #800000;">Use `.all()` or call `.get_queryset()` instead.</span><span style="color: #800000;">'</span><span style="color: #000000;">
)
cls.queryset._fetch_all </span>=<span style="color: #000000;"> force_evaluation
view </span>= super(APIView,cls).as_view(**<span style="color: #000000;">initkwargs) <span style="color: #ff6600;">#执行父类as_view()方法</span>
view.cls </span>=<span style="color: #000000;"> cls
view.initkwargs </span>=<span style="color: #000000;"> initkwargs
</span><span style="color: #008000;">#</span><span style="color: #008000;"> Note: session based authentication is explicitly CSRF validated,</span>
<span style="color: #008000;">#</span><span style="color: #008000;"> all other authentication is CSRF exempt.</span>
<span style="color: #0000ff;">return</span> csrf_exempt(view)</pre>
3.从以上源码中可以看到APIView中as_view又执行了父类的as_view方法,在看看APIView的父类是View类,这恰好是django中的view视图类,以下是View类中的as_view()的源码:
as_view(cls,**
key key TypeError(
% (key,cls. TypeError(
% (cls. </span><span style="color: #0000ff;">def</span> view(request,**<span style="color: #000000;">kwargs):
self </span>= cls(**<span style="color: #000000;">initkwargs)
</span><span style="color: #0000ff;">if</span> hasattr(self,<span style="color: #800000;">'</span><span style="color: #800000;">get</span><span style="color: #800000;">'</span>) <span style="color: #0000ff;">and</span> <span style="color: #0000ff;">not</span> hasattr(self,<span style="color: #800000;">'</span><span style="color: #800000;">head</span><span style="color: #800000;">'</span><span style="color: #000000;">):
self.head </span>=<span style="color: #000000;"> self.get
self.request </span>=<span style="color: #000000;"> request
self.args </span>=<span style="color: #000000;"> args
self.kwargs </span>=<span style="color: #000000;"> kwargs
</span><span style="color: #0000ff;">return</span> self.dispatch(request,**<span style="color: #000000;">kwargs)
view.view_class </span>=<span style="color: #000000;"> cls
view.view_initkwargs </span>=<span style="color: #000000;"> initkwargs
</span><span style="color: #008000;">#</span><span style="color: #008000;"> take name and docstring from class</span>
update_wrapper(view,cls,updated=<span style="color: #000000;">())
</span><span style="color: #008000;">#</span><span style="color: #008000;"> and possible attributes set by decorators</span>
<span style="color: #008000;">#</span><span style="color: #008000;"> like csrf_exempt from dispatch</span>
update_wrapper(view,cls.dispatch,assigned=<span style="color: #000000;">())
</span><span style="color: #0000ff;">return</span> view</pre>
4.从上源码可以看出View类的as_view()方法执行流程:验证请求方法--->返回view函数名称(view函数会执行dispatch方法),一旦有请求进来执行view函数-->执行dispatch方法
5.当APIView的as_view方法执行了父类的as_view方法以后,请求进来会执行view方法,view方法中会执行dispatch方法,而Oderview没有dispatch方法,所以执行父类(APIView)的dispatch方法,下面的APIView的dispatch()方法源码:
dispatch(self,**=== self.initialize_request(request,**
self.request == self.default_response_headers
<span style="color: #0000ff;">try</span><span style="color: #000000;">:
self.initial(request,</span>*args,**<span style="color: #000000;">kwargs) <span style="color: #ff6600;">#这里request参数实则是Request对象
</span></span><span style="color: #008000;">#</span><span style="color: #008000;"> Get the appropriate handler method</span>
<span style="color: #0000ff;">if</span> request.method.lower() <span style="color: #0000ff;">in</span><span style="color: #000000;"> self.http_method_names:
handler </span>=<span style="color: #000000;"> getattr(self,request.method.lower(),self.http_method_not_allowed)
</span><span style="color: #0000ff;">else</span><span style="color: #000000;">:
handler </span>=<span style="color: #000000;"> self.http_method_not_allowed
response </span>= handler(request,**<span style="color: #000000;">kwargs)
</span><span style="color: #0000ff;">except</span><span style="color: #000000;"> Exception as exc:
response </span>=<span style="color: #000000;"> self.handle_exception(exc)
self.response </span>= self.finalize_response(request,response,**<span style="color: #000000;">kwargs)
</span><span style="color: #0000ff;">return</span> self.response</pre>
6.从以上源码分析,执行APIView的dispatch方法时候会执行self.initialize_request方法,会对django原始的request进行封装。再看看initialize_request源码封装的内容,以下是self.initialize_request()源码:
initialize_request(self,**= </span><span style="color: #0000ff;">return</span><span style="color: #000000;"> Request( <span style="color: #ff6600;"> #实例化Request类,</span>
request,<span style="color: #ff6600;">#django原始的request对象,封装到Request中变成self._request </span>
parsers</span>=<span style="color: #000000;">self.get_parsers(),authenticators</span>=<span style="color: #000000;">self.get_authenticators(),<span style="color: #ff6600;">#开始认证流程</span>
negotiator</span>=<span style="color: #000000;">self.get_content_negotiator(),parser_context</span>=<span style="color: #000000;">parser_context
)</span></pre>
7.self.initialize_request()源码分析,实例化Request()类,封装原始的request,authenticators(认证),执行self.get_authenticators(),到了这里就开始django rest framework的认证流程,以下是self.get_authenticators()源码:
[auth() auth self.authentication_classes]
8.self.get_authenticators()源码分析,采用列表生成式,循环self.authentication_classes,实例化其中的每一个类,返回列表,不难发现authentication_classes属性正式我们在认证的时候用到认证类列表,这里会自动寻找该属性进行认证。倘若我们的视图类没有定义认证方法呢?,当然django rest framework 已经给我们加了默认配置,如果我们没有定义会自动使用settings中的DEFAULT_AUTHENTICATION_CLASSES作为默认(全局)下面是APIView类中的共有属性:
</span><span style="color: #008000;">#</span><span style="color: #008000;"> The following policies may be set at either globally,or per-view.</span>
renderer_classes =<span style="color: #000000;"> api_settings.DEFAULT_RENDERER_CLASSES
parser_classes </span>=<span style="color: #000000;"> api_settings.DEFAULT_PARSER_CLASSES
<span style="color: #ff6600;">authentication_classes </span></span><span style="color: #ff6600;">=</span><span style="color: #000000;"><span style="color: #ff6600;"> api_settings.DEFAULT_AUTHENTICATION_CLASSES</span> <span style="color: #ff6600;">#默认认证配置</span>
throttle_classes </span>=<span style="color: #000000;"> api_settings.DEFAULT_THROTTLE_CLASSES
permission_classes </span>=<span style="color: #000000;"> api_settings.DEFAULT_PERMISSION_CLASSES
content_negotiation_class </span>=<span style="color: #000000;"> api_settings.DEFAULT_CONTENT_NEGOTIATION_CLASS
metadata_class </span>=<span style="color: #000000;"> api_settings.DEFAULT_METADATA_CLASS
versioning_class </span>= api_settings.DEFAULT_VERSIONING_CLASS</pre>
9.继续分析APIView的dispatch方法,此时执行self.inital方法,并将封装过后的request对象(Reuqest)作为参数进行传递,下面是self.inital()方法源码:
initial(self,**= self.get_format_suffix(** </span><span style="color: #008000;">#</span><span style="color: #008000;"> Perform content negotiation and store the accepted info on the request</span>
neg =<span style="color: #000000;"> self.perform_content_negotiation(request)
request.accepted_renderer,request.accepted_media_type </span>=<span style="color: #000000;"> neg
</span><span style="color: #008000;">#</span><span style="color: #008000;"> Determine the API version,if versioning is in use.</span>
version,scheme = self.determine_version(request,**<span style="color: #000000;">kwargs)
request.version,request.versioning_scheme </span>=<span style="color: #000000;"> version,scheme
</span><span style="color: #008000;">#</span><span style="color: #008000;"> Ensure that the incoming request is permitted</span>
<span style="color: #000000;"> self.perform_authentication(request) <span style="color: #ff6600;"> #实现认证
self.check_permissions(request)
self.check_throttles(request)
10.在self.inital方法中会执行self.perform_authentication方法,而self.perform_authentication方法用会执行request.user,此时的request是Request对象,所以需分析Request类中的user属性,以下是Request部分类源码:
Kwargs:
- request(HttpRequest). The original request instance.
- parsers_classes(list/tuple). The parsers to use for parsing the
request content.
- authentication_classes(list/tuple). The authentications used to try
authenticating the request's user.
</span><span style="color: #800000;">"""</span>
<span style="color: #0000ff;">def</span> <span style="color: #800080;">__init__</span>(self,parsers=None,authenticators=<span style="color: #000000;">None,negotiator</span>=None,parser_context=<span style="color: #000000;">None):
</span><span style="color: #0000ff;">assert</span><span style="color: #000000;"> isinstance(request,HttpRequest),(
</span><span style="color: #800000;">'</span><span style="color: #800000;">The `request` argument must be an instance of </span><span style="color: #800000;">'</span>
<span style="color: #800000;">'</span><span style="color: #800000;">`django.http.HttpRequest`,not `{}.{}`.</span><span style="color: #800000;">'</span><span style="color: #000000;">
.format(request.</span><span style="color: #800080;">__class__</span>.<span style="color: #800080;">__module__</span>,request.<span style="color: #800080;">__class__</span>.<span style="color: #800080;">__name__</span><span style="color: #000000;">)
)
self._request </span>= request <span style="color: #ff6600;">#django原生的request封装为_request</span>
self.parsers = parsers <span style="color: #0000ff;">or</span><span style="color: #000000;"> ()
self.authenticators </span>= authenticators <span style="color: #0000ff;">or</span><span style="color: #000000;"> ()
self.negotiator </span>= negotiator <span style="color: #0000ff;">or</span><span style="color: #000000;"> self._default_negotiator()
self.parser_context </span>=<span style="color: #000000;"> parser_context
self._data </span>=<span style="color: #000000;"> Empty
self._files </span>=<span style="color: #000000;"> Empty
self._full_data </span>=<span style="color: #000000;"> Empty
self._content_type </span>=<span style="color: #000000;"> Empty
self._stream </span>=<span style="color: #000000;"> Empty
<span style="color: #008000;">#<span style="color: #008000;">###
<span style="color: #000000;"> @property
<span style="color: #0000ff;">def<span style="color: #000000;"> user(self):
<span style="color: #800000;">"""<span style="color: #800000;">
Returns the user associated with the current request,as authenticated
by the authentication classes provided to the request.
<span style="color: #800000;">"""
<span style="color: #0000ff;">if <span style="color: #0000ff;">not hasattr(self,<span style="color: #800000;">'<span style="color: #800000;">_user<span style="color: #800000;">'<span style="color: #000000;">):
with wrap_attributeerrors():
self._authenticate() #下hi ing
<span style="color: #0000ff;">return self._user
11.从上源码分析,在Request对象中,user属性是一个属性方法,并会执行self._authentication方法,在继续看Request对象的self._authentication方法:
authenticator
=
<span style="color: #0000ff;">if</span> user_auth_tuple <span style="color: #0000ff;">is</span> <span style="color: #0000ff;">not</span><span style="color: #000000;"> None:
self._authenticator </span>=<span style="color: #000000;"> authenticator
self.user,self.auth </span>=<span style="color: #000000;"> user_auth_tuple <span style="color: #ff6600;">#返回值对应示例中的token_obj.user和token_obj
</span></span><span style="color: #0000ff;">return</span><span style="color: #000000;">
self._not_authenticated()</span></pre>
12.从上源码分析,Request对象的self._authentication中循环self.authenticators(该列表是由认证对象构成的[对象1,对象2]),并执行每一个对象中的方法返回tuple,同时对该过程其进行了异常捕捉,有异常将返回给用户,下面是异常验证逻辑:
-
如果有异常则执行self._not_authenticated()方法,继续向上抛异常。
-
如果有返回值必须是一个元组,分别赋值给self.user,self.auth(request.user和request.auth),并跳出循环。
-
如果返回None,则由下一个循环处理,如果都为None,则执行self._not_authenticated(),返回 (AnonymousUser,None)
13.当都没有返回值,就执行self._not_authenticated(),相当于匿名用户,没有通过认证,并且此时django会返回默认的匿名用户设置AnonymousUser,如需要单独设置匿名用户返回值,则编写需要写UNAUTHENTICATED_USER的返回值:
Defaults are None,AnonymousUser & None.
</span><span style="color: #800000;">"""</span><span style="color: #000000;">
self._authenticator </span>=<span style="color: #000000;"> None
</span><span style="color: #0000ff;">if</span><span style="color: #000000;"> api_settings.UNAUTHENTICATED_USER:
self.user </span>= api_settings.UNAUTHENTICATED_USER() <span style="color: #008000;">#匿名用户配置,默认返回</span><span style="color: #008000;">AnonymousUser</span>
<span style="color: #0000ff;">else</span><span style="color: #000000;">:
self.user </span>=<span style="color: #000000;"> None
</span><span style="color: #0000ff;">if</span><span style="color: #000000;"> api_settings.UNAUTHENTICATED_TOKEN:
self.auth </span>= api_settings.UNAUTHENTICATED_TOKEN() <span style="color: #008000;">#</span><span style="color: #008000;">None</span>
<span style="color: #0000ff;">else</span><span style="color: #000000;">:
self.auth </span>= None</pre>
14.所以经过以上分析,我们需要进行认证时候,需要在每一个认证类中定义authenticate进行验证,并且需要返回元祖。
<table style="height: 30px; background-color: #afeeee; width: 1266px; ; width: 1266px;" border="0">
<tr>
<td><span style="font-size: 16px;">六、配置认证类</td>
</tr></table>
1.认证全局配置文件
经过认证的源码流程剖析,DRF的认证全局配置在api_setting中,以下是api_setings部分源码:
api_settings =
<span style="color: #0000ff;">def reload_api_settings(*args,**<span style="color: #000000;">kwargs):
setting = kwargs[<span style="color: #800000;">'<span style="color: #800000;">setting<span style="color: #800000;">'<span style="color: #000000;">]
<span style="color: #0000ff;">if setting == <span style="color: #800000;">'<span style="color: #800000;">REST_FRAMEWORK<span style="color: #800000;">'<span style="color: #000000;">: <span style="color: #ff6600;">#项目中settings.py的key
api_settings.reload()
setting_changed.connect(reload_api_settings)
其中引用了django,settings.py中的REST_FRAMEWORK作为key作为配置,所以全局配置示例:
REST_FRAMEWORK =:[,]
}
2.局部使用
局部某个视图不需要认证,则在视图类中加入authentication_classes=[]
authentication_classes = []
3.匿名用户配置:
REST_FRAMEWORK =
:[,],
: :"UNAUTHENTICATED_token": None,
}
七、内置认证类1.BaseAuthentication
BaseAuthentication是django rest framework为我们提供了最基本的认证类,正如源码流程一样,该类中其中定义的两个方法authenticate和authenticate_header(认证失败返回的响应头),使用时候重写该两个方法进行认证,正如示例:
<span style="color: #0000ff;">def</span><span style="color: #000000;"> authenticate(self,request):
</span><span style="color: #800000;">"""</span><span style="color: #800000;">
Authenticate the request and return a two-tuple of (user,token).
</span><span style="color: #800000;">"""</span>
<span style="color: #0000ff;">raise</span> NotImplementedError(<span style="color: #800000;">"</span><span style="color: #800000;">.authenticate() must be overridden.</span><span style="color: #800000;">"</span><span style="color: #000000;">)
</span><span style="color: #0000ff;">def</span><span style="color: #000000;"> authenticate_header(self,request):
</span><span style="color: #800000;">"""</span><span style="color: #800000;">
Return a string to be used as the value of the `WWW-Authenticate`
header in a `401 Unauthenticated` response,or `None` if the
authentication scheme should return `403 Permission Denied` responses.
</span><span style="color: #800000;">"""</span>
<span style="color: #0000ff;">pass</span></pre>
2.其他认证类
SessionAuthentication
RemoteUserAuthentication
TokenAuthentication
<table style="height: 30px; background-color: #afeeee; width: 1266px; ; width: 1266px;" border="0">
<tr>
<td><span style="font-size: 16px;">八、总结</td>
</tr></table>
1.自定义认证类:
继承BaseAuthentication,重写authenticate方法和authenticate_header(pass就可以),authenticate()方法需要有三种情况(返回元祖、出现异常、返回none)。
2.认证配置:
REST_FRAMEWORK =:[<span style="color: #008000;">#<span style="color: #008000;">局部认证
authentication_classes =<span style="color: #000000;"> [BaseAuthentication,]
<span style="color: #008000;">#<span style="color: #008000;">是某个视图不进行认证
authentication_classes =[]
3.源码流程:
相关文章
注:所有源代码均实测运行过。所有源代码均已上传CSDN,请有...

继承APIView和ViewSetMixin;作用也与APIView基本类似,提供...

一、Django介绍Python下有许多款不同的 Web 框架。Django是重...
本文从nginx快速掌握到使用,gunicorn快速掌握到使用,实现小...
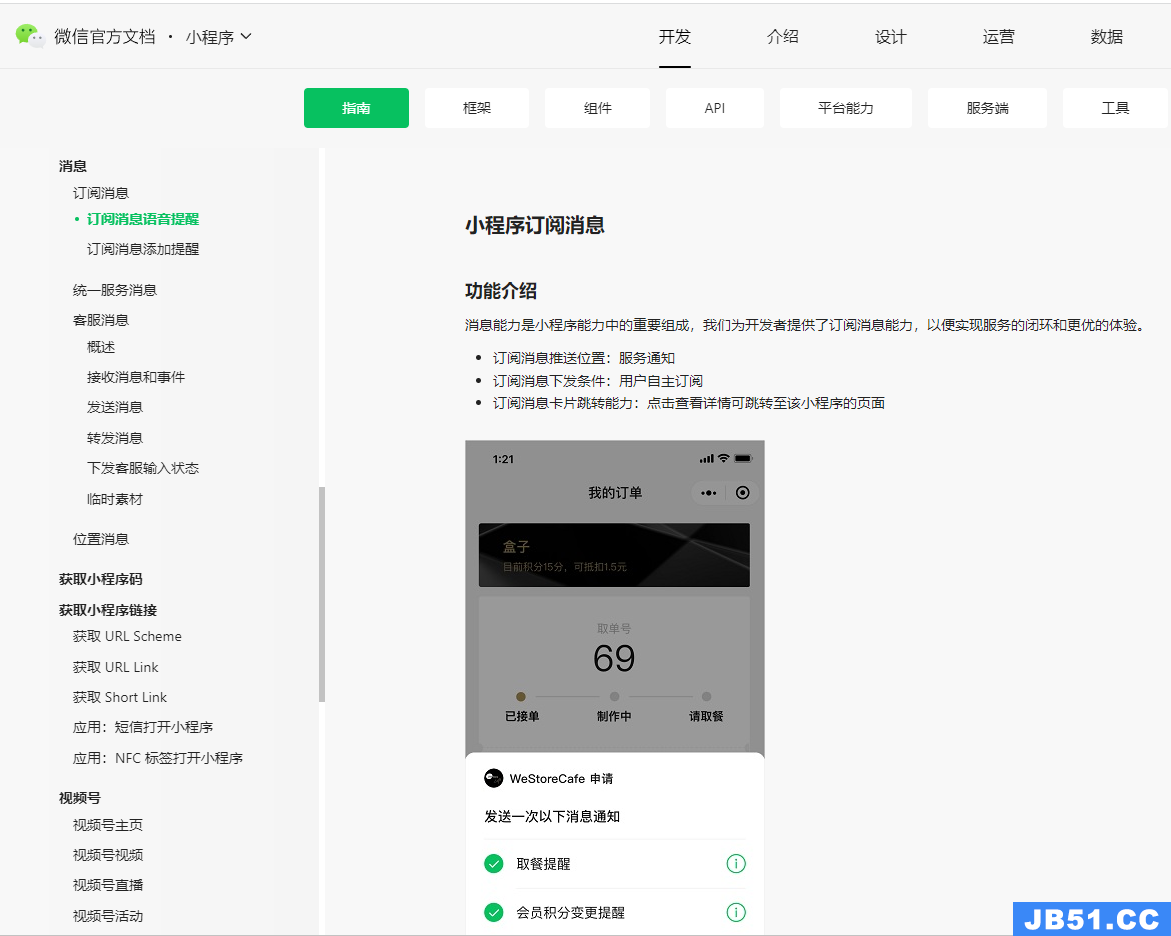
uniapp微信小程序订阅消息发送服务通知
Django终端打印SQL语句 1 Setting配置: 2 默认python 使用的...