cobbler 安装
一:定义yum源
yum update (升级所有包,改变软件设置和系统设置,系统版本内核都升级)
yum upgrade (升级所有包,不改变软件设置和系统设置,系统版本升级,内核不改变)
二:关闭防火墙和SElinux
(关闭防火墙)
chkconfig ip6tables off
chkconfig iptables off
/etc/init.d/ip6tables stop
/etc/init.d/iptables stop
(关闭selinux)
sed -i ‘/^SELINUX=/ s/^SELINUX=.*/SELINUX=disabled/g‘ /etc/selinux/config
setenforce 0 (这个需要重启机器才能生效,所以建议修改完重启)
sestatus
三:安装cobbler
yum -y install cobbler cobbler-web
yum install tftp-server xinetd dhcp httpd rsync
yum install pykickstart debmirror python-ctypes cman
配置web认证
sed -i ‘s/module = authn_denyall/module = authn_configfile/g‘ /etc/cobbler/modules.conf
四:打开服务需要使用的端口
udp 69 tftp
udp 53 dns
tcp 80 443 web
dhcp 67 68
五:启动Cobbler服务
/etc/init.d/cobblerd start
可能会缺少的包:
请注意察看 cobbler服务启动的报错信息,我第一次安装时候就遇到有关ctypes的报错,只能手动安装:
yum -y install python-ctypes
六:配置cobbler
(1)配置httpd配置文件
# vi /etc/httpd/conf/httpd.conf
ServerName 127.0.0.1:80
启用wsgi模块
需要确认mod_wsgi已经正确安装,否则需要手动安装
yum -y install mod_wsgi
启用wsgi模块只需要取消 /etc/httpd/conf.d/wsgi.conf 文件中LoadModule wsgi_module modules/mod_wsgi.so 行的注释
sed -i ‘s*#LoadModule*LoadModule*g‘ /etc/httpd/conf.d/wsgi.conf
(2)配置tftp与rsync
sed -i ‘/disable/c disable = no‘ /etc/xinetd.d/tftp
sed -i -e ‘s/= yes/= no/g‘ /etc/xinetd.d/rsync
service xinetd restart
(3)Server 和 Next_Server
sed -i ‘s/server: 127.0.0.1/server: 192.168.21.128/g‘ /etc/cobbler/settings
sed -i ‘s/next_server: 127.0.0.1/next_server: 192.168.21.128 /g‘ /etc/cobbler/settings
(4)防止误重装系统(pxe安装 只允许一次,防止误操作)
sed -i ‘s/pxe_just_once: 0/pxe_just_once: 1/g‘ /etc/cobbler/settings
(5)生成Cobbler安装系统root初始密码
openssl passwd -1 -salt ‘random-phrase-here‘ ‘111111‘
# vi /etc/cobbler/settings
修改为如下配置
default_password_crypted: "$1$random-p$WbZ3JxhRzCS/1Ne4S9g4Z."
(6)Cobbler管理rsync,dhcp(默认为0,不对rsync进行管理,可以修改为1 进行管理)
sed -i ‘s/manage_rsync: 0/manage_rsync: 1/g‘ /etc/cobbler/settings
(7)Cobbler管理dhcp
为了pxe的启动,需要一个DHCP服务器地址,并直接引导系统,它可以在网络中下载引导文件到TFTP的服务器,cobbler可以通过manage_dhcp的设置来进行管理
sed -i ‘s/manage_dhcp: 0/manage_dhcp: 1/g‘ /etc/cobbler/settings
接下来修改/etc/cobbler/dhcp.template,此文件是cobbler管理dhcp的模板,确保DHCP分配的地址和Cobbler在同一网段
如果是多网卡需要指定DHCP服务的网络接口
#vi /etc/sysconfig/dhcpd
修改内容如下:
#Command line options here DHCPDARGS=eth0
DHCPDARGS=eth0
# 测试dhcp服务器配置是否正确
# dhcpd # 在执行cobbler sync 之后测试才有效,因为没同步之前文件/etc/dhcp/dhcpd.conf还没有被同步修改
(8)设置debmirror(注释掉@dists和@arches的行)
sed -i -e ‘s|@dists=.*|#@dists=|‘ /etc/debmirror.conf
sed -i -e ‘s|@arches=.*|#@arches=|‘ /etc/debmirror.conf
(9)加载部分缺失的网络boot-loaders
cobbler get-loaders
(10)检查Cobbler配置
cobbler check
(11)重启cobbler和更新相关配置并且同步最新cobbler配置
/etc/init.d/cobblerd restart
cobbler sync
(12)启动相关服务并设置开机启动
chkconfig httpd on
chkconfig xinetd on
chkconfig cobblerd on
chkconfig dhcpd on
/etc/init.d/httpd restart
/etc/init.d/xinetd restart
/etc/init.d/cobblerd restart
/etc/init.d/dhcpd restart
七:cobbler使用
(1)上传镜像到cobbler服务器上
(2)挂载镜像 mount -t iso9660 -o loop /usr/local/src/CentOS-6.5-x86_64-bin-DVD1.iso \mnt
(3)导入系统镜像到Cobbler cobbler import --path=/mnt --name=CentOS-6.5-x86_64 --arch=x86_64
八:修改profile指定新的KS启动文件
cobbler profile report --name CentOS-6.5-x86_64 #查看profile设置
cobbler distro report --name CentOS-6.5-x86_64 #查看安装镜像文件信息
cobbler profile remove --name=CentOS-6.5-x86_64 #移除profile
cobbler profile add --name=CentOS-6.5-x86_64 --distro=CentOS-6.5-x86_64 --kickstart=/var/lib/cobbler/kickstarts/CentOS-6.5-x86_64.ks #添加
cobbler profile edit --name=CentOS-6.5-x86_64 --distro=CentOS-6.5-x86_64 --kickstart=/var/lib/cobbler/kickstarts/CentOS-6.5-x86_64.ks #编辑
cobbler profile rename --name=Centos-5.9-x86_64 --newname=CentOS-5U9-x64 更改profile名称
cobbler system add --name=test_000 --ip=192.168.1.0/24 --profile=Centos-5.9-x86_64 指定一个网段使用特定的装机配置
cobbler system add --name=test_001 --hostname=test_001 --mac=00:0C:29:E3:81:32 --interface=eth0 --ip-address=192.168.1.123 --subnet=255.255.255.0 --gateway=192.168.1.1 --static=1 --profile=Centos-5.9-x86_64 添加一个指定服务器的装机配置
cobbler system rename --name=test001 --newname=abc变更system配置名称
cobbler system add --name=test_001 --ip=192.168.1.110机器IP地址变更为192.168.10.110
cobbler system remove --name=test_001删除system配置
cobbler system list查看定义的系统列表
#查看Cobbler列表
cobbler list
cobbler report
cobbler profile report
cobbler distro list # 查看导入列表
九:为Cobbler添加RPM仓库
这个只是对centos有效,如果你吧repo添加到profle,他会自动添加到节点上的repo上,指向内网,非常方便。
cobbler profile edit --name=CentOS6.5-x86_64 --repos="epel6-x86_64 epel6-x86_64-testing"
cobbler reposync
十:安装koan
koan --server=192.168.1.10 --list=profiles
十一:无法通过cobbler引导
安装 asu IPMITool/UTIL
asu set PXE.NicPortPxeMode.1 "UEFI Support" --host 9.111.115.45 --user USERID --password PASSW0RD
cobbler profile add --name=RHEL-7.1-x86_64-21 --distro=RHEL-7.1-x86_64 --kopts="console=tty0 console=ttyS0,115200n8" --kickstart="/var/lib/cobbler/kickstarts/RHEL7.1-21.ks"
十二:修改超时
/etc/cobbler/pxe 的两个文件 pxedefault.template和efidefault.template
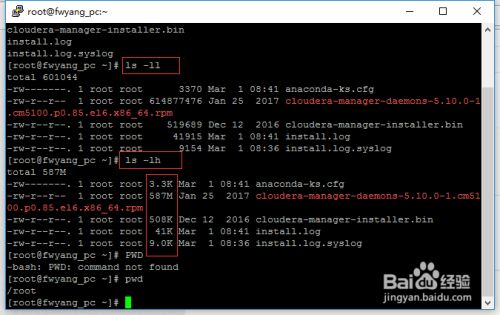 最简单的查看方法可以使用ls -ll、ls-lh命令进行查看,当使用...