闲来无事,就来学习下被称为新全文的ElasticSearch。新手第一次装新全文,问题还是挺多的。
1.关于ElasticSearch
ElasticSearch是一个基于Lucene的搜索工具,它使用Java开发并且使用Lucene作为核心来实现索引和搜索的功能。但是它的目的是通过简单的Restful API来隐藏Lucene的复杂性,从而让全文搜索变得简单。
但是,Elasticsearch不仅仅是Lucene和全文搜索,我们还能这样去描述它:
1)分布式的实时文件存储,每个字段都被索引并可被搜索
2)分布式的实时分析搜索引擎
3)可以扩展到上百台服务器,处理PB级结构化或非结构化数据
而且,所有的这些功能被集成到一个服务里面,你的应用可以通过简单的RestfulAPI、各种语言的客户端甚至命令行与之交互。
2. 下载最新版的ElasticSearch的安装包,该版本可直接部署到Linux系统上
安装之前,请确认已安装好最新版的JDK版本,安装步骤请参照其他网友文章。最好把安装的工具包放在/opt目录,本人安装在centos 6.7下的/home目录下使用,wget命令得到该zip安装包。
Elasticsearch 2.3.3
ZIP https://download.elastic.co/elasticsearch/release/org/elasticsearch/distribution/zip/elasticsearch/2.3.3/elasticsearch-2.3.3.zip</span>
Woo hoo! Your download is almost complete! It's clear you're about to do great things with data. Whether this is your first,tenth,or umpteenth download of an open source Elastic project,there's always something new to learn.

So,before you dive into the documentation,have a gander at the goodness below. Try something new,expand to a new use case,think up something totally novel,and,above all,stay curious.
3. 正式安装ElasticSearch
在root用户,/home目录下解压zip包,创建软连接In -s ElasticSearch2.3.3 elasticsearch,cd /elasticsearch后,执行 ./bin/elasticsearch,会出现如下的错误:
[root@xxxx bin]# ./elasticsearch
Exception in thread "main" java.lang.RuntimeException: don't run elasticsearch as root.</span>
	at org.elasticsearch.bootstrap.Bootstrap.initializeNatives(Bootstrap.java:93)
	at org.elasticsearch.bootstrap.Bootstrap.setup(Bootstrap.java:144)
	at org.elasticsearch.bootstrap.Bootstrap.init(Bootstrap.java:270)
	at org.elasticsearch.bootstrap.Elasticsearch.main(Elasticsearch.java:35)
Refer to the log for complete error details.
这是ElasticSearch出于系统安全考虑设置的条件。由于ElasticSearch可以接收用户输入的脚本并且执行,为了系统安全考虑,因此可以创建一个单独的用户用来运行ElasticSearch。
1) 创建单独的用户组和elsearch用户:
	groupadd elsearch
	useradd elsearch -g elsearch -p elasticsearch
2) 更改/home/elasticsearch用户及组:
<span style="white-space:pre">	</span></span>cd /home
<span style="white-space:pre">	</span></span>chown -R elsearch:elsearch  elasticsearch
3) 使用elsearch用户执行安装命令
<span style="white-space:pre">	</span></span>su elsearch
<span style="white-space:pre">	</span></span>cd elasticsearch/bin	执行 ./elasticsearch
4. 关于安装plugins(插件管理)
Exception in thread "main" java.lang.IllegalStateException: Unable to access 'path.plugins' (/home/hye/elasticsearch/plugins)
Likely root cause: java.nio.file.AccessDeniedException: /home/hye/elasticsearch/plugins
	at sun.nio.fs.UnixException.translateToIOException(UnixException.java:84)
	at sun.nio.fs.UnixException.rethrowAsIOException(UnixException.java:102)
	at sun.nio.fs.UnixException.rethrowAsIOException(UnixException.java:107)
	at sun.nio.fs.UnixFileSystemProvider.createDirectory(UnixFileSystemProvider.java:384)
	at java.nio.file.Files.createDirectory(Files.java:674)
	at java.nio.file.Files.createAndCheckIsDirectory(Files.java:781)
	at java.nio.file.Files.createDirectories(Files.java:767)
	at org.elasticsearch.bootstrap.Security.ensureDirectoryExists(Security.java:337)
	at org.elasticsearch.bootstrap.Security.addPath(Security.java:314)
	at org.elasticsearch.bootstrap.Security.addFilePermissions(Security.java:246)
	at org.elasticsearch.bootstrap.Security.createPermissions(Security.java:212)
	at org.elasticsearch.bootstrap.Security.configure(Security.java:118)
	at org.elasticsearch.bootstrap.Bootstrap.setupSecurity(Bootstrap.java:196)
	at org.elasticsearch.bootstrap.Bootstrap.setup(Bootstrap.java:167)
	at org.elasticsearch.bootstrap.Bootstrap.init(Bootstrap.java:270)
	at org.elasticsearch.bootstrap.Elasticsearch.main(Elasticsearch.java:35)
Refer to the log for complete error details.
请按照官网的plguins Managerment的介绍和安装方法进行安装:
4.1安装前的准备
Running as root
If Elasticsearch was installed using the deb or rpm package then run bin/plugin as root so it can write to the appropriate files on disk. Otherwise run bin/plugin as the user that owns all of the Elasticsearch files.
4.2 正式安装plugins插件
本人安装的是Core Elasticsearch plugins,按照图中的安装步骤,完成安装。
Plugin Management
Core Elasticsearch pluginsedit
Core Elasticsearch plugins can be installed as follows:
sudo bin/plugin install [plugin_name]
For instance,to install the core ICU plugin,just run the following command:
sudo bin/plugin install analysis-icu
This command will install the version of the plugin that matches your Elasticsearch version.
Community and non-core pluginsedit
Non-core plugins provided by Elasticsearch,or plugins provided by the community,can be installed from download.elastic.co,from Maven (Central and Sonatype),or from GitHub. In this case,the command is as follows:
sudo bin/plugin install [org]/[user|component]/[version]</span><span style="font-size:14px;">
5. 启动ElasticSearch
使用非root用户进行安装:
<span style="white-space:pre">	</span>su elsearch
<span style="white-space:pre">	</span>cd elasticsearch/bin
<span style="white-space:pre">	</span>./elasticsearch
如果想要ElasticSearch在后端运行:
<span style="white-space:pre">	</span>./elasticsearch -d
控制台显示:(启动ElasticSearch成功)
[elsearch@xhyu-100 elasticsearch]$ ./bin/elasticsearch
[2016-06-19 00:27:24,188][WARN ][bootstrap                ] unable to install syscall filter: seccomp unavailable: CONFIG_SECCOMP not compiled into kernel,CONFIG_SECCOMP and CONFIG_SECCOMP_FILTER are needed
[2016-06-19 00:27:24,417][INFO ][node                     ] [Mad-Dog] version[2.3.3],pid[4260],build[218bdf1/2016-05-17T15:40:04Z]
[2016-06-19 00:27:24,417][INFO ][node                     ] [Mad-Dog] initializing ...
[2016-06-19 00:27:25,040][INFO ][plugins                  ] [Mad-Dog] modules [reindex,lang-expression,lang-groovy],plugins [analysis-icu],sites []
[2016-06-19 00:27:25,066][INFO ][env                      ] [Mad-Dog] using [1] data paths,mounts [[/ (/dev/sda3)]],net usable_space [33.4gb],net total_space [45.6gb],spins? [possibly],types [ext4]
[2016-06-19 00:27:25,066][INFO ][env                      ] [Mad-Dog] heap size [1015.6mb],compressed ordinary object pointers [true]
[2016-06-19 00:27:25,066][WARN ][env                      ] [Mad-Dog] max file descriptors [4096] for elasticsearch process likely too low,consider increasing to at least [65536]
[2016-06-19 00:27:27,264][INFO ][node                     ] [Mad-Dog] initialized
[2016-06-19 00:27:27,264][INFO ][node                     ] [Mad-Dog] starting ...
[2016-06-19 00:27:27,330][INFO ][transport                ] [Mad-Dog] publish_address {192.168.31.200:9300},bound_addresses {192.168.31.200:9300}
[2016-06-19 00:27:27,333][INFO ][discovery                ] [Mad-Dog] elasticsearch/-H0Z_q6iRsuYDXd1b1jCAg
[2016-06-19 00:27:30,390][INFO ][cluster.service          ] [Mad-Dog] new_master {Mad-Dog}{-H0Z_q6iRsuYDXd1b1jCAg}{192.168.31.200}{192.168.31.200:9300},reason: zen-disco-join(elected_as_master,[0] joins received)
[2016-06-19 00:27:30,420][INFO ][http                     ] [Mad-Dog] publish_address {192.168.31.200:9200},bound_addresses {192.168.31.200:9200}
[2016-06-19 00:27:30,420][INFO ][node                     ] [Mad-Dog] started
[2016-06-19 00:27:30,441][INFO ][gateway                  ] [Mad-Dog] recovered [0] indices into cluster_state
6. ElasticSearch界面验证失败,修改ElasticSearch配置文件
未修改配置文件前,使用非root用户进行elasticsearch安装。
[root@xxxx elasticsearch]# curl -X GET http://机器ip:9200/
curl: (7) couldn't connect to host
按照网上的文章和官网安装说明,并没有修改默认配置文件的说法。
/home/hye/elasticsearch/config
修改完后,开启验证界面,最好找个好点浏览器,QQ浏览器就别用了。可以用Chrome浏览器。
在界面输入:http://安装机器ip:9200/,页面回馈信息如下:
{
  "name" : "Mad-Dog","cluster_name" : "elasticsearch","version" : {
    "number" : "2.3.3","build_hash" : "218bdf10790eef486ff2c41a3df5cfa32dadcfde","build_timestamp" : "2016-05-17T15:40:04Z","build_snapshot" : false,"lucene_version" : "5.5.0"
  },"tagline" : "You Know,for Search"
}
至此,安装结束。。。(今天博客上传图片有问题,只能用文字描述了,抱歉)
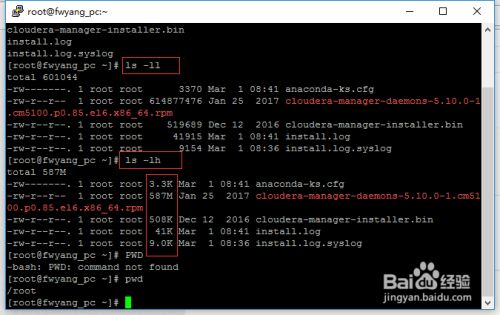 最简单的查看方法可以使用ls -ll、ls-lh命令进行查看,当使用...