一、准备工作:
软件默认下载在/usr/local/src下,安装在/app/local下的php、mysql、nginx、data目录下,安装顺序按照nginx->mysql->php进行
编译工具集:
yum install -y wget gccgcc-c++autoconfautomake cmakebison m4libxml2libxml2-devellibcurl-devel libjpeg-devel libpng-devel libicu-develpcre pcre-devellibtool
openssl openssl-develbzip2 bzip2-devel ncurses ncurses-develfreetype freetype-devel
libxslt-devel
更新系统:yum install -y update
下载需要的软件:
php:wget -c http://mirrors.sohu.com/php/php-7.0.10.tar.gz
mysql:wget -c http://mirrors.sohu.com/mysql/MySQL-5.7/mysql-boost-5.7.14.tar.gz
nginx:wget -c http://nginx.org/download/nginx-1.10.1.tar.gz
cmake:wget -c https://cmake.org/files/v3.1/cmake-3.1.3.tar.gz
php需要的一些库文件:wget -chttp://zlib.net/zlib-1.2.8.tar.gz
wget -c http://blog.zyan.cc/soft/linux/nginx_php/mcrypt/libmcrypt-2.5.8.tar.gz
wget -c http://blog.zyan.cc/soft/linux/nginx_php/mcrypt/mcrypt-2.6.8.tar.gz
wget -c http://blog.zyan.cc/soft/linux/nginx_php/mhash/mhash-0.9.9.9.tar.gz
二、安装nginx
新建用户和组:useradd -u 500 -g 500 -G 500 -s /sbin/nologin www
groupadd -g 500 www
新建相应的目录:mkdir -p /app/local/{nginx,mysql,php,data}
#tar zxvfnginx-1.10.1.tar.gz
#cd nginx-1.10.1
#可以通过./configure --help查看帮助
#./configure --prefix=/app/local/nginx --with-http_realip_module --with-http_gzip_static_module --with-http_stub_status_module
#make && make install
#cd ../
#systemctl stop firewalld.service#关闭防火墙
#/app/local/nginx/sbin/nginx #开启nginx
#可以通过curl判断nginx是否正常访问或者在浏览器地址栏输入ip地址查看
三、安装mysql
#tar zxvf cmake-3.1.3.tar.gz
#cd cmake-3.1.3
#./configure
#make && make install
#cd ../
#tar zxvf mysql-boost-5.7.14.tar.gz
#cd mysql-5.7.14/
#cmake -DCMAKE_INSTALL_PREFIX=/app/local/mysql -DMYSQL_UNIX_ADDR=/app/local/mysql/mysql.sock -DSYSCONFDIR=/app/local/mysql/etc -DSYSTEMD_PID_DIR=/app/local/mysql -DDEFAULT_CHARSET=utf8 -DDEFAULT_COLLATION=utf8_general_ci -DWITH_INNOBASE_STORAGE_ENGINE=1 -DWITH_ARCHIVE_STORAGE_ENGINE=1 -DWITH_BLACKHOLE_STORAGE_ENGINE=1 -DWITH_PERFSCHEMA_STORAGE_ENGINE=1 -DMYSQL_DATADIR=/app/local/data -DWITH_BOOST=boost -DWITH_SYSTEMD=1
#make && make install
#cd ../
#chown -R mysql:mysql /app/local/mysql/
#chown -R mysql:mysql /app/local/data/
#cd /app/local/mysql/bin
#./mysqld --initialize --user=mysql --basedir=/app/local/mysql/ --datadir=/app/local/data/ #初始化数据库并且随机生成一个密码
#./mysqld --user=mysql#开启mysql
#echo 'export PATH=$PATH:/app/local/mysql/bin' >> /etc/profile.d/mysql.sh
#source /etc/profile.d/mysql.sh
#mysql -uroot -p
Enter password:#输入刚才随机生成的密码
mysql>ALTER USER 'root'@'localhost' IDENTIFIED BY 'new_password';#通过这个重置密码
四、安装php
首先安装php的一些包文件
#cd /usr/local/src/
#tar zxvf mhash-0.9.9.9.tar.gz
#cd mhash-0.9.9.9
#./configure
#make && make install
#cd ../
#tar zxvf libmcrypt-2.5.8.tar.gz
#cd libmcrypt-2.5.8
#./configure
#make && make install
#cd ../
#tar zxvf mcrypt-2.6.8.tar.gz
#cd mcrypt-2.6.8
#./configure
出现错误:configure: error: *** libmcrypt was not found
解决办法:ln -s /usr/local/bin/libmcrypt_config /usr/bin/libmcrypt_config再./configure依然报错,执行export LD_LIBRARY_PATH=/usr/local/lib: LD_LIBRARY_PATH
再./configure通过
#make && make install
#cd ../
#tar zxvf zlib-1.2.8.tar.gz
#cd zlib-1.2.8
#./configure
#make && make install
#cd ../
#tar zxvf php-7.0.10.tar.gz
#cd php-7.0.10
#./configure --prefix=/app/local/php --with-config-file-path=/app/local/php/etc --with-pdo-sqlite --with-zlib-dir --with-freetype-dir --enable-mbstring --with-libxml-dir=/usr --enable-xmlreader --enable-xmlwriter --enable-soap --enable-calendar --with-curl --with-mcrypt --with-gd --disable-rpath --enable-inline-optimization --with-bz2 --with-zlib --enable-sockets --enable-sysvsem --enable-sysvshm --enable-pcntl --enable-mbregex --enable-exif --enable-bcmath --with-mhash --enable-zip --with-pcre-regex --with-pdo-mysql --with-mysqli --with-mysql-sock --enable-mysqlnd --with-jpeg-dir=/usr --with-png-dir=/usr --enable-gd-native-ttf --with-openssl --enable-ftp --with-imap-ssl --with-kerberos --with-gettext --with-xmlrpc --with-xsl --enable-opcache --enable-fpm --with-fpm-user=www --with-fpm-group=www --disable-fileinfo
#make && make install
#cd ../
五、配置
#cp /usr/local/src/php-7.0.10 /app/local/php/etc/php.ini
#cp/app/local/php/etc/php-fpm.conf.default/app/local/php/etc/php-fpm.conf
#cp/app/local/php/etc/php-fpm.d/www.conf.default/app/local/php/etc/php-fpm.d/www.conf
#vi www.conf#查找/static将pm=dynamic 改成pm =static保存退出
#vi/app/local/php/etc/php.ini#查找date.timezone将前面的分号去掉并设置为PRC保存退出
#vi /app/local/nginx/conf/nginx.conf
修改为
user www www;
worker_processes 4;
error_log logs/error.log;
#error_log logs/error.log notice;
#error_log logs/error.log info;
#pid logs/nginx.pid;
events {
use epoll;
worker_connections 51024;
}
location ~ \.php${
root html;
fastcgi_pass 127.0.0.1:9000;
fastcgi_index index.php;
#fastcgi_param SCRIPT_FILENAME $fastcgi_script_name;
include fastcgi.conf;
}
保存退出
#/app/local/nginx/sbin/nginx -t#测试配置文件是否有误 如果出现如下则表示无误 否则会提示错误信息在多少行
nginx: the configuration file /app/local/nginx/conf/nginx.conf syntax is ok
nginx: configuration file /app/local/nginx/conf/nginx.conf test is successful
#vi /app/local/nginx/html/index.php
输入<?php phpinfo ?>保存退出
#/app/local/nginx/sbin/nginx#启动nginx
#/app/local/php/sbin/php-fpm#启动php-fpm
#systemctl stop firewalld.service#关闭防火墙
在浏览器地址栏输入ip/index.php 如果出现如下则表明安装配置成功

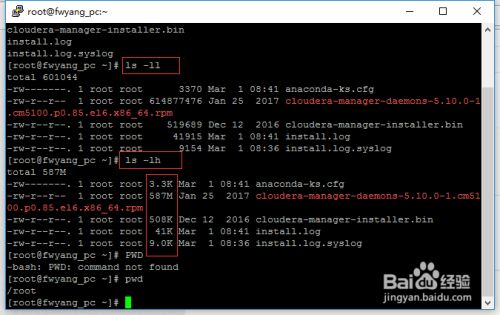 最简单的查看方法可以使用ls -ll、ls-lh命令进行查看,当使用...