CENTOS 7.0 apache + php + mariadb 环境搭建(附带wordpress搭建)
一、安装apache
yum install httpd
安装成功后,apache操作命令:
systemctl start httpd      //启动apache
systemctl stop httpd       //停止apache
systemctl restart httpd    //重启apache
systemctl enable httpd     //设置apache开机启动
外部对其访问时还需要对防火墙进行配置如下。
CentOS 7.0默认使用的是firewall作为防火墙,这里改为iptables防火墙。
1.关闭firewall:
systemctl stop firewalld.service    //停止firewall服务
systemctl disable firewalld.service //禁止firewall开机启动
2.安装iptables防火墙
yum intall iptables-services   //安装
vim /etc/sysconfig/iptables    //编辑防火墙配置文件


# Firewall configuration written by system-config-firewall
# Manual customization of this file is not recommended.
*filter
:INPUT ACCEPT [0:0]
:FORWARD ACCEPT [0:0]
:OUTPUT ACCEPT [0:0]
-A INPUT -m state --state ESTABLISHED,RELATED -j ACCEPT
-A INPUT -p icmp -j ACCEPT
-A INPUT -i lo -j ACCEPT
-A INPUT -m state --state NEW -m tcp -p tcp --dport 22 -j ACCEPT
-A INPUT -m state --state NEW -m tcp -p tcp --dport 80 -j ACCEPT
-A INPUT -m state --state NEW -m tcp -p tcp --dport 3306 -j ACCEPT
-A INPUT -j REJECT --reject-with icmp-host-prohibited
-A FORWARD -j REJECT --reject-with icmp-host-prohibited
COMMIT
:wq! #保存退出

systemctl restart iptables.service   //最后重启防火墙使配置生效
systemctl enable iptables.service    //设置防火墙开机启动
3.关闭SELINUX
vim /etc/selinux/config

#SELINUX=enforcing #注释掉
#SELINUXTYPE=targeted #注释掉
SELINUX=disabled #增加
:wq! #保存退出

setenforce 0    //使配置立即生效
这时候restart一下apache服务,输入localhost之后,会出现apache的测试页面testing 123..
二、安装mariadb(mysql的一个开源分支)
yum install mariadb mariadb-server
mariadb安装成功后,需要配置mysql的root密码,先备注一下常用命令:
systemctl start mariadb     //启动MariaDB
systemctl stop mariadb      //停止MariaDB
systemctl restart mariadb   //重启MariaDB
systemctl enable mariadb    //设置开机启动
设置root账户密码
mysql_secure_installation
Enter current password for root (enter for none):
Set root password? [Y/n]点击回车然后提示是否设置root账号密码,输入y
New password:
Re-enter new password:
Password updated successfully!提示输入新密码和重复输入新密码,重复输入两次后,出现更新密码成功提示。
然后一路输入y就可以
Remove anonymous users? [Y/n] y
... Success!Disallow root login remotely? [Y/n] y
... Success!Remove test database and access to it? [Y/n] y
- Dropping test database...
... Success!
- Removing privileges on test database...
... Success!Reload privilege tables now? [Y/n] y
... Success!Thanks for using MariaDB!
设置root密码后,重启mariadb生效
systemctl restart mariadb.service
测试访问数据库:
mysql -uroot -p
然后输入密码,登录成功后显示如下:
Enter password:
Welcome to the MariaDB monitor. Commands end with ; or g.
Your MariaDB connection id is 2
Server version: 5.5.44-MariaDB MariaDB ServerCopyright (c) 2000,2015,Oracle,MariaDB Corporation Ab and others.
Type 'help;' or 'h' for help. Type 'c' to clear the current input statement.
MariaDB [(none)]>
输入如下命令,查看数据库服务器的数据库
show databases;
退出命令
exit;
三、安装php以及php扩展
yum install php php-mysql php-gd libjpeg* php-ldap php-odbc php-pear php-xml php-xmlrpc php-mbstring php-bcmath php-mhash
安装完成后,重启apache服务器
systemctl restart httpd.service
测试php安装结果
vim /var/www/html/index.php
输入如下内容
<?php
    phpinfo();
?>

:wq!保存
在浏览器中输入服务器地址,查看是否可以看到:php的版本信息以及其他具体信息页面。
&wordpress部署
·1.用ftp工具将wordpress文件夹直接transfer到服务器/var/www目录下,这时候在浏览器中访问127.0.0.1/wordpress(ip地址为服务器ip可以看到wordpress的五分钟安装界面。
Q&A
您的 PHP 似乎没有安装运行 WordPress 所必需的 MySQL 扩展”处理方法?
第一步:先用ssh,打开php.ini
vim /etc/php.ini
第二步:php.ini中 添加
extension=mysql.so
第三步:在php.ini 中找到如下
extension_dir="xxxxxxx"

注:  xxxxxxx指扩展安装目录,centos64位的主机一般安装在extension_dir = "/usr/lib64/php/modules"
第四步:找到这个扩展安装目录,确认是否有mysql.so这个文件,如果没有,下载
重启服务。
不过mysql.so这个文件应该不是直接可以yum的,我在有这个问题的时候发现是没有安装php-mysql扩展,装上之后重启服务应该就没问题了。
2.这时候要在mysql中创建一个wordpress数据库才能保证wordpress安装成功,不过如果配置不成功,也没关系,可以后续操作wp-config-sample.php在其中手动输入相关信息改动文件名为wp-config.php即可。
新建数据库指令如下,不要忘记加结尾的分号;
create database wordpress;
访问你自己的站点吧!
ps.
不过在访问站点的时候,你可能会碰到新的问题,比如你无法上传自定义的图片。
Q&A
无法建立目录“wcontent/uploads”/2016/12。有没有上级目录的写权限?
确认拥有上传目录uploads,如没有则手动创建一个目录;
wordpress拥有对文件夹的操作权限,给文件夹赋权,在创建文件夹的时候勾选write和子文件夹赋权选项;
在数据库中wp-options表中设置upload_path的值为wp-content/uploads不需要加双引号,可以看到我上面的错误就是加了双引号
其中第三步对数据库进行操作我们可以在phpmyadmin中直接修改。
安装phpmyadmin
yum install epel-release
yum install phpmyadmin php-mcrypt
phpmyadmin的默认安装目录是/usr/share/phpMyAdmin,同时会在 Apache 的配置文件目录中自动创建虚拟主机配置文件 /etc/httpd/conf.d/phpMyAdmin.conf(区分大小写)。默认情况下,CentOS 7上的phpMyAdmin只允许从回环地址(127.0.0.1)访问。为了能远程连接,你需要改动它的配置。
<Directory /usr/share/phpMyAdmin/>
   AddDefaultCharset UTF-8

   <IfModule mod_authz_core.c>
     # Apache 2.4
     <RequireAny>
      # Require ip 127.0.0.1  #注释掉
      # Require ip ::1   #注释掉
      Require all granted   #新添加
     </RequireAny>
 </IfModule>
 <IfModule !mod_authz_core.c>
     # Apache 2.2
     Order Deny,Allow
     Deny from All
     Allow from 127.0.0.1
     Allow from ::1
   </IfModule>
</Directory>

<Directory /usr/share/phpMyAdmin/setup/>
   <IfModule mod_authz_core.c>
     # Apache 2.4
     <RequireAny>
      #Require ip 127.0.0.1  #注释掉
      #Require ip ::1   #注释掉
      Require all granted   #新添加
     </RequireAny>
   </IfModule>
   <IfModule !mod_authz_core.c>
     # Apache 2.2
     Order Deny,Allow
     Deny from All
     Allow from 127.0.0.1
     Allow from ::1
   </IfModule>
</Directory>
然后重启apache服务器,就可以通过ip地址/phpmyadmin访问数据库了。
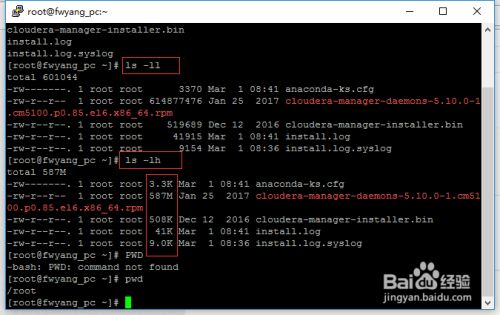 最简单的查看方法可以使用ls -ll、ls-lh命令进行查看,当使用...