| 越来越多的企业已经采用ELK解决方案来对其公司产生的日志进行分析,笔者最近着手在生产环境部署自己的ELK stack,本文介绍ELK中elasticsearch5.2集群的实现。 |
1、系统:CentOS 6.8
ip及角色:192.168.1.121(master node) 192.168.122(data node) 192.168.123(client node)
2、JDK
# 笔者使用的jdk版本jdk-8u121-linux-x64.rpm,下面给出可以直接下载的JDK版本
wget --no-cookies --no-check-certificate --header "Cookie: gpw_e24=http%3A%2F%2Fwww.oracle.com%2F; oraclelicense=accept-securebackup-cookie" "http://download.oracle.com/otn-pub/java/jdk/8u77-b02/jdk-8u77-linux-x64.rpm"
3、elasticsearch安装
# 分别在三台服务器上安装elastic,以yum安装为例
rpm --import https://artifacts.elastic.co/GPG-KEY-elasticsearch
# 添加elasticsearch源
echo '[elasticsearch-5.x]
name=Elasticsearch repository for 5.x packages
baseurl=https://artifacts.elastic.co/packages/5.x/yum
gpgcheck=1
gpgkey=https://artifacts.elastic.co/GPG-KEY-elasticsearch
enabled=1
autorefresh=1
type=rpm-md
' | sudo tee /etc/yum.repos.d/elasticsearch.repo
#
yum makecache && yum install elasticsearch -y
1、Elasticsearch cluster 三种角色
master node:master节点主要用于元数据(metadata)处理,如、索引的新增、删除、分片
data node: data节点上保存了数据片
client node: client节点起到路由请求的作用,可看做负载均衡器
2、节点选择
# 配置文件中给出了三种配置高性能集群拓扑结构的模式,如下:
- 如果你想让节点从不选举为主节点,只用来存储数据,可作为负载器
node.master: false
node.data: true
- 如果想让节点成为主节点,且不存储任何数据,并保有空闲资源,可作为协调器
node.master: true
node.data: false
- 如果想让节点既不称为主节点,又不成为数据节点,那么可将他作为搜索器,从节点中获取数据,生成搜索结果等
node.master: false
node.data: false
3、elasticsearch.yaml配置详解
# elastic-a1(192.168.1.121),master节点
[root@elastic-a1 ~]# egrep -v "^#|^$" /etc/elasticsearch/elasticsearch.yml
cluster.name: es-cluster
node.name: es-node-a1
node.master: true
node.data: true
path.logs: /var/log/elasticsearch
bootstrap.memory_lock: false
network.host: 192.168.1.121
http.port: 9200
transport.tcp.port: 9300
discovery.zen.ping.unicast.hosts: ["192.168.1.121","192.168.1.122","192.168.1.123"]
discovery.zen.minimum_master_nodes: 1
gateway.recover_after_nodes: 2
gateway.recover_after_time: 5m
gateway.expected_nodes: 1
bootstrap.system_call_filter: false
script.engine.groovy.inline.search: on
script.engine.groovy.inline.aggs: on
indices.recovery.max_bytes_per_sec: 20mb
http.cors.enabled: true
http.cors.allow-origin: "*"
# elastic-a2 ,data节点(192.168.1.122)
[root@elastic-a2 ~]# egrep -v "^#|^$" /etc/elasticsearch/elasticsearch.yml
cluster.name: es-cluster
node.name: es-node-a2
node.master: false
node.data: true
path.logs: /var/log/elasticsearch
bootstrap.memory_lock: false
network.host: 192.168.1.122
http.port: 9200
transport.tcp.port: 9300
discovery.zen.ping.unicast.hosts: ["192.168.1.121","192.168.1.123"]
discovery.zen.minimum_master_nodes: 1
gateway.recover_after_nodes: 2
gateway.recover_after_time: 5m
gateway.expected_nodes: 1
bootstrap.system_call_filter: false
script.engine.groovy.inline.search: on
script.engine.groovy.inline.aggs: on
indices.recovery.max_bytes_per_sec: 20mb
# elastic-a3,client节点(192.168.1.123)
[root@elastic-a3 ~]# egrep -v "^#|^$" /etc/elasticsearch/elasticsearch.yml
cluster.name: es-cluster
node.name: es-node-a3
node.master: false
node.data: false
path.logs: /var/log/elasticsearch
bootstrap.memory_lock: false
network.host: 192.168.1.123
http.port: 9200
transport.tcp.port: 9300
discovery.zen.ping.unicast.hosts: ["192.168.1.121",sans-serif; font-size:12px"> # 注,建议配置参考本文配置,集体到没想参数的含义,这里不具体给你,自行google,baidu,如果读者做实验时没有足够多的主机来实现es-cluster,可以在同一主机上进行配置,这里只需要修改下面一行:
discovery.zen.ping.unicast.hosts: ["192.168.1.121","192.168.1.123"] 改成 discovery.zen.ping.unicast.hosts: ["0.0.0.0:9300","0.0.0.0:9301","0.0.0.0:9302"]

  三、elastic集群启动

 1、分别在三个主机上启动elasticsearch服务,并查看启动日志是否报错
/etc/init.d/elasticsearch start tailf
/var/log/elasticsearch/es-cluster.log
 2、启动成功,浏览器访问 http://192.168.1.121:9200/_cluster/health?pretty=true
 # 到这里elasticsearch集群已经部署完成,具体使用详情请自行移步到elsatic官网,查看官方文档

  四、head插件安装

 #(安装在elastic-a1节点)
 1、参考:https://github.com/mobz/elasticsearch-head
yum install npm git -y

cd /usr/share/elasticsearch/

git clone git://github.com/mobz/elasticsearch-head.git

cd elasticsearch-head && npm install

npm install -g grunt
 2、插件配置
cd /usr/share/elasticsearch/elasticsearch-head/ # 移动到插件项目目录下

vim +4329 _site/app.js #修改app.js中localhost为节点IP,便于连接es-cluster
 3、后台运行插件
cd /usr/share/elasticsearch/elasticsearch-head/
 nohup grunt server &
 4、通过插件es-cluster状态 # http://192.168.1.121:9100/ ()


  五、总结

 1、unable to install syscall filter
 echo "bootstrap.system_call_filter: false" >> /etc/elasticsearch/elasticsearch.yml # 解决报错 !
 使用本地 IP(127.0.0.1)时,Elasticsearch 进入 dev mode,只能从本机访问,只显示警告。
 使用局域网IP后,可以从其他机器访问,但启动时进入 production mode,并进行 bootstrap check,有可能对不合适的系统参数报错。
 2、安装注意事项主要是elasticsearch配置文件,确保配置文件正确,然后再去启动elastic节点 参考链接: http://blog.csdn.net/gamer_gyt/article/details/59077189#reply https://www.gitbook.com/book/chenryn/elk-stack-guide-cn/details https://www.elastic.co/guide/index.html
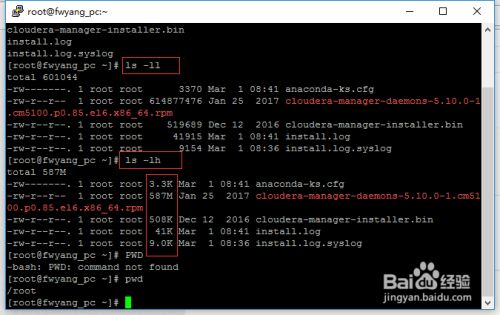 最简单的查看方法可以使用ls -ll、ls-lh命令进行查看,当使用...