前言:
一、为什么要用Rsync+sersync架构?
1、sersync是基于Inotify开发的,类似于Inotify-tools的工具
2、sersync可以记录下被监听目录中发生变化的(包括增加、删除、修改)具体某一个文件或某一个目录的名字,然后使用rsync同步的时候,只同步发生变化的这个文件或者这个目录。
二、Rsync+Inotify-tools与Rsync+sersync这两种架构有什么区别?
1、Rsync+Inotify-tools
(1):Inotify-tools只能记录下被监听的目录发生了变化(包括增加、删除、修改),并没有把具体是哪个文件或者哪个目录发生了变化记录下来;
(2):rsync在同步的时候,并不知道具体是哪个文件或者哪个目录发生了变化,每次都是对整个目录进行同步,当数据量很大时,整个目录同步非常耗时(rsync要对整个目录遍历查找对比文件),因此,效率很低。
2、Rsync+sersync
(1):sersync可以记录下被监听目录中发生变化的(包括增加、删除、修改)具体某一个文件或某一个目录的名字;
(2):rsync在同步的时候,只同步发生变化的这个文件或者这个目录(每次发生变化的数据相对整个同步目录数据来说是很小的,rsync在遍历查找比对文件时,速度很快),因此,效率很高。
小结:当同步的目录数据量不大时,建议使用Rsync+Inotify-tools;当数据量很大(几百G甚至1T以上)、文件很多时,建议使用Rsync+sersync。
环境说明:
操作系统:CentOS 7.0
源服务器:192.168.1.51
目标服务器:192.168.1.52
目的:
把源服务器上/data/image /data/pic两个目录
实时同步到目标服务器的data/image /data/pic下
具体操作:
一、目标服务器安装Rsync服务端
1、关闭SELINUX
vi /etc/selinux/config |
SELINUX=disabled |
setenforce 0#立即生效
2. 配置防火墙IPTABLES
| [root@master2 ~]# vim /etc/sysconfig/iptables |
增加规则:-A INPUT -p tcp -m state --state NEW -m tcp --dport 873 -j ACCEPT |
iptables -L -v -n 查看防火墙状态,873端口是否开放 |
3、检查是否安装rsync
[root@master2 ~]# rpm -qa|grep rsync rsync-3.0.9-15.el7.x86_64 |
4、配置rsync的配置文件
vim /etc/rsyncd.conf |
#Rsync configuration: uid = root gid = root use chroot = no port = 873 max connections = 2000 timeout = 200 log file = /var/run/rsyncd.log pid file = /var/run/rsyncd.pid lock file = /var/run/rsyncd.lock read only = false auth users = lyc secrets file = /etc/rsyncd.secret hosts allow = 192.168.1.0/255 hosts deny = 0.0.0.0/32 list = yes ignore errors = yes [image] path = /data/image [pic] pate = /data/pic |
注解 #Rsync configuration: uid = root #设置rsync运行权限为root gid = root #设置rsync运行权限为root use chroot = no # 安全相关,默认为true,修改为no,增加对目录文件软连接的备份 port = 873 # 指定rsync服务的默认端口号 max connections = 2000 # 并发连接数 timeout = 200 # 超时时间(秒) log file = /var/run/rsyncd.log # 指定日志文件位置,启动rsync后自动产生这个文件,无需提前创建 pid file = /var/run/rsyncd.pid # 指定rsync的pid目录 lock file = /var/run/rsyncd.lock # 指定rsync的锁文件【重要】,支持max connections参数的锁文件 read only = false # no客户端可上传文件,yes只读 auth users = lyc #执行数据同步的用户名,可以设置多个,用英文状态下逗号隔开 secrets file = /etc/rsyncd.secret #用户认证配置文件,里面保存用户名称和密码,后面会创建这个文件 hosts allow = 192.168.1.0/255 #允许进行数据同步的客户端IP地址段,可以设置多个,用英文状态下逗>号隔开 hosts deny = 0.0.0.0/32 #禁止数据同步的客户端IP地址,这里设置了不禁止 ################################################# [image] # 模块 path = /home/ces/ #rsync服务端数据目录路径 |
5、创建rsync同步密码文件,并设置权限为600
[root@master2 ~]# echo "lyc:test123" > /etc/rsyncd.secret [root@master2 ~]# chmod 600 /etc/rsyncd.secret [root@master2 ~]# ll //etc/rsyncd.secret -rw------- 1 root root 14 4月 18 09:25 /[root@master2 ~]# cat /etc/rsyncd.secret lyc:test123 |
6.启动rsync守护进程,并写入开机自启动
[root@master2 ~]# rsync --daemon
[root@master2 ~]# ps -ef | grep rsync
root 1662 1 0 09:34 ? 00:00:00 rsync --daemon
root 6310 6068 0 17:02 pts/0 00:00:00 grep --color=auto rsync
[root@master2 ~]# netstat -nulpt| grep rsync
tcp 0 0 0.0.0.0:873 0.0.0.0:* LISTEN 1662/rsync
tcp6 0 0 :::873 :::* LISTEN 1662/rsync
设置开机自启动,写入到/etc/rc.local里面
vim /etc/rc.local
# rsync server progress
/usr/bin/rsync --daemon --config=/etc/rsyncd.conf
7.创建相关待同步的目录/home/ces/并授予权限
[root@master2 ~]# mkdir -p /data/image/data/pic [root@master2 ~]# chown -R root.root /data/image |
二、在源服务器安装配置Rsync服务端+配置sersync
1、按照上面步骤配置按照Rsync服务端,需要注意的是创建rsync同步密码文件,内容只需要填写密码:test123
[root@master1 ~]# echo "test123" > /etc/rsyncd.secret [root@master1 ~]# chmod 600 /etc/rsyncd.secret [root@master1 ~]# ll -rw------- 1 root root 14 4月 18 09:25 /etc/rsync.password [root@master1 ~]# cat /etc/rsyncd.secret test123 |
2、手动测试rsync同步情况,此步非常关键,如果测试不成功,后面的sersync配好了也不会同步数据。
[root@master1 lyc]# rm -rf /test/
[root@master1 lyc]# mkdir -p /test/
[root@master1 lyc]# touch /test/lyc{1,2,3}{a,b,c}
[root@master1 lyc]# ls /test/
lyc1a lyc1b lyc1c lyc2a lyc2b lyc2c lyc3a lyc3b lyc3c
[root@master1 lyc]# rsync -avzP /lyc/ lyc@192.168.1.52::rsync --password-file=/etc/rsyncd.secret
sending incremental file list
./
lyca
0 100% 0.00kB/s 0:00:00 (xfer#1,to-check=11/13)
lycb
0 100% 0.00kB/s 0:00:00 (xfer#2,to-check=10/13)
lycc
0 100% 0.00kB/s 0:00:00 (xfer#3,to-check=9/13)
lycca
0 100% 0.00kB/s 0:00:00 (xfer#4,to-check=8/13)
lyccb
0 100% 0.00kB/s 0:00:00 (xfer#5,to-check=7/13)
lyccc
0 100% 0.00kB/s 0:00:00 (xfer#6,to-check=6/13)
lycla
0 100% 0.00kB/s 0:00:00 (xfer#7,to-check=5/13)
lyclb
0 100% 0.00kB/s 0:00:00 (xfer#8,to-check=4/13)
lyclc
0 100% 0.00kB/s 0:00:00 (xfer#9,to-check=3/13)
lycya
0 100% 0.00kB/s 0:00:00 (xfer#10,to-check=2/13)
lycyb
0 100% 0.00kB/s 0:00:00 (xfer#11,to-check=1/13)
lycyc
0 100% 0.00kB/s 0:00:00 (xfer#12,to-check=0/13)
sent 550 bytes received 239 bytes 1578.00 bytes/sec
total size is 0 speedup is 0.00
3、在源服务器上执行推送命令后,在目的服务器上查看同步目录/home/ces中的内容,如果内容同步完成,进行sersync的配置;未完成,检查rsync配置及认证用户密码信息。
三、源服务器上开始部署sersync服务
1、下载sersync
[root@master1 lyc]#tar -zxf sersync2.5.4_64bit_binary_stable_final.tar.gz-C/usr/local/ [root@master1 lyc]#mvGNU-Linux-x86/usr/local/sersync |
由于谷歌的原因,不能成功下载的话,请手动下载上传到源服务器端
2、配置sersync
[root@master1 local]#mkdir -p sersync/bin sersync/image sersync/pic [root@master1 local]#cp sersync/confxml.xmlsersync/image/ [root@master1 local]#mv sersync/serynce2sersync/bin/ |
3、修改配置文件image/confxml.xml、pic/confxml.xml
| [root@master1 local]#vimsersync/image/confxml.xml |
<?xml version="1.0" encoding="ISO-8859-1"?> <head version="2.5"> <host hostip="localhost" port="8008"></host> <debug start="false"/> <fileSystem xfs="false"/> <filter start="false"> <exclude expression="(.*)\.svn"></exclude> <exclude expression="(.*)\.gz"></exclude> <exclude expression="^info/*"></exclude> <exclude expression="^static/*"></exclude> </filter> <inotify> <delete start="true"/> <createFolder start="true"/> <createFile start="false"/> <closeWrite start="true"/> <moveFrom start="true"/> <moveTo start="true"/> <attrib start="false"/> <modify start="false"/> </inotify> <sersync> <localpath watch="/data/image"> <remote ip="192.168.1.52" name="image"/> <!--<remote ip="192.168.8.39" name="tongbu"/>--> <!--<remote ip="192.168.8.40" name="tongbu"/>--> </localpath> <rsync> <commonParams params="-artuz"/> <auth start="true" users="lyc" passwordfile="/etc/rsyncd.secret"/> <userDefinedPort start="true" port="873"/><!-- port=874 --> <timeout start="true" time="200"/><!-- timeout=100 --> <ssh start="false"/> </rsync> <failLog path="/tmp/rsync_fail_log.sh" timeToExecute="60"/><!--default every 60mins execute once--> <crontab start="false" schedule="600"><!--600mins--> <crontabfilter start="false"> <exclude expression="*.php"></exclude> <exclude expression="info/*"></exclude> </crontabfilter> </crontab> <plugin start="false" name="command"/> </sersync> <plugin name="command"> <param prefix="/bin/sh" suffix="" ignoreError="true"/> <!--prefix /opt/tongbu/mmm.sh suffix--> <filter start="false"> <include expression="(.*)\.php"/> <include expression="(.*)\.sh"/> </filter> </plugin> <plugin name="socket"> <localpath watch="/opt/tongbu"> <deshost ip="192.168.138.20" port="8009"/> </localpath> </plugin> <plugin name="refreshCDN"> <localpath watch="/data0/htdocs/cms.xoyo.com/site/"> <cdninfo domainname="ccms.chinacache.com" port="80" username="xxxx" passwd="xxxx"/> <sendurl base="http://pic.xoyo.com/cms"/> <regexurl regex="false" match="cms.xoyo.com/site([/a-zA-Z0-9]*).xoyo.com/images"/> </plugin> </head> |
[root@master1 local]#vimpic/confxml.xml
<?xml version="1.0"encoding"ISO-8859-1"?> <headversion"2.5"> <hosthostip="localhost"port="8008"></host> <debugstart"false"/> <fileSystemxfs <filter"false"> <excludeexpression"(.*)\.svn"></exclude> "(.*)\.gz"></exclude> "^info/*"></exclude> "^static/*"></exclude> </filter> <inotify> <delete"true"/> <createFolder <createFile <closeWrite <moveFrom <moveTo <attrib <modify </inotify> <sersync> <localpathwatch="/data/pic" <remoteip="192.168.1.52"name="pic"/> <!--<remote ip="192.168.8.39" name="tongbu"/>--> <!--<remote ip="192.168.8.40" name="tongbu"/>--> </localpath> <rsync> <commonParamsparams"-artuz"/> <auth="true"users="lyc"passwordfile="/etc/rsyncd.secret"/> <userDefinedPort"true""873"/><!-- port=874 --> <timeout"true"time"200"/><!-- timeout=100 --> <sshstart="false"/> </rsync> <failLogpath="/tmp/rsync_fail_log.sh"<!--default every 60mins execute once--> <crontabschedule"600"><!--600mins--> <crontabfilter <exclude"*.php"></exclude> "info/*"></exclude> </crontabfilter> </crontab> <plugin="false"="command" </sersync> > <paramprefix"/bin/sh"suffix""ignoreError/><!--prefix /opt/tongbu/mmm.sh suffix--> <filter> <includeexpression="(.*)\.php""(.*)\.sh" </filter> </plugin> <plugin"socket"> ="/opt/tongbu"<deshost="192.168.138.20"="8009" </localpath> </plugin> ="refreshCDN"="/data0/htdocs/cms.xoyo.com/site/"<cdninfodomainname="ccms.chinacache.com"="80"username="xxxx"passwd/> <sendurlbase="http://pic.xoyo.com/cms"<regexurlregexmatch="cms.xoyo.com/site([/a-zA-Z0-9]*).xoyo.com/images" </plugin> </head> |
只需要修改以下配置: 24行:<localpath="/data/image"> #源服务器本地同步目录 25行:<remote="image"/> #目的服务器同步目录 31行:<auth/> #指定rsync的用户和密码文件 32行:<userDefinedPort<!-- port=874 --> #指定rsync的端口 33行:<timeoutstart="true"time"200"<!-- timeout=100 --> #超时时间(秒) |
4、创建源服务器端同步目录
[root@master2 ~]# mkdir -p /data/image/data/pic [root@master2 ~]# chown -R root.root/data/image/data/pic |
5、把sersync的执行脚本加入到PATH并启动sersync
[root@master1 ces]#echo "export PATH=$PATH:/usr/local/sersync/bin/" >>/etc/profile
[root@master1 ces]#source/etc/profile
[root@master1 ces]#sersync2 -d -r -o /usr/local/sersync/image/confxml.xml
[root@master1 ces]#sersync2 -d -r -o /usr/local/sersync/confxml.xml
6、启动命令后返回结果如下为正常:
set the system param
execute:echo 50000000 > /proc/sys/fs/inotify/max_user_watches
execute:echo 327679 > /proc/sys/fs/inotify/max_queued_events
parse the command param
option: -d run as a daemon
option: -r rsync all the local files to the remote servers before the sersync work
option: -o config xml name: /usr/local/sersync/confxml.xml
daemon thread num: 10
parse xml config file
host ip : localhosthost port: 8008
daemon start,sersync run behind the console
use rsync password-file :
user islyc
passwordfile is /etc/rsyncd.secret
config xml parse success
please set /etc/rsyncd.conf max connections=0 Manually
sersync working thread 12 = 1(primary thread) + 1(fail retry thread) + 10(daemon sub threads)
Max threads numbers is: 22 = 12(Thread pool nums) + 10(Sub threads)
please according your cpu ,use -n param to adjust the cpu rate
------------------------------------------
rsync the directory recursivly to the remote servers once
working please wait...
execute command: cd /ces && rsync -artuz -R --delete ./ --port=873 --timeout=200 lyc@192.168.1.52::rsync --password-file=/etc/rsyncd.secret >/dev/null 2>&1
run the sersync:
watch path is: /data/image
7、设置开机启动sersync
[root@master1]echo "sersync2 -r -d -o /usr/local/sersync/image/confxml.xml" >> /etc/rc.d/rc.local /picconfxml.xml" >> /etc/rc.d/rc.local |
四、测试
1、源服务器端创建文件
[root@master1]# touch lyc.txt /data/image /data/pic [root@master1 /]# cd/data/image [root@master1 image]# ls lyc.txt [root@master1 /]# cd/data/pic [root@master1 pic]# ls lyc.txt |
2、目的服务器端查看
[root@master2 /]# cd /data/image [root@master2 image]# ls [root@master2 /]# cd/data/pic [root@master2 pic]# ls lyc.txt 3、同步失败解决办法 目的服务器端执行命令 rsync --daemon |
源服务器端执行命令
/usr/local/sersync/bin/sersync2 -d -r -o /usr/local/sersync/image/confxml.xml /usr/local/sersync/bin/sersync2 -d -r -o /usr/local/sersync/picconfxml.xml |
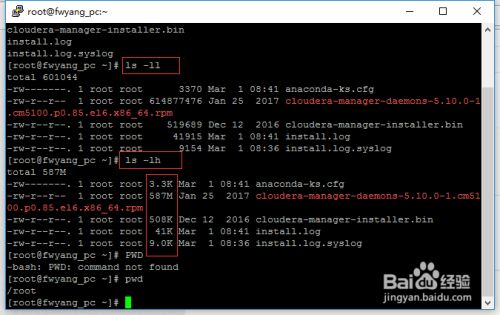 最简单的查看方法可以使用ls -ll、ls-lh命令进行查看,当使用...