CentOS7.0下Hadoop2.7.3的集群搭建
1.基本环境
1.1.操作系统
CentOS7.0
1.2.四台虚拟机
- 192.168.56.216 apollo.hadoop.com
- 192.168.56.217 artemis.hadoop.com
- 192.168.56.218 uranus.hadoop.com
- 192.168.56.219 ares.hadoop.com
1.3.软件包
- hadoop-2.7.3.tar.gz
- jdk-8u77-linux-x64.rpm
2.配置系统环境
2.1.配置ntp时间同步
2.2.修改hostname
#Host: 192.168.56.216
[root@apollo~]$ echo "apollo.hadoop.com" > /etc/hostname
#Host: 192.168.56.217
[root@artemis~]$ echo "artemis.hadoop.com" > /etc/hostname
#Host: 192.168.56.218
[root@uranus~]$ echo "uranus.hadoop.com" > /etc/hostname
#Host: 192.168.56.219
[root@ares~]$ echo "ares.hadoop.com" > /etc/hostname
2.3.修改主机上的/etc/hosts文件
[root@apollo~]$ echo "192.168.56.216 apollo.hadoop.com" >> /etc/hosts
[root@artemis~]$ echo "192.168.56.217 artemis.hadoop.com" >> /etc/hosts
[root@uranus~]$ echo "192.168.56.218 uranus.hadoop.com" >> /etc/hosts
[root@ares~]$ echo "192.168.56.219 ares.hadoop.com" >> /etc/hosts
2.4.同步三台从机的/etc/hosts文件
[root@apollo~]$ scp /etc/hosts artemis.hadoop.com:/etc/
[root@apollo~]$ scp /etc/hosts uranus.hadoop.com:/etc/
[root@apollo~]$ scp /etc/hosts ares.hadoop.com:/etc/
2.5.关闭主从机上的防火墙
#停止防火墙
[root@apollo~]$ systemctl stop firewalls.service
#禁止防火墙开机启动
[root@apollo~]$ systemctl disable firewalls.service
#停止防火墙
[root@artemis~]$ systemctl stop firewalls.service
#禁止防火墙开机启动
[root@artemis~]$ systemctl disable firewalls.service
#停止防火墙
[root@uranus~]$ systemctl stop firewalls.service
#禁止防火墙开机启动
[root@uranus~]$ systemctl disable firewalls.service
#停止防火墙
[root@ares~]$ systemctl stop firewalls.service
#禁止防火墙开机启动
[root@ares~]$ systemctl disable firewalls.service
3.配置hadoop环境
3.1.主从机上安装JDK
有关JDK1.8安装和环境变量配置请参考CentOS7.0安装配置JDK1.8
3.2.主从机上创建hadoop用户
#创建hadoop组
[root@apollo~]$ groupadd hadoop
[root@apollo~]$ groupadd hadoop
[root@apollo~]$ groupadd hadoop
[root@apollo~]$ groupadd hadoop
#创建hadoop用户
[root@apollo~]$ useradd -d /home/hadoop -g hadoop hadoop
[root@artemis~]$ useradd -d /home/hadoop -g hadoop hadoop
[root@uranus~]$ useradd -d /home/hadoop -g hadoop hadoop
[root@ares~]$ useradd -d /home/hadoop -g hadoop hadoop
#设置hadoop用户密码
[root@apollo~]$ passwd hadoop
Changing password for user hadoop.
New password:
Retype new password:
passwd: all authentication tokens updated successfully.
[root@artemis~]$ passwd hadoop
Changing password for user hadoop.
New password:
Retype new password:
passwd: all authentication tokens updated successfully.
[root@uranus~]$ passwd hadoop
Changing password for user hadoop.
New password:
Retype new password:
passwd: all authentication tokens updated successfully.
[root@ares~]$ passwd hadoop
Changing password for user hadoop.
New password:
Retype new password:
passwd: all authentication tokens updated successfully.
3.3.建议
建议在学习阶段将hadoop用户加入sudo权限管理,简单设置方法如下:
[root@apollo ~]# visudo
#在root ALL=(ALL) ALL下一行加入
hadoop ALL=(ALL) ALL

[root@artemis ~]# visudo
#在root ALL=(ALL) ALL下一行加入
hadoop ALL=(ALL) ALL

[root@uranus ~]# visudo
#在root ALL=(ALL) ALL下一行加入
hadoop ALL=(ALL) ALL

[root@ares ~]# visudo
#在root ALL=(ALL) ALL下一行加入
hadoop ALL=(ALL) ALL
3.4. 主从机之间设置无密钥连接
#主机切换hadoop用户
[root@apollo ~]$ su - hadoop
[hadoop@apollo ~]$ ssh-keygen -t rsa
Generating public/private rsa key pair.
Enter file in which to save the key (/home/hadoop/.ssh/id_rsa):
/home/hadoop/.ssh/id_rsa already exists.
Overwrite (y/n)? y
Enter passphrase (empty for no passphrase):
Enter same passphrase again:
Your identification has been saved in /home/hadoop/.ssh/id_rsa.
Your public key has been saved in /home/hadoop/.ssh/id_rsa.pub.
The key fingerprint is:
9c:88:8a:b4:67:66:6e:d6:e4:a9:05:40:04:f0:1f:a1 hadoop@apollo.hadoop.com
The key's randomart image is:
+--[ RSA 2048]----+
|*o  .            |
|.. . .           |
| .E .            |
|  .. o o .       |
| . .o . S        |
|......           |
|...=+..          |
|  *o.+           |
|  oo.            |
+-----------------+

[hadoop@apollo ~]$ cd /home/hadoop/.ssh/
[hadoop@apollo .ssh]$ cp id_rsa.pub authorized_keys
[hadoop@apollo .ssh]$ chmod go-wx authorized_keys

#将apollo.hadoop.com(主机上的公钥authorized_keys拷贝到artemis.hadoop.com,uranus.hadoop.com,ares.hadoo.com三台从机上以便三台从机可同时访问主机
[hadoop@apollo .ssh]$ scp authorized_keys artemis.hadoop.com:/home/hadoop/.ssh/
hadoop@artemis.hadoop.com's password:
authorized_keys                               100%  406     0.4KB/s   00:00
[hadoop@apollo .ssh]$ scp authorized_keys uranus.hadoop.com:/home/hadoop/.ssh/
hadoop@uranus.hadoop.com's password:
authorized_keys                               100%  406     0.4KB/s   00:00
[hadoop@apollo .ssh]$ scp authorized_keys ares.hadoop.com:/home/hadoop/.ssh/
hadoop@ares.hadoop.com's password:
authorized_keys                               100%  406     0.4KB/s   00:00
3.5.主从机设置hadoop环境变量
#主从机设置hadoop环境变量HADOOP_HOME
[root@apollo ~]# vim /etc/profile
[root@artemis ~]# vim /etc/profile
[root@uranus ~]# vim /etc/profile
[root@ares ~]# vim /etc/profile
#使修改生效
[root@apollo ~]# source /etc/profile
[root@artemis ~]# source /etc/profile
[root@uranus ~]# source /etc/profile
[root@ares ~]# source /etc/profile
3.6.主从机上创建相关目录
#创建hadoop的数据目录
[root@apollo hadoop]# mkdir -p /data/hadoop
[root@apollo ~]$ cd /data/hadoop/
[root@apollo hadoop]$ mkdir tmp #创建 tmp
[root@apollo hadoop]$ mkdir hdfs #创建hdfs
[root@apollo hadoop]$ cd hdfs/
[root@apollo hdfs]$ mkdir data #创建datanode目录
[root@apollo hdfs]$ mkdir name #创建namenode目录
[root@apollo hdfs]$ mkdir namesecondary
[root@apollo hadoop]# chown -R hadoop:hadoop /data/hadoop/

#同样方法创建三台从机的hadoop数据目录
[root@artemis hadoop]# mkdir -p /data/hadoop
[root@artemis ~]$ cd /data/hadoop/
[root@artemis hadoop]$ mkdir tmp #创建 tmp
[root@artemis hadoop]$ mkdir hdfs #创建hdfs
[root@artemis hadoop]$ cd hdfs/
[root@artemis hdfs]$ mkdir data #创建datanode目录
[root@artemis hdfs]$ mkdir name #创建namenode目录
[root@artemis hdfs]$ mkdir namesecondary
[root@artemis hadoop]# chown -R hadoop:hadoop /data/hadoop/

[root@uranus hadoop]# mkdir -p /data/hadoop
[root@uranus ~]$ cd /data/hadoop/
[root@uranus hadoop]$ mkdir tmp #创建 tmp
[root@uranus hadoop]$ mkdir hdfs #创建hdfs
[root@uranus hadoop]$ cd hdfs/
[root@uranus hdfs]$ mkdir data #创建datanode目录
[root@uranus hdfs]$ mkdir name #创建namenode目录
[root@uranus hdfs]$ mkdir namesecondary
[root@uranus hadoop]# chown -R hadoop:hadoop /data/hadoop/

[root@ares hadoop]# mkdir -p /data/hadoop
[root@ares ~]$ cd /data/hadoop/
[root@ares hadoop]$ mkdir tmp #创建 tmp
[root@ares hadoop]$ mkdir hdfs #创建hdfs
[root@ares hadoop]$ cd hdfs/
[root@ares hdfs]$ mkdir data #创建datanode目录
[root@ares hdfs]$ mkdir name #创建namenode目录
[root@ares hdfs]$ mkdir namesecondary
[root@ares hadoop]# chown -R hadoop:hadoop /data/hadoop/
3.7.主机上安装hadoop
#下载hadoop2.7.3
[root@apollo ~]$ wget http://mirror.bit.edu.cn/apache/hadoop/common/hadoop-2.7.3/hadoop-2.7.3.tar.gz
--2017-04-19 04:49:17--  http://mirror.bit.edu.cn/apache/hadoop/common/hadoop-2.7.3/hadoop-2.7.3.tar.gz
Resolving mirror.bit.edu.cn (mirror.bit.edu.cn)... 202.204.80.77,2001:da8:204:2001:250:56ff:fea1:22
Connecting to mirror.bit.edu.cn (mirror.bit.edu.cn)|202.204.80.77|:80... connected.
HTTP request sent,awaiting response... 200 OK
Length: 214092195 (204M) [application/octet-stream]
Saving to: ‘hadoop-2.7.3.tar.gz’

100%[==========================================================================>] 214,092,195 1.13MB/s   in 4m 14s

2017-04-19 04:53:30 (825 KB/s) - ‘hadoop-2.7.3.tar.gz’ saved [214092195/214092195]

#安装hadoop
[root@apollo ~]$ tar -zxvf hadoop-2.7.3.tar.gz

#把解压后的hadoop移到/home/hadoop/目录下
[root@apollo ~]$ mv hadoop-2.7.3 /home/hadoop/hadoop2.7

#修改hadoop的所属主
[root@apollo ~]$ chown -R Hadoop:hadoop /home/hadoop/hadoop2.7
4.修改配置文件
4.1. 有关配置文件的详细说明请参考官方文档:
4.2.配置hadoop-env.sh
#切换到hadoop的配置文件所在目录
[hadoop@apollo ~]$ cd $HADOOP_HOME/etc/hadoop/
[hadoop@apollo hadoop]$ ls -la
total 164
drwxrwxr-x. 2 hadoop hadoop  4096 Apr 19 13:49 .
drwxrwxr-x. 3 hadoop hadoop    19 Aug 17  2016 ..
-rw-rwxr--. 1 hadoop hadoop  4436 Aug 17  2016 capacity-scheduler.xml
-rw-rwxr--. 1 hadoop hadoop  1335 Aug 17  2016 configuration.xsl
-rw-rwxr--. 1 hadoop hadoop   318 Aug 17  2016 container-executor.cfg
-rw-rwxr--. 1 hadoop hadoop  1946 Apr 19 11:47 core-site.xml
-rw-rwxr--. 1 hadoop hadoop  3589 Aug 17  2016 hadoop-env.cmd
-rw-rwxr--. 1 hadoop hadoop  4249 Apr 19 13:48 hadoop-env.sh
-rw-rwxr--. 1 hadoop hadoop  2598 Aug 17  2016 hadoop-metrics2.properties
-rw-rwxr--. 1 hadoop hadoop  2490 Aug 17  2016 hadoop-metrics.properties
-rw-rwxr--. 1 hadoop hadoop  9683 Aug 17  2016 hadoop-policy.xml
-rw-rwxr--. 1 hadoop hadoop  2181 Apr 19 12:06 hdfs-site.xml
-rw-rwxr--. 1 hadoop hadoop  1449 Aug 17  2016 httpfs-env.sh
-rw-rwxr--. 1 hadoop hadoop  1657 Aug 17  2016 httpfs-log4j.properties
-rw-rwxr--. 1 hadoop hadoop    21 Aug 17  2016 httpfs-signature.secret
-rw-rwxr--. 1 hadoop hadoop   620 Aug 17  2016 httpfs-site.xml
-rw-rwxr--. 1 hadoop hadoop  3518 Aug 17  2016 kms-acls.xml
-rw-rwxr--. 1 hadoop hadoop  1527 Aug 17  2016 kms-env.sh
-rw-rwxr--. 1 hadoop hadoop  1631 Aug 17  2016 kms-log4j.properties
-rw-rwxr--. 1 hadoop hadoop  5511 Aug 17  2016 kms-site.xml
-rw-rwxr--. 1 hadoop hadoop 11237 Aug 17  2016 log4j.properties
-rw-rwxr--. 1 hadoop hadoop   931 Aug 17  2016 mapred-env.cmd
-rw-rwxr--. 1 hadoop hadoop  1383 Aug 17  2016 mapred-env.sh
-rw-rwxr--. 1 hadoop hadoop  4113 Aug 17  2016 mapred-queues.xml.template
-rw-rwxr--. 1 hadoop hadoop  1292 Apr 19 12:15 mapred-site.xml
-rw-rwxr--. 1 hadoop hadoop   758 Aug 17  2016 mapred-site.xml.template
-rw-rw-r--. 1 hadoop hadoop    18 Apr 19 13:36 masters
-rw-rwxr--. 1 hadoop hadoop    64 Apr 19 13:34 slaves
-rw-rwxr--. 1 hadoop hadoop  2316 Aug 17  2016 ssl-client.xml.example
-rw-rwxr--. 1 hadoop hadoop  2268 Aug 17  2016 ssl-server.xml.example
-rw-rwxr--. 1 hadoop hadoop  2191 Aug 17  2016 yarn-env.cmd
-rw-rwxr--. 1 hadoop hadoop  4567 Aug 17  2016 yarn-env.sh
-rw-rwxr--. 1 hadoop hadoop  1361 Apr 19 12:37 yarn-site.xml

#设置HADOOP——HEAPSIZE=128M(默认值为1000M,这里修改为128M)
#设置JAVA_HOME
[hadoop@apollo hadoop]$ vim hadoop-env.sh
# Licensed to the Apache Software Foundation (ASF) under one
# or more contributor license agreements. See the NOTICE file
# distributed with this work for additional information
# regarding copyright ownership. The ASF licenses this file
# to you under the Apache License,Version 2.0 (the
# "License"); you may not use this file except in compliance
# with the License. You may obtain a copy of the License at
#
# http://www.apache.org/licenses/LICENSE-2.0
#
# Unless required by applicable law or agreed to in writing,software
# distributed under the License is distributed on an "AS IS" BASIS,
# WITHOUT WARRANTIES OR CONDITIONS OF ANY KIND,either express or implied.
# See the License for the specific language governing permissions and
# limitations under the License.

# Set Hadoop-specific environment variables here.

# The only required environment variable is JAVA_HOME. All others are
# optional. When running a distributed configuration it is best to
# set JAVA_HOME in this file,so that it is correctly defined on
# remote nodes.

# The java implementation to use.
export JAVA_HOME=/usr/java/jdk1.8.0_77 #${JAVA_HOME}

# The jsvc implementation to use. Jsvc is required to run secure datanodes
# that bind to privileged ports to provide authentication of data transfer
# protocol. Jsvc is not required if SASL is configured for authentication of
# data transfer protocol using non-privileged ports.
#export JSVC_HOME=${JSVC_HOME}

export HADOOP_CONF_DIR=${HADOOP_CONF_DIR:-"/etc/hadoop"}

# Extra Java CLASSPATH elements. Automatically insert capacity-scheduler.
for f in $HADOOP_HOME/contrib/capacity-scheduler/*.jar; do
  if [ "$HADOOP_CLASSPATH" ]; then
    export HADOOP_CLASSPATH=$HADOOP_CLASSPATH:$f
  else
 else
    export HADOOP_CLASSPATH=$f
  fi
done

# The maximum amount of heap to use,in MB. Default is 1000.
export HADOOP_HEAPSIZE=128
#export HADOOP_NAMENODE_INIT_HEAPSIZE=""

# Extra Java runtime options. Empty by default.
export HADOOP_OPTS="$HADOOP_OPTS -Djava.net.preferIPv4Stack=true"

# Command specific options appended to HADOOP_OPTS when specified
export HADOOP_NAMENODE_OPTS="-Dhadoop.security.logger=${HADOOP_SECURITY_LOGGER:-INFO,RFAS} -Dhdfs.audit.logger=${HDFS_AUDIT_LOGGER:-INFO,NullAppender} $HADOOP_NAMENODE_OPTS"
export HADOOP_DATANODE_OPTS="-Dhadoop.security.logger=ERROR,RFAS $HADOOP_DATANODE_OPTS"

export HADOOP_SECONDARYNAMENODE_OPTS="-Dhadoop.security.logger=${HADOOP_SECURITY_LOGGER:-INFO,NullAppender} $HADOOP_SECONDARYNAMENODE_OPTS"

export HADOOP_NFS3_OPTS="$HADOOP_NFS3_OPTS"
export HADOOP_PORTMAP_OPTS="-Xmx512m $HADOOP_PORTMAP_OPTS"

# The following applies to multiple commands (fs,dfs,fsck,distcp etc)
export HADOOP_CLIENT_OPTS="-Xmx512m $HADOOP_CLIENT_OPTS"
#HADOOP_JAVA_PLATFORM_OPTS="-XX:-UsePerfData $HADOOP_JAVA_PLATFORM_OPTS"

# On secure datanodes,user to run the datanode as after dropping privileges.
# This **MUST** be uncommented to enable secure HDFS if using privileged ports
# to provide authentication of data transfer protocol. This **MUST NOT** be
# defined if SASL is configured for authentication of data transfer protocol
# using non-privileged ports.
export HADOOP_SECURE_DN_USER=${HADOOP_SECURE_DN_USER}

# Where log files are stored. $HADOOP_HOME/logs by default.
#export HADOOP_LOG_DIR=${HADOOP_LOG_DIR}/$USER

# Where log files are stored in the secure data environment.
export HADOOP_SECURE_DN_LOG_DIR=${HADOOP_LOG_DIR}/${HADOOP_HDFS_USER}

###
# HDFS Mover specific parameters
###
# Specify the JVM options to be used when starting the HDFS Mover.
# These options will be appended to the options specified as HADOOP_OPTS
# and therefore may override any similar flags set in HADOOP_OPTS
#
# export HADOOP_MOVER_OPTS=""

###
# Advanced Users Only!
###

# The directory where pid files are stored. /tmp by default.
# NOTE: this should be set to a directory that can only be written to by
# the user that will run the hadoop daemons. Otherwise there is the
# potential for a symlink attack.
export HADOOP_PID_DIR=${HADOOP_PID_DIR}
export HADOOP_SECURE_DN_PID_DIR=${HADOOP_PID_DIR}
# A string representing this instance of hadoop. $USER by default.
export HADOOP_IDENT_STRING=$USER
4.3. 配置core-site.xml (全局配置)
[hadoop@apollo hadoop]$ vim core-site.xml #配置全局变量
<?xml version="1.0" encoding="UTF-8"?>
<?xml-stylesheet type="text/xsl" href="configuration.xsl"?>
<!-- Licensed under the Apache License,Version 2.0 (the "License"); you may not use this file except in compliance with the License. You may obtain a copy of the License at http://www.apache.org/licenses/LICENSE-2.0 Unless required by applicable law or agreed to in writing,software distributed under the License is distributed on an "AS IS" BASIS,WITHOUT WARRANTIES OR CONDITIONS OF ANY KIND,either express or implied. See the License for the specific language governing permissions and limitations under the License. See accompanying LICENSE file. -->

<!-- Put site-specific property overrides in this file. -->

<configuration>
        <property>
                <name>fs.defaultFS</name>
                <value>hdfs://apollo.hadoop.com:9000</value>
                <!-- hadoop namenode 服务器地址和端口,以域名形式 -->
        </property>

        <property>
                <name>dfs.namenode.checkpoint.period</name>
                <value>1800</value>
                <!-- editlog每隔30分钟触发一次合并,默认为60分钟 -->
        </property>

        <property>
                <name>fs.checkpoint.size</name>
                <value>67108864</value>
        </property>

        <property>
                <name>fs.trash.interval</name>
                <value>1440</value>
                <!-- Hadoop文件回收站,自动回收时间,单位分钟,这里设置是1天,默认值为0. -->
        </property>

        <property>
                <name>hadoop.tmp.dir</name>
                <value>/data/hadoop/tmp</value>
                <!-- Hadoop的默认临时路径,这个最好配置,如果在新增节点或者其它情况下莫名其妙的DataNode启动不了,就>删除此文件中的tmp目录即可。不过如果删除了NameNode机器的此目录,那么就需要重新执行NameNode格式化命令。/data/hadoop/tmp这里给的路径不需要创建会自动生成。-->
        </property>
        <property>
                <name>io.file.buffer.size</name>
                <value>131702</value>
                <!-- 流文件的缓冲区 -->
        </property>
</configuration>
4.4. hdfs中NameNode,DataNode局部配置(hdfs-site.xml)
[hadoop@apollo hadoop]$ vim hdfs-site.xml
<?xml version="1.0" encoding="UTF-8"?>
<?xml-stylesheet type="text/xsl" href="configuration.xsl"?>
<!-- Licensed under the Apache License,either express or implied. See the License for the specific language governing permissions and limitations under the License. See accompanying LICENSE file. -->

<!-- Put site-specific property overrides in this file. -->

<configuration>
        <property>
                <name>dfs.namenode.name.dir</name>
                <value>/data/hadoop/hdfs/name</value>
                <!-- HDFS namenode数据镜像目录 -->
                <description> </description>
        </property>

        <property>
                <name>dfs.datanode.data.dir</name>
                <value>/data/hadoop/hdfs/data</value>
                <!-- HDFS datanode数据镜像存储路径,可以配置多个不同的分区和磁盘中,使用,号分隔 -->
                <description> </description>
        </property>

        <property>
                <name>dfs.namenode.http-address</name>
                <value>apollo.hadoop.com:50070</value>
                <!-- HDFS Web查看主机和端口号 -->
        </property>

        <property>
                <name>dfs.namenode.secondary.http-address</name>
                <value>artemis.hadoop.com:50090</value>
                <!-- 辅控HDFS Web查看主机和端口 -->
        </property>

        <property>
                <name>dfs.webhdfs.enabled</name>
                <value>true</value>
        </property>
        <property>
                <name>dfs.replication</name>
                <value>3</value>
                <!-- HDFS数据保存份数,通常是3 -->
        </property>

        <property>
                <name>dfs.datanode.du.reserved</name>
                <value>1073741824</value>
                <!-- datanode写磁盘会预留1G空间给其它程序使用,而非写满,单位 bytes -->
        </property>

        <property>
                <name>dfs.block.size</name>
                <value>134217728</value>
                <!-- HDFS数据块大小,当前设置为128M/Blocka -->
        </property>

        <property>
                <name>dfs.permissions.enabled</name>
                <value>false</value>
                <!-- HDFS关闭文件权限 -->
        </property>

</configuration>
4.5. 配置MapReduce,使用yarn框架、jobhistory使用地址及web地址(mapred-site.xml)
[hadoop@apollo hadoop]$ vi mapred-site.xml
<?xml version="1.0"?>
<?xml-stylesheet type="text/xsl" href="configuration.xsl"?>
<!-- Licensed under the Apache License,either express or implied. See the License for the specific language governing permissions and limitations under the License. See accompanying LICENSE file. -->

<!-- Put site-specific property overrides in this file. -->

<configuration>
        <property>
                <name>mapreduce.framework.name</name>
                <value>yarn</value>
        </property>
        <property>
                <name>mapreduce.jobtracker.http.address</name>
                <value>apollo.hadoop.com:50030</value>
        </property>
        <property>
                <name>mapred.job.tracker</name>
                <value>http://apollo.hadoop.com:9001</value>
        </property>
        <property>
                <name>mapreduce.jobhistory.address</name>
                <value>apollo.hadoop.com:10020</value>
        </property>
        <property>
                <name>mapreduce.jobhistory.webapp.address</name>
                <value>apollo.hadoop.com:19888</value>
        </property>
</configuration>
4.6.配置yarn-site.xml文件(yarn-site.xml)
[hadoop@apollo hadoop]$ vim yarn-site.xml
<?xml version="1.0"?>
<!-- Licensed under the Apache License,either express or implied. See the License for the specific language governing permissions and limitations under the License. See accompanying LICENSE file. -->
<configuration>

<!-- Site specific YARN configuration properties -->
        <property>
                <name>mapreduce.framework.name</name>
                <value>yarn</value>
        </property>
        <property>
                <name>yarn.resourcemanager.address</name>
                <value>apollo.hadoop.com:8032</value>
        </property>
        <property>
                <name>yarn.resourcemanager.scheduler.address</name>
                <value>apollo.hadoop.com:8030</value>
        </property>
        <property>
                <name>yarn.resourcemanager.resource-tracker.address</name>
                <value>apollo.hadoop.com:8031</value>
        </property>
        <property>
                <name>yarn.resourcemanager.admin.address</name>
                <value>apollo.hadoop.com:8033</value>
        </property>
        <property>
                <name>yarn.resourcemanager.webapp.address</name>
                <value>apollo.hadoop.com:8088</value>
        </property>
</configuration>
5.检查主机上的Hadoop
5.1.测试hdfs中的namenode与datanode
[hadoop@apollo hadoop]$ sh $HADOOP_HOME/sbin/hadoop-daemon.sh start namenode
[hadoop@apollo hadoop]$ chmod go-w /data/hadoop/hdfs/data/
[hadoop@apollo hadoop]$ sh $HADOOP_HOME/sbin/hadoop-daemon.sh start datanode
5.2.测试resourcemanager
[hadoop@apollo hadoop]$ sh $HADOOP_HOME/sbin/yarn-daemon.sh start resourcemanager
5.3.测试nodemanager
[hadoop@apollo hadoop]$ sh $HADOOP_HOME/sbin/yarn-daemon.sh start nodemanager
5.4.测试nodemanager
[hadoop@apollo hadoop]$ sh $HADOOP_HOME/sbin/mr-jobhistory-daemon.sh start historyserver
5.5.执行jps
* 看到以下信息表明单机版的Hadoop安装成功 *
[hadoop@apollo sbin]$ jps
15570 Jps
13861 JobHistoryServer
15273 ResourceManager
13997 DataNode
14349 NodeManager
15149 NameNode
6.Hadoop集群搭建
6.1.把主机上解压好的hadoop拷贝到从机上
#拷贝到从机artemis.hadoop.com
[hadoop@apollo sbin]$ scp -r $HADOOP_HOME/ artemis.hadoop.com:/home/hadoop/
#拷贝到从机uranus.hadoop.com
[hadoop@apollo sbin]$ scp -r $HADOOP_HOME/ uranus.hadoop.com:/home/hadoop/
#拷贝到从机ares.hadoop.com
[hadoop@apollo sbin]$ scp -r $HADOOP_HOME/ ares.hadoop.com:/home/hadoop/
6.2主机apollo.hadoop.com配置masters和slaves
[hadoop@apollo sbin]$ vim $HADOOP_HOME/etc/hadoop/salves
#1.删除localhost
#2.添加量台从机
artemis.hadoop.com
uranus.hadoop.com
ares.hadoop.com

[hadoop@apollo sbin]$ vim $HADOOP_HOME/etc/hadoop/masters
#1.删除localhost
#2.添加主机hostname
apollo.hadoop.com #目的是为了在从机artemis.hadoop.com节点上存放secondnamenode
7.测试集群搭建是否成功
#主机apollo.hadoop.com上,开启所有节点
[hadoop@apollo sbin]$ $HADOOP_HOME/bin/hdfs namenode -format
[hadoop@apollo sbin]$ sh $HADOOP_HOME/sbin/start-all.sh
#各个节点的jps:
[hadoop@apollo sbin]$jps
13861 JobHistoryServer
16567 GetConf
17527 Jps
15273 ResourceManager
13997 DataNode
14349 NodeManager
15149 NameNode

[hadoop@artemis ~]$ jps
13748 NodeManager
13606 DataNode
14598 Jps
13678 SecondaryNameNode

[hadoop@uranus ~]$ jps
13526 NodeManager
13449 DataNode
13916 Jps

[hadoop@ares ~]$ jps
13690 Jps
13355 NodeManager
13196 DataNode
* 如果存在上面状态,说明Hadoop的集群搭建成功*
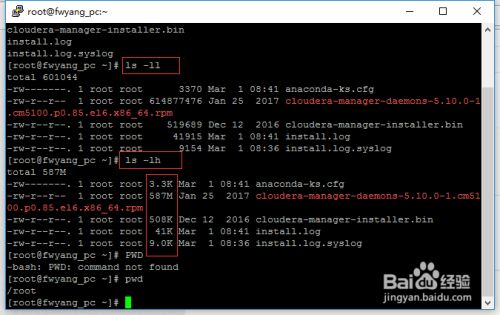 最简单的查看方法可以使用ls -ll、ls-lh命令进行查看,当使用...