系统版本:Linux centos6 2.6.32-431.el6.x86_64
mysql版本:MySQL-5.6.38-1.el6.x86_64
1.mysql5.6 rpm包下载
进入mysql官网下载页
https://dev.mysql.com/downloads
点击MySQL Community Server (GPL)版本下的DOWNLOAD按钮进入Download MySQL Community Server页面
点击MySQL Community Server 5.6 »超链接进入mysql5.6下载页
由于mysql5.7早已发布,目前官网下载页面只提供了mysql 5.6.38的下载
这里选择下载MySQL-5.6.38-1.el6.x86_64.rpm-bundle.tar打包版本
2.rpm安装mysql5.6
2.1查看CentOS6自带的mysql并卸载
[root@centos6 ~]# rpm -qa | grep mysql
[root@centos6 ~]# rpm -e --nodeps mysql-libs-5.1.71-1.el6.x86_64
如果不卸载会在安装mysql时会出现如下的情况
warning: MySQL-server-5.6.38-1.el6.x86_64.rpm: Header V3 DSA/SHA1 Signature,key ID 5072e1f5: NOKEY
Preparing... ########################################### [100%]
file /usr/share/mysql/czech/errmsg.sys from install of MySQL-server-5.6.38-1.el6.x86_64 conflicts with file from package mysql-libs-5.1.71-1.el6.x86_64
    file /usr/share/mysql/danish/errmsg.sys from install of MySQL-server-5.6.38-1.el6.x86_64 conflicts with file from package mysql-libs-5.1.71-1.el6.x86_64
    file /usr/share/mysql/dutch/errmsg.sys from install of MySQL-server-5.6.38-1.el6.x86_64 conflicts with file from package mysql-libs-5.1.71-1.el6.x86_64
    file /usr/share/mysql/english/errmsg.sys from install of MySQL-server-5.6.38-1.el6.x86_64 conflicts with file from package mysql-libs-5.1.71-1.el6.x86_64
    file /usr/share/mysql/estonian/errmsg.sys from install of MySQL-server-5.6.38-1.el6.x86_64 conflicts with file from package mysql-libs-5.1.71-1.el6.x86_64
    file /usr/share/mysql/french/errmsg.sys from install of MySQL-server-5.6.38-1.el6.x86_64 conflicts with file from package mysql-libs-5.1.71-1.el6.x86_64
    file /usr/share/mysql/german/errmsg.sys from install of MySQL-server-5.6.38-1.el6.x86_64 conflicts with file from package mysql-libs-5.1.71-1.el6.x86_64
    file /usr/share/mysql/greek/errmsg.sys from install of MySQL-server-5.6.38-1.el6.x86_64 conflicts with file from package mysql-libs-5.1.71-1.el6.x86_64
    file /usr/share/mysql/hungarian/errmsg.sys from install of MySQL-server-5.6.38-1.el6.x86_64 conflicts with file from package mysql-libs-5.1.71-1.el6.x86_64
    file /usr/share/mysql/italian/errmsg.sys from install of MySQL-server-5.6.38-1.el6.x86_64 conflicts with file from package mysql-libs-5.1.71-1.el6.x86_64
2.2上传mysql5.6 rpm包
2.3解压安装
解压上传的tar包
[root@centos6 ~]# tar -xvf MySQL-5.6.38-1.el6.x86_64.rpm-bundle.tar
解压后会得到以下rpm安装文件:
MySQL-client-5.6.38-1.el6.x86_64.rpm
MySQL-devel-5.6.38-1.el6.x86_64.rpm
MySQL-embedded-5.6.38-1.el6.x86_64.rpm
MySQL-server-5.6.38-1.el6.x86_64.rpm
MySQL-shared-5.6.38-1.el6.x86_64.rpm
MySQL-shared-compat-5.6.38-1.el6.x86_64.rpm
MySQL-test-5.6.38-1.el6.x86_64.rpm
安装服务端
[root@centos6 ~]# rpm -ivh MySQL-server-5.6.38-1.el6.x86_64.rpm
报error: Failed dependencies的错误,缺少perl、libaio.so.1(64bit)、libnuma.so.1(64bit)的依赖,具体信息如下:
warning: MySQL-server-5.6.38-1.el6.x86_64.rpm: Header V3 DSA/SHA1 Signature,key ID 5072e1f5: NOKEY
error: Failed dependencies:
/usr/bin/perl is needed by MySQL-server-5.6.38-1.el6.x86_64
    libaio.so.1()(64bit) is needed by MySQL-server-5.6.38-1.el6.x86_64
    libaio.so.1(LIBAIO_0.1)(64bit) is needed by MySQL-server-5.6.38-1.el6.x86_64
    libaio.so.1(LIBAIO_0.4)(64bit) is needed by MySQL-server-5.6.38-1.el6.x86_64
    libnuma.so.1()(64bit) is needed by MySQL-server-5.6.38-1.el6.x86_64
    libnuma.so.1(libnuma_1.1)(64bit) is needed by MySQL-server-5.6.38-1.el6.x86_64
    libnuma.so.1(libnuma_1.2)(64bit) is needed by MySQL-server-5.6.38-1.el6.x86_64
解决缺少perl的依赖:
[root@centos6 ~]# yum install -y perl
解决缺少libaio.so.1(64bit)的依赖:
这里使用yum install –y libaio.so.1后发现并不能解决问题,原因yum安装的并非x86_64版本,而是i686版本
[root@centos6 ~]# rpm -qa | grep libaio
libaio-0.3.107-10.el6.i686
手动下载libaio-0.3.107-10.el6.x86_64.rpm,下载地址如下:
http://mirror.centos.org/cent...
上传后安装
[root@centos6 ~]# rpm -ivh libaio-0.3.107-10.el6.x86_64.rpm
解决缺少libnuma.so.1(64bit)依赖:
[root@centos6 ~]# yum install -y numactl
安装完成后提示默认为root用户设置了随机密码,可以在/root/.mysql_secret文件中找到,并且移除了匿名用户,可以运行/usr/bin/mysql_secure_installation命令来移除自带的测试数据库,还生成了默认配置文件/usr/my.cnf
A RANDOM PASSWORD HAS BEEN SET FOR THE MySQL root USER ! You will find
that password in '/root/.mysql_secret'.You must change that password on your first connect,no other
statement but 'SET PASSWORD' will be accepted. See the manual for the
semantics of the 'password expired' flag.Also,the account for the anonymous user has been removed.
In addition,you can run:
/usr/bin/mysql_secure_installation
which will also give you the option of removing the test database.
This is strongly recommended for production servers.See the manual for more instructions.
Please report any problems at http://bugs.mysql.com/
The latest information about MySQL is available on the web at
Support MySQL by buying support/licenses at http://shop.mysql.com
New default config file was created as /usr/my.cnf and will be used by
default by the server when you start it. You may edit this file to
change server settings
安装客户端
[root@centos6 ~]# rpm -ivh MySQL-client-5.6.38-1.el6.x86_64.rpm
2.4启动mysql设置root密码
启动mysql服务
[root@centos6 ~]# service mysql start
[root@centos6 ~]# service mysql start Starting MySQL.Logging to
'/var/lib/mysql/centos6.err'. .... SUCCESS!
[root@centos6 ~]# service
mysql status SUCCESS! MySQL running (1620)
查看默认生成的随机密码
[root@centos6 ~]# cat /root/.mysql_secret
使用随机密码登录mysql
[root@centos6 ~]# mysql -u root -p
设置密码,这里设置为mysql123
mysql> set password = password('mysql123');
2.5开启mysql的远程登录
默认情况下mysql为安全起见,不支持远程登录mysql,因此需要设置开启远程登录mysql的权限
登录mysql后输入如下命令:
mysql> grant all privileges on *.* to 'root' @'%' identified by 'mysql123';
mysql> flush privileges;
2.6设置开机启动
加入到系统服务
[root@centos6 ~]# chkconfig --add mysql
开机自启
[root@centos6 ~]# chkconfig mysql on
2.7开放Linux的对外访问的端口3306
mysql默认没有开启对外访问端口3306,需要手动开启
[root@centos6 ~]# /sbin/iptables -I INPUT -p tcp --dport 3306 -j ACCEPT
[root@centos6 ~]# /etc/rc.d/init.d/iptables save
2.8删除测试数据库
运行提示的/usr/bin/mysql_secure_installation命令来删除测试数据库
[root@centos6 ~]# /usr/bin/mysql_secure_installation
[root@centos6 ~]# /usr/bin/mysql_secure_installation
NOTE: RUNNING ALL PARTS OF THIS SCRIPT IS RECOMMENDED FOR ALL MySQL
SERVERS IN PRODUCTION USE! PLEASE READ EACH STEP CAREFULLY!In order to log into MySQL to secure it,we'll need the current
password for the root user. If you've just installed MySQL,and you
haven't set the root password yet,the password will be blank,so you
should just press enter here.Enter current password for root (enter for none): OK,successfully
used password,moving on...Setting the root password ensures that nobody can log into the MySQL
root user without the proper authorisation.You already have a root password set,so you can safely answer 'n'.
Change the root password? [Y/n] n ... skipping.
By default,a MySQL installation has an anonymous user,allowing
anyone to log into MySQL without having to have a user account created
for them. This is intended only for testing,and to make the
installation go a bit smoother. You should remove them before moving
into a production environment.Remove anonymous users? [Y/n] y ... Success!
Normally,root should only be allowed to connect from 'localhost'.
This ensures that someone cannot guess at the root password from the
network.Disallow root login remotely? [Y/n] n ... skipping.
By default,MySQL comes with a database named 'test' that anyone can
access. This is also intended only for testing,and should be removed
before moving into a production environment.Remove test database and access to it? [Y/n] y
- Dropping test database... ... Success!
- Removing privileges on test database... ... Success!
Reloading the privilege tables will ensure that all changes made so
far will take effect immediately.Reload privilege tables now? [Y/n] y ... Success!
All done! If you've completed all of the above steps,your MySQL
installation should now be secure.Thanks for using MySQL!
2.9几个重要目录
数据库目录 /var/lib/mysql/配置文件 /usr/share/mysql(mysql.server命令及配置文件)相关命令 /usr/bin(mysqladmin mysqldump等命令)启动脚本 /etc/rc.d/init.d/(启动脚本文件mysql的目录)
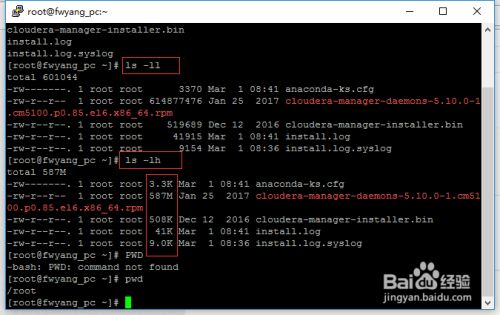 最简单的查看方法可以使用ls -ll、ls-lh命令进行查看,当使用...