1.前期准备
|
工具
|
版本 | 备注 |
|
Centos
|
7.4 | 64位 最小化安装 |
|
docker
|
1.13.1 | |
| Harbor | 1.1.2 | https://github.com/vmware/harbor/releases/download/v1.1.2/harbor-offline-installer-v1.1.2.tgz |
| Other tools | 详见具体配置 |
说明:
1.域名设置为docker-hub.vonechain.com
2.安装前置组件
2.1 更新系统
yum -y update && yum -y upgrade && yum -y install wget python-devel libevent-devel epel-release python-pip gcc gcc-c++ xz-devel lrzsz
yum -y upgrade kernel && yum -y reinstall kernel
2.2 安装ca-certificates包
yum install ca-certificates
#使能动态CA配置功能
update-ca-trust force-enable
3. 安装docker
yum -yinstalldocker
3.1 设置docker为开启启动
systemctlenabledocker.service
3.2 启动 docker 服务
systemctlstartdocker.service
3.3 安装 docker-compose
预先安装epel-release后方可安装python-pip[在前置条件中已安装,此处可不执行]
yum -y install epel-releasepython-pip
pipinstall--upgradepip
pipinstalldocker-compose
pipinstall--upgradebackports.ssl_match_hostname
yum clean all
python-pip其他安装方法:
curl "https://bootstrap.pypa.io/get-pip.py" -o "get-pip.py"
python get-pip.py
pip -V
4.安装harbor
4.1 下载harbor离线版
wget https://github.com/vmware/harbor/releases/download/v1.1.2/harbor-offline-installer-v1.1.2.tgz
解压到指定目录,此处为~/docker/harbor
tar xvf harbor-offline-installer-v1.1.2.tgz
4.2 创建证书存放目录
mkdir-p/data/cert
cd/data/cert/
4.3 配置Harbor内置nginx,并启用ssl
进入harbor离线包存放nginx配置目录
cd ~/docker/harbor/common/config/nginx
备份nginx.conf
cp nginx.conf nginx.conf.backup
新建https认证的nginx配置文件nginx.https.conf
cp nginx.conf nginx.https.conf
4.4 自签ssl证书
cd ~/docker/harbor/common/config/nginx/cert
openssl genrsa -out nginx.key 2048
openssl req -new -key nginx.key -sha256 -out nginx.csr
openssl x509 -req -days 3650 -in nginx.csr -signkey nginx.key -sha256 -out nginx.crt
cd ~/docker/harbor
4.5 将自签的SSL证书导入系统的CA
证书认证与输出连接配置
openssl s_client -showcerts -connect docker-hub.vonechain.com:443 </dev/null 2>/dev/null | openssl x509 -outform PEM >/etc/pki/ca-trust/source/anchors/docker-hub.vonechain.com.crt
更新ca证书信任
update-ca-trust
4.6 修改habor配置
hostname=docker-hub.vonechain.com
#指定私有仓库的主机名,可以是IP地址,也可以是域名
ui_url_protocol=https
#用户访问私仓时使用的协议,默认时http,配置成https
db_password=root123
#指定mysql数据库管理员密码
harbor_admin_password:Harbor12345
#harbor的管理员账户密码
ssl_cert=/data/cert/server.crt
#设置证书文件路径
ssl_cert_key=/data/cert/server.key
#设置证书密钥文件路径
4.7 通过自带脚本一键安装(在harbor目录下)
[root@harborharbor]#
./prepare
[root@harborharbor]#
./install.sh
[root@harborharbor]#
docker-compose up
设置harbor自启动
[root@harborharbor]#
echo "~/docker/harbor/docker-compose up" >> /etc/rc.d/rc.local
4.8 通过浏览器访问管理
[提前设置本地 hosts文件本地重定向至harbor服务器IP]
vi /etc/hosts
添加
127.0.0.1 localhost docker-hub.onechain.com
重启docker服务或者直接重启服务器
systemctl restart docker.service
4.9 开启80/443端口
firewall-cmd --zone=public --add-port=80/tcp --permanent
firewall-cmd --zone=public --add-port=443/tcp --permanent
firewall-cmd --reload
firewall-cmd --query-port=80/tcp
firewall-cmd --query-port=443/tcp
firewall-cmd --list-all
https://docker-hub.onechain.com
用户默认为admin
密码默认为Harbor12345 [可通过安装前 harbor.cfg 配置文件修改harbor_admin_password指定 ]
5. 客户端从docker下载证书
本地/etc/hosts [你的域名] 重定向至harbor服务器IP
vi /etc/hosts
新增
[harbor服务器IP] [你的域名]
e.g.
172.16.20.90 docker-hub.vonechain.com
5.1 创建仓库证书存放目录
sudo mkdir /etc/docker/certs.d/[你的域名]
e.g.
sudo mkdir /etc/docker/certs.d/docker-hub.vonechain.com
5.2 从harbor服务器获取证书至仓库证书目录
sudo scproot@[服务器IP]:/data/cert/ca.crt/etc/docker/certs.d/[你的域名]/ca.crt
e.g.
sudo scproot@172.16.20.90:/data/cert/ca.crt/etc/docker/certs.d/docker-hub.vonechain.com/ca.crt
5.3 登录至harbor
docker login -u admin -p 'Harbor12345' docker-hub.vonechain.com
如下图所示说明登录成功:
6.使用dockerfile制作自定义镜像
6.1 完成自定义镜像
略
6.2 推送自定义镜像至harbor
使用docker tag修改镜像标签
推送修改标签后的镜像
harbor上传成功结果(harbor的test用户原来已在harbor上创建,请自行动手创建)
至此,docker私有仓库基于harbor的搭建已全部完成。
FAQ
1.x509: certificate signed by unknown authority harbor
answer:
重复步骤4.2-4.5即可完成认证,使用内置nginx配置ssl证书认证
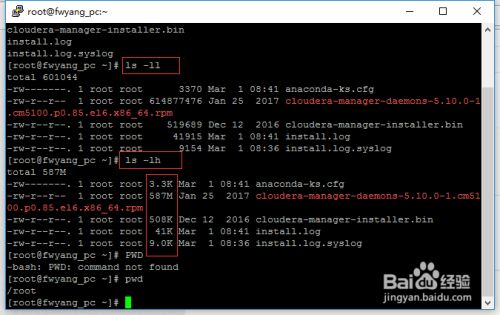 最简单的查看方法可以使用ls -ll、ls-lh命令进行查看,当使用...