最近工作中用到了daemontools工具来管理服务进程,再次总结下。
当服务进程因为某些原因(包括kill)挂掉了,daemontools会重新启动这个进程
环境介绍:
CentOS 6.9 x86_64位最小化安装
一、软件包下载安装过程
1.1下载软件包解压
[root@git-server ~]#wget http://cr.yp.to/daemontools/daemontools-0.76.tar.gz
[root@git-server ~]# tar xf daemontools-0.76.tar.gz
[root@git-server ~]# cd admin/daemontools-0.76/
编辑src/conf-cc文件在文件后面加入-include /usr/include/errno.h 防止在后续编译安装过程中报错
[root@git-server daemontools-0.76]# vim src/conf-cc
gcc -O2 -Wimplicit -Wunused -Wcomment -Wchar-subscripts -Wuninitialized -Wshadow -Wcast-qual -Wcast-align -Wwrite-strings -include /usr/include/errno.h
注意:下面的最后一条命令的package表示daemontools-0.76目录下的package目录,而不是一个package命令
1.2sudo编译安装
[root@git-server daemontools-0.76]#sudo package/install
Linking ./src/* into ./compile...
Compiling everything in ./compile...
sh find-systype.sh > systype
rm -f compile
sh print-cc.sh > compile
chmod 555 compile
./compile byte_chr.c
。。。。。。。。
。。。。。。。。。
env - /bin/sh rts.tests 2>&1 | cat -v > rts
rm -f sysdeps
cat systype compile load >> sysdeps
grep sysdep direntry.h >> sysdeps
grep sysdep haswaitp.h >> sysdeps
grep sysdep hassgact.h >> sysdeps
grep sysdep hassgprm.h >> sysdeps
grep sysdep select.h >> sysdeps
grep sysdep uint64.h >> sysdeps
grep sysdep iopause.h >> sysdeps
grep sysdep hasmkffo.h >> sysdeps
grep sysdep hasflock.h >> sysdeps
grep sysdep hasshsgr.h >> sysdeps
Copying commands into ./command...
Creating symlink daemontools -> daemontools-0.76...
Making command links in /command...
Making compatibility links in /usr/local/bin...
Creating /service...
Adding svscanboot to inittab...
init should start svscan now.

查看inittab,在文件末尾可以看到这一行:
[root@git-server daemontools-0.76]# tail -1 /etc/inittab
SV:123456:respawn:/command/svscanboot
之所以要使用sudo是因为,install脚本会在根目录/下创建两个目录:/service和/command目录。
其中/service目录用来存放被daemontools管理的进程.
注意在/service目录下存放的只能是连接。
/command命令下存放的是daemontools的一些常用命令。
二、配置daemontools
配置启动项,把 csh -cf '/command/svscanboot &' 加入到 /etc/rc.local=>/etc/rc.d/rc.local 末尾:开机自启动
[root@git-server command]# sed -i '$acsh -cf \x27\/command\/svscanboot &\x27' /etc/rc.local
[root@git-server command]# tail -2 /etc/rc.local
csh -cf '/command/svscanboot &'

[root@git-server command]# sh  /etc/rc.local
/etc/rc.local: line 15: csh: command not found
报错,于是安装csh命令
[root@git-server command]# yum install tcsh  -y
[root@git-server command]# which tcsh
/bin/tcsh
[root@git-server command]# which csh
/bin/csh
再次安装成功:
[root@git-server command]# sh -x /etc/rc.local
+ bash /var/lib/subsys/local
+ csh -cf '/command/svscanboot &'
[1] 13689
[root@git-server command]#
[root@git-server command]# ps -ef|grep svs
root     13689     1  0 22:55 pts/3    00:00:00 /bin/sh /command/svscanboot
root     13694 13689  0 22:55 pts/3    00:00:00 svscan /service
root     13768  9451  0 22:55 pts/3    00:00:00 grep --color svs
或者是直接后台运行
[root@git-server service]# /command/svscanboot &
[root@git-server service]# ps -ef|grep svs
root      1044  7763  0 22:37 pts/2    00:00:00 grep --color svs
root     30451  9451  0 22:34 pts/3    00:00:00 /bin/sh /command/svscanboot
root     30458 30451  0 22:34 pts/3    00:00:00 svscan /service
从ps -ef | grep svs的输出可以看到svscan作为svscanboot的子进程在运行。而且svscan监听的目录是/service目录。
三、daemontools的简单介绍
daemontools是一个守护进程工具,防止用户进程意外退出。daemontools的工具有如下截图:
3.1、常用的命令介绍:
(1)svscanboot
这个命令一般不用手动输入执行,因为这个一般会随Linux系统的启动而自动启动。于是加入开启自启动:/etc/rc.local就可以直到它会随Linux的启动而启动。
svscanboot启动之后会启动svscan,svscan会启动supervise,supervise会启动并监听/service中存放服务目录下的run可执行文件。
(2)svscan
svscan会为/service目录下所有服务启动supervise进程。svscan会为每个服务启动一对supervise服务:一个s子目录(即服务进程的工程目录),其实是个软连接;一个是s子目录下的log目录(如果有的话)。supervise会执行s子目录下的run脚本,并监听run脚本启动的进程,同时会启动s/log目录下的run脚本。这个s/log目录下的run脚本用来输出s目录run脚本的日志到指定目录。svscan每隔5s检查下/service目录,如果有新的服务,则启动新的supervise;如果有supervise意外退出会重新启动supervise。
(3)supervise
supervise用来执行/service目录下服务的run脚本。如果run脚本退出的话,会每隔几秒执行一下。在/service下的服务目录s下会有一个supervise目录用来存放进程状态的二进制格式信息。svstate就会读取这个状态信息
[root@git-server nginx]# svstat /service/nginx
/service/nginx: up (pid 19169) 0 seconds
[root@git-server nginx]#
(4)svc命令
svc opts services
opts是一系列的参数,services是指/service下的服务目录。opts参数如下:
-u : up,如果services没有运行的话,启动它,如果services停止了,重启它。
-d : down,如果services正在运行的话,给它发送一个TERM(terminate)信号,然后再发送一个CONT(continue)信号,在它停止后,不再启动它。
-o : once,如果services没有运行,启动它,但是在它停止后不再启动了。就是只运行一次。
-p : pause,给services发送一个停止信号。
-c : continue,给services发送一个CONT信号。
-h : hang up, 给services发送一个HUP信号。
-a : alarm, 给services发送一个ALRM信号。
-i : interrupt, 给services发送一个INT信号。
-t : Terminate,给services发送一个TERM信号。
-k : kill,给services发送一个KILL信号。
-x : exit,supervise在services停止后会立刻退出, 但是值得注意的是,如果你在一个稳定的系统中使用了这个选项,你已经开始犯错了:supervise被设计成为永远运行的。
关掉一个服务进程通常使用-dk参数,此时supervise进程并没有关闭,所以依然可以将这个服务进程重启。即使,supervice进程挂掉了,svscan依然会重启supervise,supervise会重新运行服务进程的run脚本。
Interface svc opts services
opts is a series of getopt-style options. services consists of any number of arguments,each argument naming a directory used by supervise.
svc applies all the options to each service in turn. Here are the options:
-u: Up. If the service is not running,start it. If the service stops,restart it.
-d: Down. If the service is running,send it a TERM signal and then a CONT signal. After it stops,do not restart it.
-o: Once. If the service is not running,start it. Do not restart it if it stops.
-p: Pause. Send the service a STOP signal.
-c: Continue. Send the service a CONT signal.
-h: Hangup. Send the service a HUP signal.
-a: Alarm. Send the service an ALRM signal.
-i: Interrupt. Send the service an INT signal.
-t: Terminate. Send the service a TERM signal.
-k: Kill. Send the service a KILL signal.
-x: Exit. supervise will exit as soon as the service is down. If you use this option on a stable system,you’re doing something wrong; supervise is designed to run forever.
(5)svstat
[root@git-server service]# ps -ef|grep svs
root     13689     1  0 22:55 pts/3    00:00:00 /bin/sh /command/svscanboot
root     13694 13689  0 22:55 pts/3    00:00:00 svscan /service
root     21765  7763  0 23:06 pts/2    00:00:00 grep --color svs
查看服务的状态:
[root@git-server nginx]# svstat /service/nginx
/service/nginx: up (pid 19169) 0 seconds
四、举例演示:
配置一个服务非常简单:
1) 创建一个目录,目录下放一个run脚本
2) run脚本执行启动服务的命令
3) 建立/service下一个链接
[root@git-server service]# mkdir /data/nginx -p
[root@git-server service]# cat /data/nginx/run
#!/bin/bash
exec service nginx start
停止nginx服务
[root@git-server nginx]# service nginx stop
[root@git-server service]# chmod +x /data/nginx/run
[root@git-server service]# ln -sv /data/nginx /service/nginx
`/service/nginx' -> `/data/nginx'
神奇的就是最后一句,一旦创建了链接,daemontools就会自动帮你启动nginx服务了。刚才停掉的nginx服务,然后服务是否又被启动了:
如下图:
停止对服务的监控:
[root@git-server service]# svc -d /service/nginx
[root@git-server service]# svstat /service/nginx
/service/nginx: down 213 seconds,normally up
停止nginx服务后,nginx服务不再被重启
[root@git-server nginx]# service nginx stop
如果不再需要daemontools守护某服务,可完成上述操作后,将/service下的对应目录删除。
服务所在目录/service
开启对nginx服务的监控:
[root@git-server service]# svc -u /service/nginx
[root@git-server service]# svstat /service/nginx
/service/nginx: up (pid 23563) 1 seconds
nginx服务再次被启动
[root@git-server nginx]# ps -ef|grep nginx
root     13695 13689  0 22:55 pts/3    00:00:00 readproctitle service errors: ...dy running.?Starting nginx... nginx (pid 23367 23366 23365 23364 23363) already running.?Starting nginx... nginx (pid 23367 23366 23365 23364 23363) already running.?Starting nginx... nginx (pid 23367 23366 23365 23364 23363) already running.?Starting nginx... nginx (pid 23367 23366 23365 23364 23363) already running.?Starting nginx... nginx (pid 23367 23366 23365 23364 23363) already running.?
root     13741 13694  0 22:55 pts/3    00:00:00 supervise nginx
root     23363     1  0 23:19 ?        00:00:00 nginx: master process /usr/local/nginx/sbin/nginx -c /usr/local/nginx/conf/nginx.conf
www      23364 23363  0 23:19 ?        00:00:00 nginx: worker process
www      23365 23363  0 23:19 ?        00:00:00 nginx: worker process
www      23366 23363  0 23:19 ?        00:00:00 nginx: worker process
www      23367 23363  0 23:19 ?        00:00:00 nginx: worker process
root     23820  9451  0 23:20 pts/3    00:00:00 grep --color nginx
演示到此结束,很简单吧,伙伴们一看就会。
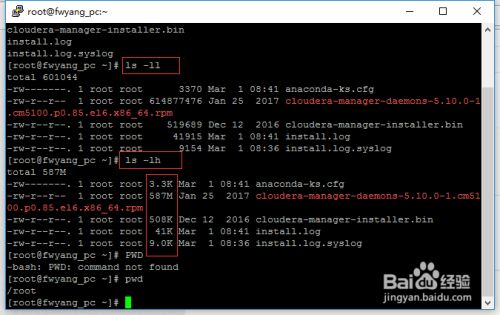 最简单的查看方法可以使用ls -ll、ls-lh命令进行查看,当使用...