1,安装openssl
tar zxvf openssl-1.0.0a.tar.gz
cd openssl-1.0.0a
./config --prefix=/usr/local/openssl
make && make install
2,安装apache
tar zxvf httpd-2.2.16.tar.gz
cd httpd-2.2.16
./configure --prefix=/usr/local/apache --enable-ssl --enable-rewrite --enable-so --with-ssl=/usr/local/openssl
make && make install
如果你是yum install,apt-get,pacman这样的软件管理工具进行安装的话,上面的二步可以省掉。
3,创建主证书
在/usr/local/apache/conf/下面建个目录ssl
3.1,mkdir ssl
3.2,cp /openssl的安装目录/ssl/misc/CA.sh /usr/local/apache/conf/ssl/
3.3用CA.sh来创建证书
查看复制打印
[root@BlackGhost ssl]# ./CA.sh -newca//建立主证书
CA certificate filename (or enter to create)
Making CA certificate ...
Generating a 1024 bit RSA private key
............++++++
......++++++
writing new private key to './demoCA/private/./cakey.pem'
Enter PEM pass phrase:
Verifying - Enter PEM pass phrase:
Verify failure
Enter PEM pass phrase:
Verifying - Enter PEM pass phrase:
-----
You are about to be asked to enter information that will be incorporated
into your certificate request.
What you are about to enter is what is called a Distinguished Name or a DN.
There are quite a few fields but you can leave some blank
For some fields there will be a default value,
If you enter '.',the field will be left blank.
-----
Country Name (2 letter code) [AU]:cn
State or Province Name (full name) [Some-State]:cn
Locality Name (eg,city) []:cn
Organization Name (eg,company) [Internet Widgits Pty Ltd]:cn
Organizational Unit Name (eg,section) []:cn
Common Name (eg,YOUR name) []:localhost
Email Address []:xtaying@gmail.com
Please enter the following 'extra' attributes
to be sent with your certificate request
A challenge password []:******************
An optional company name []:
Using configuration from /etc/ssl/openssl.cnf
Enter pass phrase for ./demoCA/private/./cakey.pem://填的是上面的PEM密码
Check that the request matches the signature
Signature ok
Certificate Details:
Serial Number:
89:11:9f:a6:ca:03:63:ab
Validity
Not Before: Aug7 12:35:28 2010 GMT
Not After : Aug6 12:35:28 2013 GMT
Subject:
countryName= cn
stateOrProvinceName= cn
organizationName= cn
organizationalUnitName= cn
commonName= localhost
emailAddress= xtaying@gmail.com
X509v3 extensions:
X509v3 Subject Key Identifier:
26:09:F3:D5:26:13:00:1F:3E:CC:86:1D:E4:EE:37:06:65:15:4E:76
X509v3 Authority Key Identifier:
keyid:26:09:F3:D5:26:13:00:1F:3E:CC:86:1D:E4:EE:37:06:65:15:4E:76
DirName:/C=cn/ST=cn/O=cn/OU=cn/CN=localhost/emailAddress=xtaying@gmail.com
serial:89:11:9F:A6:CA:03:63:AB
X509v3 Basic Constraints:
CA:TRUE
Certificate is to be certified until Aug6 12:35:28 2013 GMT (1095 days)
Write out database with 1 new entries
Data Base Updated
安装成功的话,会在ssl目录下面产生一个文件夹demoCA
4生成服务器私钥和服务器证书
查看复制打印
[root@BlackGhost ssl]# openssl genrsa -des3 -out server.key 1024//产生服务器私钥
Generating RSA private key,1024 bit long modulus
.....................++++++
.........++++++
e is 65537 (0x10001)
Enter pass phrase for server.key:
Verifying - Enter pass phrase for server.key:
[root@BlackGhost ssl]# openssl req -new -key server.key -out server.csr//生成服务器证书
Enter pass phrase for server.key:
You are about to be asked to enter information that will be incorporated
into your certificate request.
What you are about to enter is what is called a Distinguished Name or a DN.
There are quite a few fields but you can leave some blank
For some fields there will be a default value,YOUR name) []:localhost//要填全域名
Email Address []:xtaying@gmail.com
Please enter the following 'extra' attributes
to be sent with your certificate request
A challenge password []:*****************
An optional company name []:
4.1对产生的服务器证书进行签证
cp server.csr newseq.pem
查看复制打印
[root@BlackGhost ssl]# ./CA.sh -sign//为服务器证书签名
Using configuration from /etc/ssl/openssl.cnf
Enter pass phrase for ./demoCA/private/cakey.pem:
Check that the request matches the signature
Signature ok
Certificate Details:
Serial Number:
89:11:9f:a6:ca:03:63:ac
Validity
Not Before: Aug7 12:39:41 2010 GMT
Not After : Aug7 12:39:41 2011 GMT
Subject:
countryName= cn
stateOrProvinceName= cn
localityName= cn
organizationName= cn
organizationalUnitName= cn
commonName= localhost
emailAddress= xtaying@gmail.com
X509v3 extensions:
X509v3 Basic Constraints:
CA:FALSE
Netscape Comment:
OpenSSL Generated Certificate
X509v3 Subject Key Identifier:
FE:20:56:04:8E:B6:BE:3E:3A:E1:DA:A6:4A:3A:E1:16:93:1D:3F:81
X509v3 Authority Key Identifier:
keyid:26:09:F3:D5:26:13:00:1F:3E:CC:86:1D:E4:EE:37:06:65:15:4E:76
Certificate is to be certified until Aug7 12:39:41 2011 GMT (365 days)
Sign the certificate? [y/n]:y
1 out of 1 certificate requests certified,commit? [y/n]y
Write out database with 1 new entries
Data Base Updated
Certificate:
Data:
Version: 3 (0x2)
Serial Number:
89:11:9f:a6:ca:03:63:ac
Signature Algorithm: sha1WithRSAEncryption
Issuer: C=cn,ST=cn,O=cn,OU=cn,CN=localhost/emailAddress=xtaying@gmail.com
Validity
Not Before: Aug7 12:39:41 2010 GMT
Not After : Aug7 12:39:41 2011 GMT
Subject: C=cn,L=cn,CN=localhost/emailAddress=xtaying@gmail.com
Subject Public Key Info:
Public Key Algorithm: rsaEncryption
Public-Key: (1024 bit)
Modulus:
00:ce:d5:a8:df:d1:e7:ee:92:d1:d1:78:20:a9:6d:
0a:1b:f6:09:dd:13:29:ef:72:1d:17:54:dd:1c:8d:
28:27:69:fe:70:3b:fa:2b:a3:45:40:80:ea:0e:5b:
a7:bd:40:d0:cd:bc:2c:74:03:8b:f7:6c:5e:1f:09:
5d:c6:8a:05:ea:b8:72:fc:79:8b:62:62:38:0b:42:
28:7e:0d:fc:e7:bb:b0:87:66:6a:b2:35:92:91:b9:
78:9c:b6:76:01:0b:2a:74:df:5f:a1:8b:31:61:90:
93:f9:20:db:46:59:12:2e:9b:59:c0:32:4e:92:14:
a1:7e:52:7b:cc:02:5e:e2:45
Exponent: 65537 (0x10001)
X509v3 extensions:
X509v3 Basic Constraints:
CA:FALSE
Netscape Comment:
OpenSSL Generated Certificate
X509v3 Subject Key Identifier:
FE:20:56:04:8E:B6:BE:3E:3A:E1:DA:A6:4A:3A:E1:16:93:1D:3F:81
X509v3 Authority Key Identifier:
keyid:26:09:F3:D5:26:13:00:1F:3E:CC:86:1D:E4:EE:37:06:65:15:4E:76
Signature Algorithm: sha1WithRSAEncryption
09:a0:16:43:a2:93:11:a7:ab:f5:17:b7:36:35:84:9f:3b:37:
32:33:3f:93:63:b0:4c:bb:d1:b4:9b:4f:37:78:62:f4:ac:ff:
28:b0:63:71:2e:9a:7c:f4:40:2e:b1:5f:ae:49:e7:e2:6f:de:
cf:30:cc:9a:08:26:26:24:c5:00:03:32:20:48:41:b1:29:8f:
5d:3d:2a:78:54:0e:a8:76:07:6c:7f:23:42:75:c2:fb:83:1d:
70:44:5e:8c:90:cf:b4:23:b7:23:5b:06:05:32:58:e3:af:1c:
be:1d:50:7b:fd:37:66:ba:9c:ec:bb:af:ee:b6:04:f7:c5:2e:
59:22
-----BEGIN CERTIFICATE-----
MIIC2jCCAkOgAwIBAgIJAIkRn6bKA2OsMA0GCSqGSIb3DQEBBQUAMGoxCzAJBgNV
BAYTAmNuMQswCQYDVQQIEwJjbjELMAkGA1UEChMCY24xCzAJBgNVBAsTAmNuMRIw
EAYDVQQDEwlsb2NhbGhvc3QxIDAeBgkqhkiG9w0BCQEWEXh0YXlpbmdAZ21haWwu
Y29tMB4XDTEwMDgwNzEyMzk0MVoXDTExMDgwNzEyMzk0MVowdzELMAkGA1UEBhMC
Y24xCzAJBgNVBAgMAmNuMQswCQYDVQQHDAJjbjELMAkGA1UECgwCY24xCzAJBgNV
BAsMAmNuMRIwEAYDVQQDDAlsb2NhbGhvc3QxIDAeBgkqhkiG9w0BCQEWEXh0YXlp
bmdAZ21haWwuY29tMIGfMA0GCSqGSIb3DQEBAQUAA4GNADCBiQKBgQDO1ajf0efu
ktHReCCpbQob9gndEynvch0XVN0cjSgnaf5wO/oro0VAgOoOW6e9QNDNvCx0A4v3
bF4fCV3GigXquHL8eYtiYjgLQih+Dfznu7CHZmqyNZKRuXictnYBCyp031+hizFh
kJP5INtGWRIum1nAMk6SFKF+UnvMAl7iRQIDAQABo3sweTAJBgNVHRMEAjAAMCwG
CWCGSAGG+EIBDQQfFh1PcGVuU1NMIEdlbmVyYXRlZCBDZXJ0aWZpY2F0ZTAdBgNV
HQ4EFgQU/iBWBI62vj464dqmSjrhFpMdP4EwHwYDVR0jBBgwFoAUJgnz1SYTAB8+
zIYd5O43BmUVTnYwDQYJKoZIhvcNAQEFBQADgYEACaAWQ6KTEaer9Re3NjWEnzs3
MjM/k2OwTLvRtJtPN3hi9Kz/KLBjcS6afPRALrFfrknn4m/ezzDMmggmJiTFAAMy
IEhBsSmPXT0qeFQOqHYHbH8jQnXC+4MdcERejJDPtCO3I1sGBTJY468cvh1Qe/03
Zrqc7Luv7rYE98UuWSI=
-----END CERTIFICATE-----
Signed certificate is in newcert.pem
cp newcert.pem server.crt
5,产生客户端证书
生成客户私钥:
openssl genrsa -des3 -out client.key 1024
生成客户证书
openssl req -new -key client.key -out client.csr
签证:
openssl ca -in client.csr -out client.crt
这一步根安装服务器的证书差不多,不同的是签证,最后安装的时候,client.pfx的密码要记住,在客户端安装的时候要用到的。
客户端和服务器端都可以使用服务器端证书,所以这一步不做也行。
6,集中所以证书和私私钥到一起
#cp demoCA/cacert.pem cacert.pem
同时复制一份证书,更名为ca.crt
#cp cacert.pem ca.crt
7,apache配置
vi /usr/local/apache/conf/extra/ssl.conf
查看复制打印
ssl开启
SSLEngine on
指定服务器证书位置
SSLCertificateFile /usr/local/apache/conf/ssl/server.crt
指定服务器证书key位置
SSLCertificateKeyFile /usr/local/apache/conf/ssl/server.key
证书目录
SSLCACertificatePath /usr/local/apache/conf/ssl
根证书位置
SSLCACertificateFile /usr/local/apache/conf/ssl/cacert.pem
要求客户拥有证书
SSLVerifyClient require
SSLVerifyDepth1
SSLOptions +StdEnvVars
记录log
CustomLog "/usr/local/apache/logs/ssl_request_log" \
"%t %h %{SSL_PROTOCOL}x %{SSL_CIPHER}x \"%r\" %b"
vi /usr/local/apache/conf/extra/httpd_vhosts.conf
查看复制打印
listen 443 https
NameVirtualHost *:443
<VirtualHost _default_:443>
DocumentRoot "/home/zhangy/www/metbee/trunk/src/web"
ServerName*:443
ErrorLog "/home/zhangy/apache/www.metbee.com-error.log"
CustomLog "/home/zhangy/apache/www.metbee.com-access.log" common
Include conf/extra/ssl.conf
</VirtualHost>
vi /usr/local/apache/conf/httpd.conf把Include conf/extra/httpd-vhosts.conf前面的注释去掉
启动/usr/local/apache/bin/apachectl -D SSL -k start
Server *:10000 (RSA)
Enter pass phrase:输入的是server的密钥
OK: Pass Phrase Dialog successful.
8,安装客户端证书
把ca.crt和client.pfx copy到客户端,双击client.pfx就会进入证书的安装向导,下一步就行了,中间会让你输入密码
四,安装所遇到的问题
1,生成的密码很多,一会让输入密码,会忘得,并且主证书的密码和下面的证书的密码不能重得,会报错的,所以要搞个文本记下来。
2,升级openssl引发的问题
httpd: Syntax error on line 56 of /usr/local/apache/conf/httpd.conf: Cannot load /usr/local/apache/modules/libphp5.so into server: libssl.so.0.9.8: cannot open shared object file: No such file or directory
httpd: Syntax error on line 56 of /usr/local/apache/conf/httpd.conf: Cannot load /usr/local/apache/modules/libphp5.so into server: libcrypto.so.0.9.8: cannot open shared object file: No such file or directory
用ln -s来建立软链接,就可以了。不过这种方法不是万能的,比如我把libpng从1.2升到1.4,libjpeg从7.0升到8.0结果是系统差点崩掉,用软链接不管用,我把他们弄掉,从网上下的低版本重装。
3,证书的国家名称,省名要相同不然生成空证书,
The countryName field needed to be the same in the
CA certificate (cn) and the request (sh)
4,提示CommonName时,要添写全域名,会提示警告
RSA server certificate CommonName (CN) `cn' does NOT match server name!?
5,相同的证书不能生成二次,名字不一样也不行,也就是说server.cst和client.csr信息不能完相同,不然会报
failed to update database
TXT_DB error number 2
6,页面浏览时,会看到提示,你的证书是不可信的,是因为我配置的不对,还是自己建的证书就是不要信的呢?
7,当我加了SSLVerifyClient require SSLVerifyDepth 1这二个配置时,在windows下面,要你输入证书后,就可以看到页面了,但在用firefox就是不行呢?看下面的ssl_request_log日志,192.168.18.3是用windows的IE浏览器
http协议访问
Linux下Openssl的安装全过程
1、下载地址:http://www.openssl.org/source/下一个新版本的OpenSSL,我下的版本是:openssl-1.0.0e.tar.gz
2、在下载的GZ目录中,用命令执行:tar -xzf openssl-openssl-1.0.0e.tar.gz
3、进入解压的目录:openssl-1.0.0e [.......]#cd openssl-1.0.0e
4、[.....openssl-1.0.0e]# ./config --prefix=/usr/local/openssl
5[...../openssl-1.0.0e]# ./config -t
6[...../openssl-1.0.0e]# make depend
7[...../openssl-1.0.0e]# cd /usr/local
8/usr/local]# ln -s openssl ssl
9在/etc/ld.so.conf文件的最后面,添加如下内容:
/usr/local/openssl/lib
10...]# ldconfig
11添加OPESSL的环境变量:
在etc/的profile的最后一行,添加:
export OPENSSL=/usr/local/openssl/bin
export PATH=$OPENSSL:$PATH:$HOME/bin
12退出命令界面,再从新登录。
13、以上OPENSSL就安装完毕,下面进行一些检查。
14依次如下执行:
[root@localhost /]# cd /usr/local
[root@localhost local]# ldd /usr/local/openssl/bin/openssl
会出现类似如下信息:
...]# which openssl
/usr/local/openssl/bin/openssl
16查看版本
...]# openssl version
OpenSSL 1.0.0e 6 Sep 2011
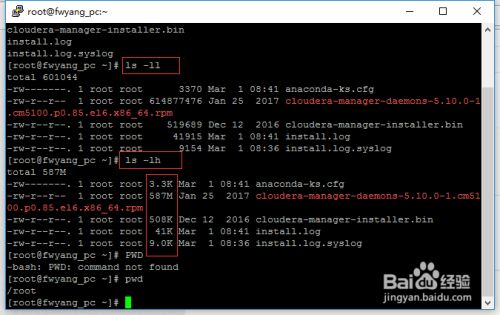 最简单的查看方法可以使用ls -ll、ls-lh命令进行查看,当使用...