有一定的后台开发经验ES6语法。后台没有用框架来,纯自己写。会sql语句
安装NodeJS的安装
从网上下载 https://nodejs.org/en/ 选择自己,我用的是最新版本
Angular CLI的安装
cli的安装可以参考https://cli.angular.io/
npm install -g @angular/cli
ng new demo                                        -- 创建一个项目
cd demo                                            -- 进入到项目面
npm i  --registry=https://registry.npm.taobao.org  -- 安装包的依赖
ng serve                                           -- 启动项目
一此顺利的话,完后会看到如下图所示
在浏览器上输入http://127.0.0.1:4200 如下图所示
用VSCode打开目录如图:
到这里基本项目框架就已经好了。
安装MySql包、http2
由于调用接口用的是xhr2,所以要安装 http2包,mysql就不用多说了,用来接连mysql数据库用的。
npm i --save-dev mysql http2
安装好了以后,就要创建一个NodeJs文件,里面创建一个启动服务监听端口等
如 index.js文件里写
const http = require('http2');
const util = require('util');
const url = require('url');
const querystring = require('querystring');
const path = require('path');
const fs = require('fs');
/*******
* 服务类
********/
class server {
  constructor() { }

  createServer(port) {
  // 创建一个自己的ca文件,网上有免费的找一个弄一下就可能了。百度...
    const __key = '/ca/www.other.org.key';
    const __crt = '/ca/www.other.org.crt';
    const __keys = [path.join('.','server',__key),'.' + __key];
    const __crts = [path.join('.',__crt),'.' + __crt];
    const extKey = __keys.filter((p) => { if (fs.existsSync(p)) { return p; } }); const extCrt = __crts.filter((p) => { if (fs.existsSync(p)) { return p; } }); const options = { key: fs.readFileSync(extKey[0]),//读取key cert: fs.readFileSync(extCrt[0]) //读取crt }; http.createServer(options,(req,res) => { // 设置响应头信息,解决跨域等问题;当然这里也可不在这里设置。可以到别一个文件里设置也可以。 res.setHeader("Content-Type","text/html;charset=utf-8"); res.setHeader("Access-Control-Allow-Origin","*"); res.setHeader("access-control-allow-headers","x-pingother,origin,x-requested-with,content-type,accept"); res.setHeader("access-control-allow-methods","GET,POST,PUT,DELETE,OPTIONS"); const r = new routes(req,res); r.initHeader(); }).listen(port || 10000); console.log('https://127.0.0.1:%d',port || 10000) } }
添加一个 router类还在index.js里写。
class routes {
  constructor(req,res) {
    this.ApiInfo = api;
    this.res = res;
    this.req = req;
  }

  initHeader() {
    this.res.setHeader("Content-Type","application/json;charset=utf-8");
    this.res.setHeader("Access-Control-Allow-Origin","*");
    this.res.setHeader("access-control-allow-headers",accept,xiaotuni,systemdate");
    this.res.setHeader("access-control-allow-methods",OPTIONS");
    this.res.setHeader("Access-Control-Expose-Headers","date,token,systemdate");
    this.res.setHeader('systemdate',new Date().getTime());
    const { method } = this.req;
    if (method && method === 'OPTIONS') {
      this.res.end();
      return;
    }

    this.processRequestMethod(method);
  }

  processRequestMethod(method) {
    const PathInfo = path.parse(this.req.url);
    if (!this.judgeIsCallApi(PathInfo)) {
      return;
    }
    this.Method = method.toLocaleLowerCase();
    this.parseUrlParams();

   // 这里开始处理接口信息了。
  }
  // 判断是接口请求,还是其它文件请求,css,icon,js等静态文件请求。
  judgeIsCallApi(PathInfo) {
    if (PathInfo.ext === '') {
      return true;
    }
    let charset = "binary";
    switch (PathInfo.ext) {
      case ".js":
        this.res.writeHead(200,{ "Content-Type": "text/javascript" });
        break;
      case ".css":
        this.res.writeHead(200,{ "Content-Type": "text/css" });
        break;
      case ".gif":
        charset = "binary";
        this.res.writeHead(200,{ "Content-Type": "image/gif" });
        break;
      case ".jpg":
        charset = "binary";
        this.res.writeHead(200,{ "Content-Type": "image/jpeg" });
        break;
      case ".png":
        charset = "binary";
        this.res.writeHead(200,{ "Content-Type": "image/png" });
        break;
      default:
        this.res.writeHead(200,{ "Content-Type": "application/octet-stream" });
    }

    const { dir,ext,name } = PathInfo;
    const __abs = path.join(dir,name + ext);
    const _pathInfo = [path.join('./server/',__abs),path.join('.',__abs)];
    const __self = this;
    let __fileIsExist = false;
    for (let i = 0; i < _pathInfo.length; i++) {
      const dir = _pathInfo[i];
      __fileIsExist = fs.existsSync(dir);
      if (__fileIsExist) {
        fs.readFile(dir,(err,data) => { if (err) { __self.res.Send({ code: -1,msg: err.toString() }); } else { __self.res.write(data,charset); } __self.res.end(); }); return false; } } if (!__fileIsExist) { __self.res.end(); } return false; } // 解析URL参数 parseUrlParams() { const _url = url.parse(this.req.url); this.UrlInfo = _url; const { query } = _url; this.QueryParams = querystring.parse(query); } }
这部分就先写到这了。
具体的可以到github上找。https://github.com/xiaotuni/angular-map-http2
目录
用 [TOC]来生成目录:
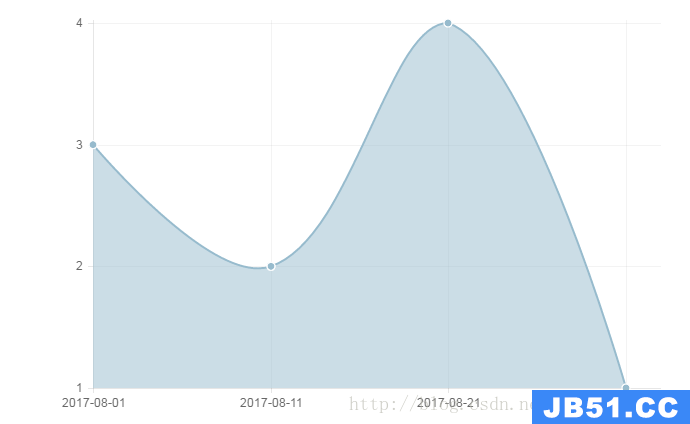 AngularJS中使用Chart.js制折线图与饼图实例 Chart.js 是...
 IE浏览器兼容性后续前言 继续尝试解决IE浏览器兼容性问题,...
 Angular实现下拉菜单多选写这篇文章时,引用文章地址如下:h...
 在AngularJS应用中集成科大讯飞语音输入功能前言 根据项目...
 Angular数据更新不及时问题探讨前言 在修复控制角标正确变...