1,gradient(渐变)
【1】<gradient>用以定义渐变色,可以定义两色渐变和三色渐变,及渐变样式;
<?xml version="1.0" encoding="utf-8"?><shape xmlns:android="http://schemas.android.com/apk/res/android" >
<gradient
    android:type=["linear" | "radial" | "sweep"]    //共有3中渐变类型,线性渐变(默认)/放射渐变/扫描式渐变
    android:angle="integer"     //渐变角度,必须为45的倍数,0为从左到右,90为从上到下
    android:centerX="float"     //渐变中心X的相当位置,范围为0~1
    android:centerY="float"     //渐变中心Y的相当位置,范围为0~1
    android:startColor="color"   //渐变开始点的颜色
    android:centerColor="color"  //渐变中间点的颜色,在开始与结束点之间
    android:endColor="color"    //渐变结束点的颜色
    android:gradientRadius="float"  //渐变的半径,只有当渐变类型为radial时才能使用
    android:useLevel=["true" | "false"] />  //使用LevelListDrawable时就要设置为true。设为false时才有渐变效果
首先有三种渐变类型,分别是:linear(线性渐变)、radial(放射性渐变)、sweep(扫描式渐变)
</shape>
- android:useLevel属性通常不使用。该属性用于指定是否将该shape当成一个LevelListDrawable来使用,默认值为false。
- angle属性确实只对线性渐变有效,其它两种渐变方式都没有任何动静
- centerX、centerY两个属性用于设置渐变的中心点位置,仅当渐变类型为放射渐变时有效。
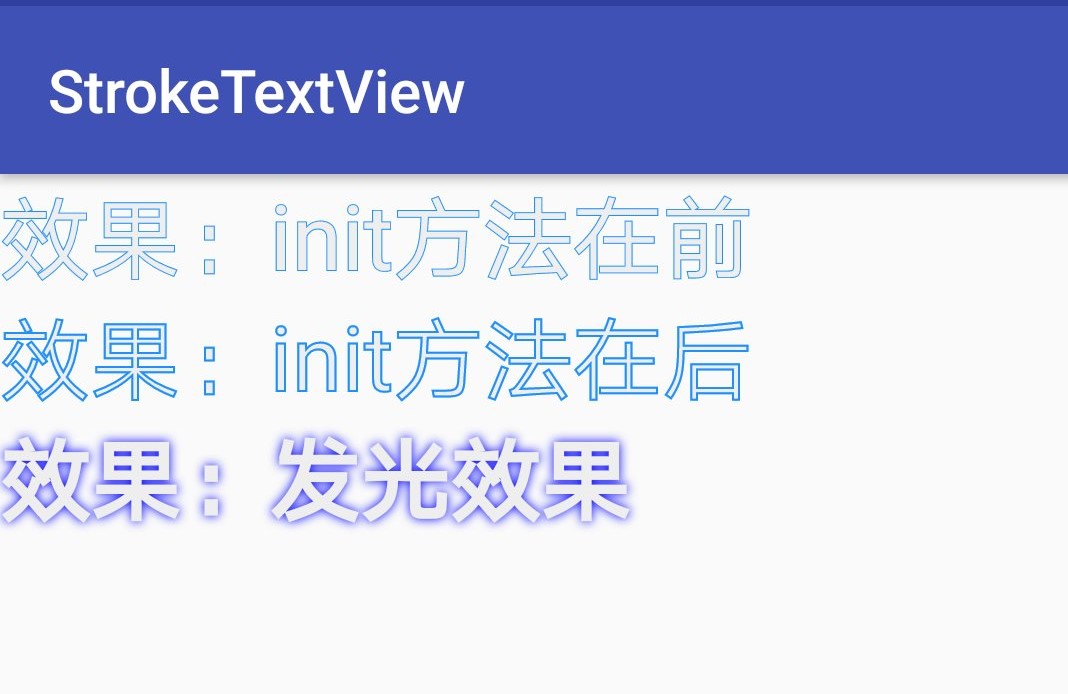
2,Demo实现效果
- 我们使用三色渐变来看看这三种渐变方式都是怎么显示的:(如果不使用centerColor属性就是双色渐变,这个属性是可选的)
- 注意: 在构造放射性渐变时,要加上android:gradientRadius属性(渐变半径),即必须指定渐变半径的大小才会起作用
【1】 线性渐变
实现效果

shape 代码
<?xml version="1.0" encoding="utf-8"?>
<shape xmlns:android="http://schemas.android.com/apk/res/android" >
  <gradient
    android:type="linear"
    android:startColor="#ff0000"
    android:centerColor="#00ff00"
    android:endColor="#0000ff"/>
</shape>
【2】 放射性渐变
实现效果
实现代码
<?xml version="1.0" encoding="utf-8"?>
<shape xmlns:android="http://schemas.android.com/apk/res/android" >
  <gradient
    android:type="radial"
    android:startColor="#ff0000"
    android:centerColor="#00ff00"
    android:endColor="#0000ff"
    android:gradientRadius="100"/>
</shape>
【3】 扫描式渐变
实现效果
实现代码
<?xml version="1.0" encoding="utf-8"?>
<shape xmlns:android="http://schemas.android.com/apk/res/android" >
  <gradient
    android:type="sweep"
    android:startColor="#ff0000"
    android:centerColor="#00ff00"
    android:endColor="#0000ff"/>
</shape>
【4】android:angle属性修改渐变角度 (仅对线性渐变有效)
1)android:angle="integer" //渐变角度,必须为45的倍数,0为从左到右,90为从上到下
2)angle属性确实只对线性渐变有效,其它两种渐变方式都没有任何动静
实现效果:
实现代码:
<?xml version="1.0" encoding="utf-8"?>
<shape xmlns:android="http://schemas.android.com/apk/res/android" >
  <gradient
    android:type="linear"
    android:startColor="#ff0000"
    android:centerColor="#00ff00"
    android:endColor="#0000ff"
    android:angle="45"/>
</shape>
【5】android:centerX与android:centerY
1) android:centerX="0.2",android:centerY="0.8"
2)centerX、centerY两个属性用于设置渐变的中心点位置,仅当渐变类型为放射渐变时有效。
3)类型为分数或小数,不接受Dimension。默认值是0.5,有效值是0.0~1.0,超出该范围后会看不出渐变效果。centerX、centerY的取值其实是宽和高的百分比
实现效果
实现代码: 取宽度的20%和高度的80%的位置,作为新的渐变原点
<?xml version="1.0" encoding="utf-8"?>
<shape xmlns:android="http://schemas.android.com/apk/res/android" >
  <gradient
    android:type="sweep"
    android:startColor="#ff0000"
    android:centerColor="#00ff00"
    android:endColor="#0000ff"
    android:centerX="0.2"
    android:centerY="0.8"/>
</shape>
总结
以上所述是小编给大家介绍的Android实现 Shape属性gradient 渐变效果,希望对大家有所帮助,如果大家有任何疑问请给我留言,小编会及时回复大家的。在此也非常感谢大家对我们网站的支持!
如果你觉得本文对你有帮助,欢迎转载,烦请注明出处,谢谢!